User manual version 1.1
How to start?
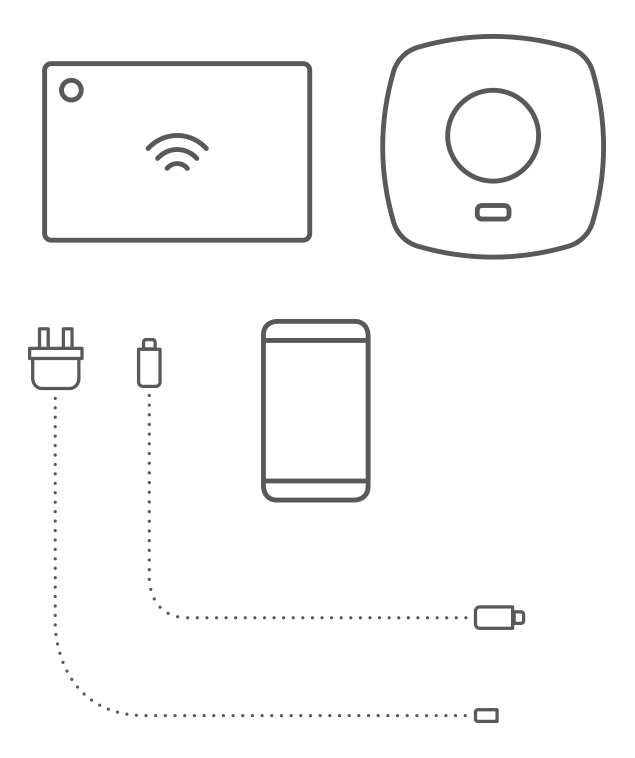
What you will need:
- Auraton Pulse
- USB power supply (included)
- USB-Micro USB cable (included)
- Ethernet cable (included)
- Router with internet access and Ethernet port
- Power socket for Auraton Pulse
- Phone/tablet with Android/iOS and internet access
1. Download the Auraton Smart app from Google Play or the App Store.


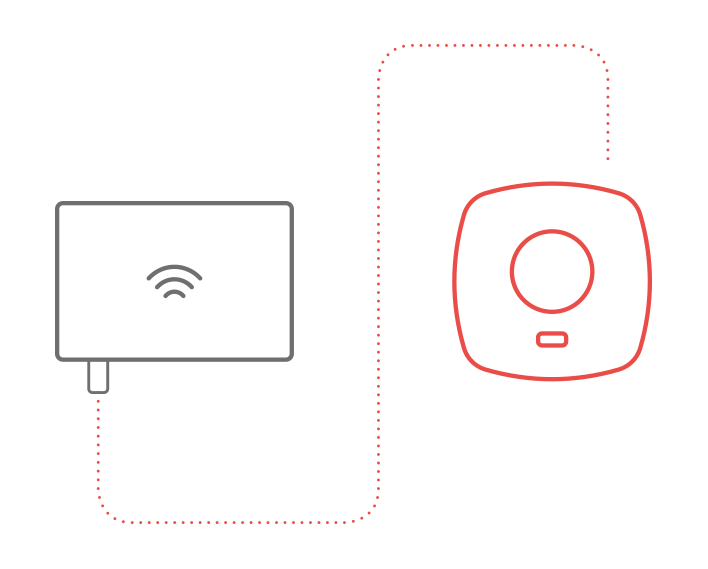
2. Connect the included network cable to any available LAN port on your router. Connect the other end to the Auraton Pulse control panel.
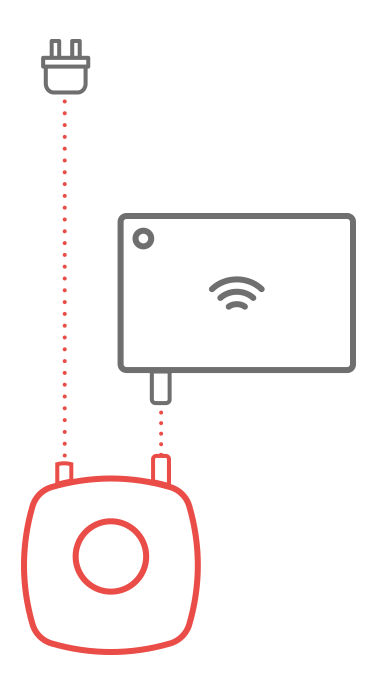
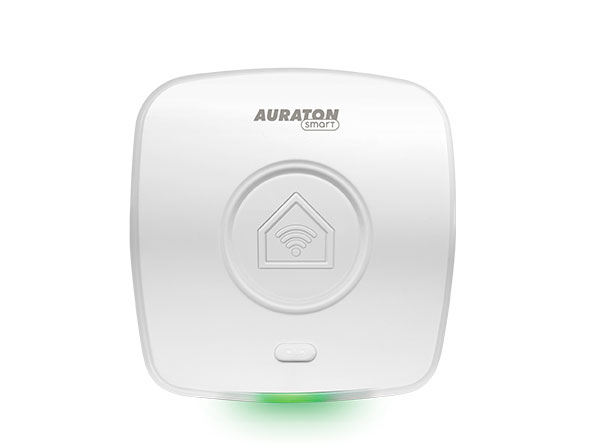
3. Connect the Auraton Pulse to the power supply using a Micro USB-to-USB cable. Plug the power supply into a power outlet to power the control panel. After a while, the LED on the control panel should turn green, indicating it's ready for operation.
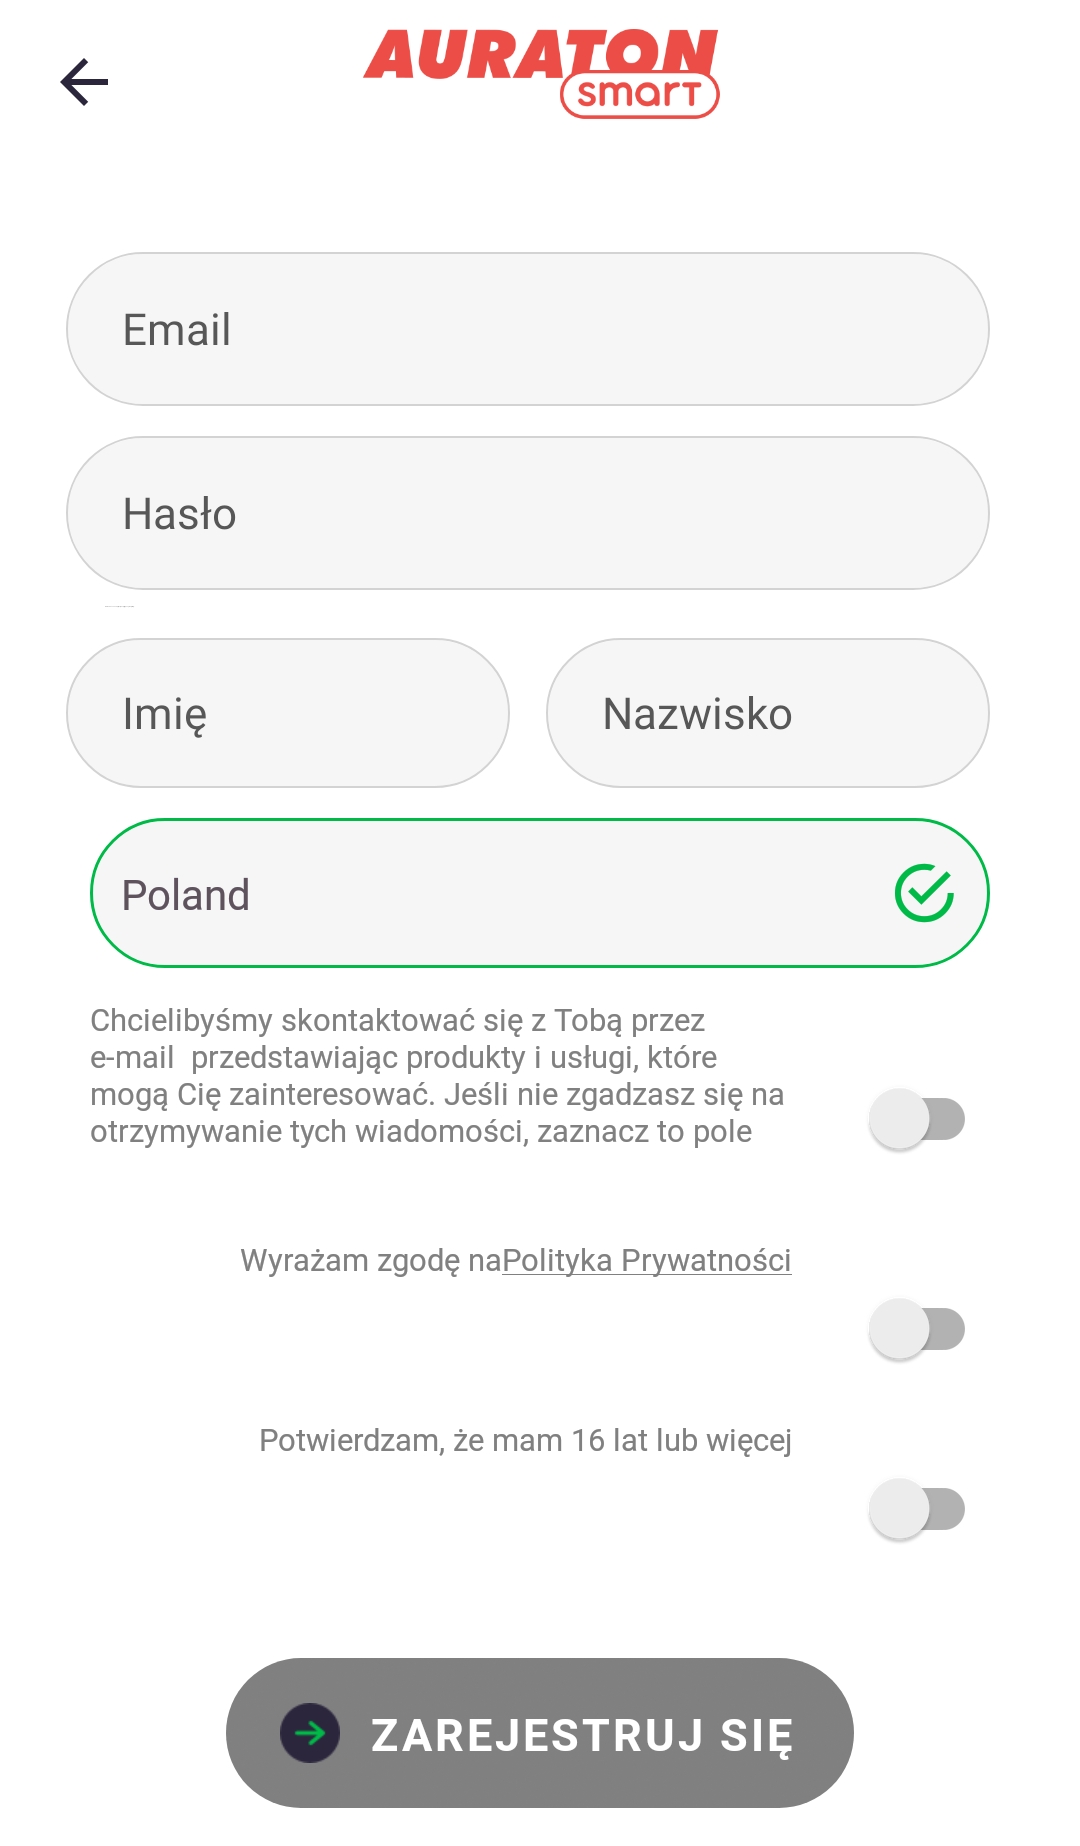
4. Open the Auraton Smart app. If you don't have an account, create one by clicking "Create an account" and filling out the form. If you already have an account, simply fill in your login details and click "Log in."
5. The LED on the Auraton Pulse should be green, if not, there are probably problems with your internet connection and please refer to your device manual for troubleshooting tips.
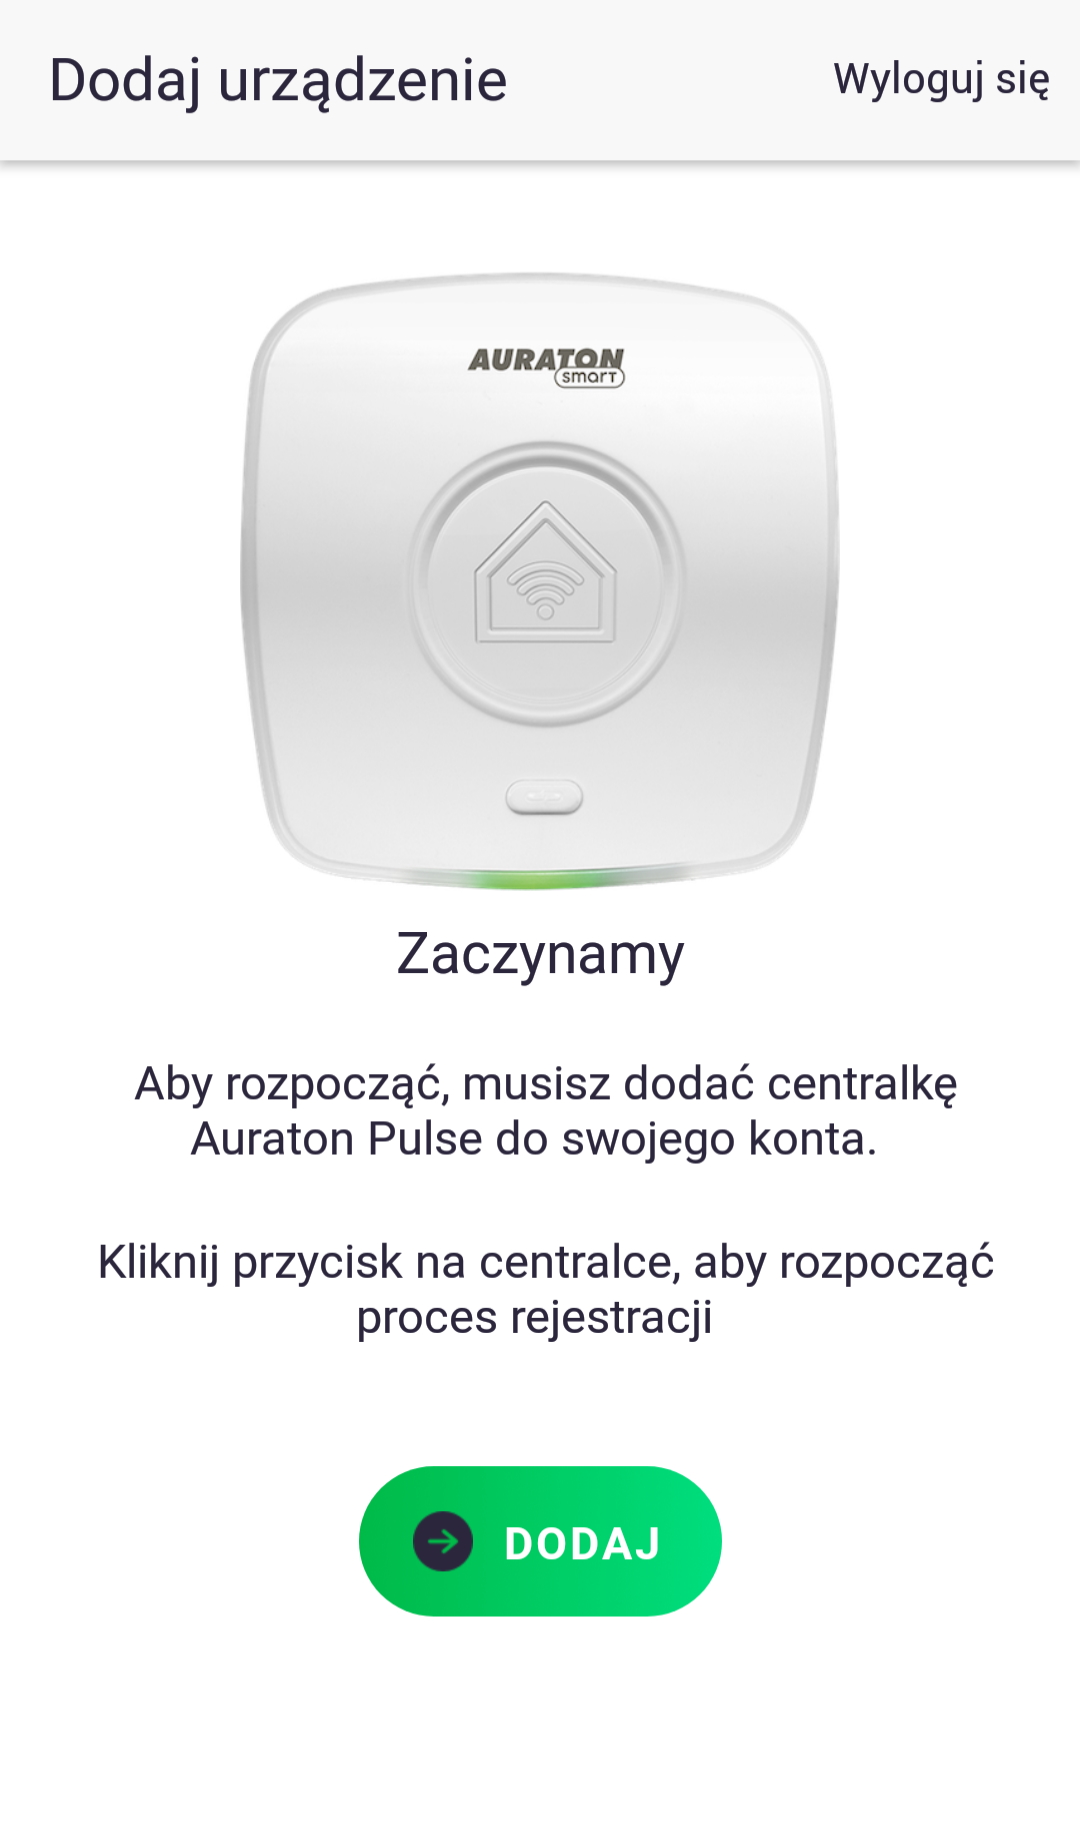
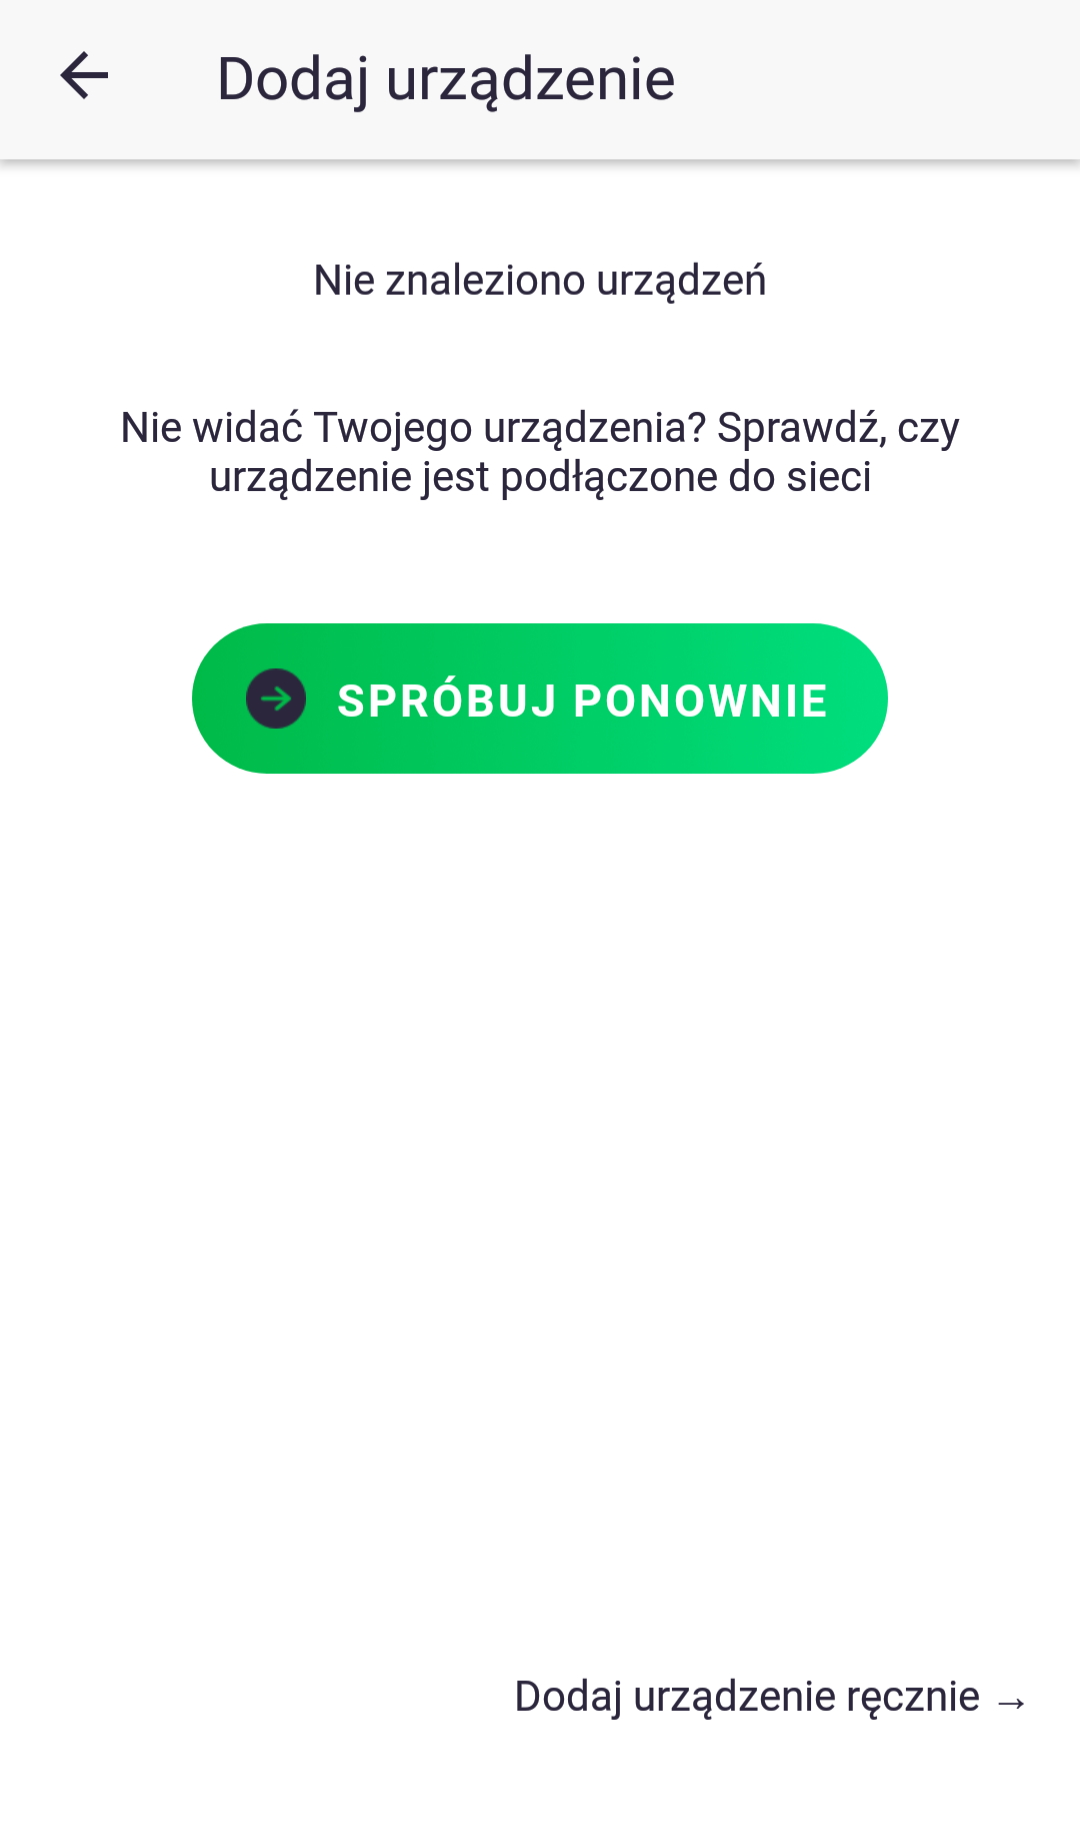
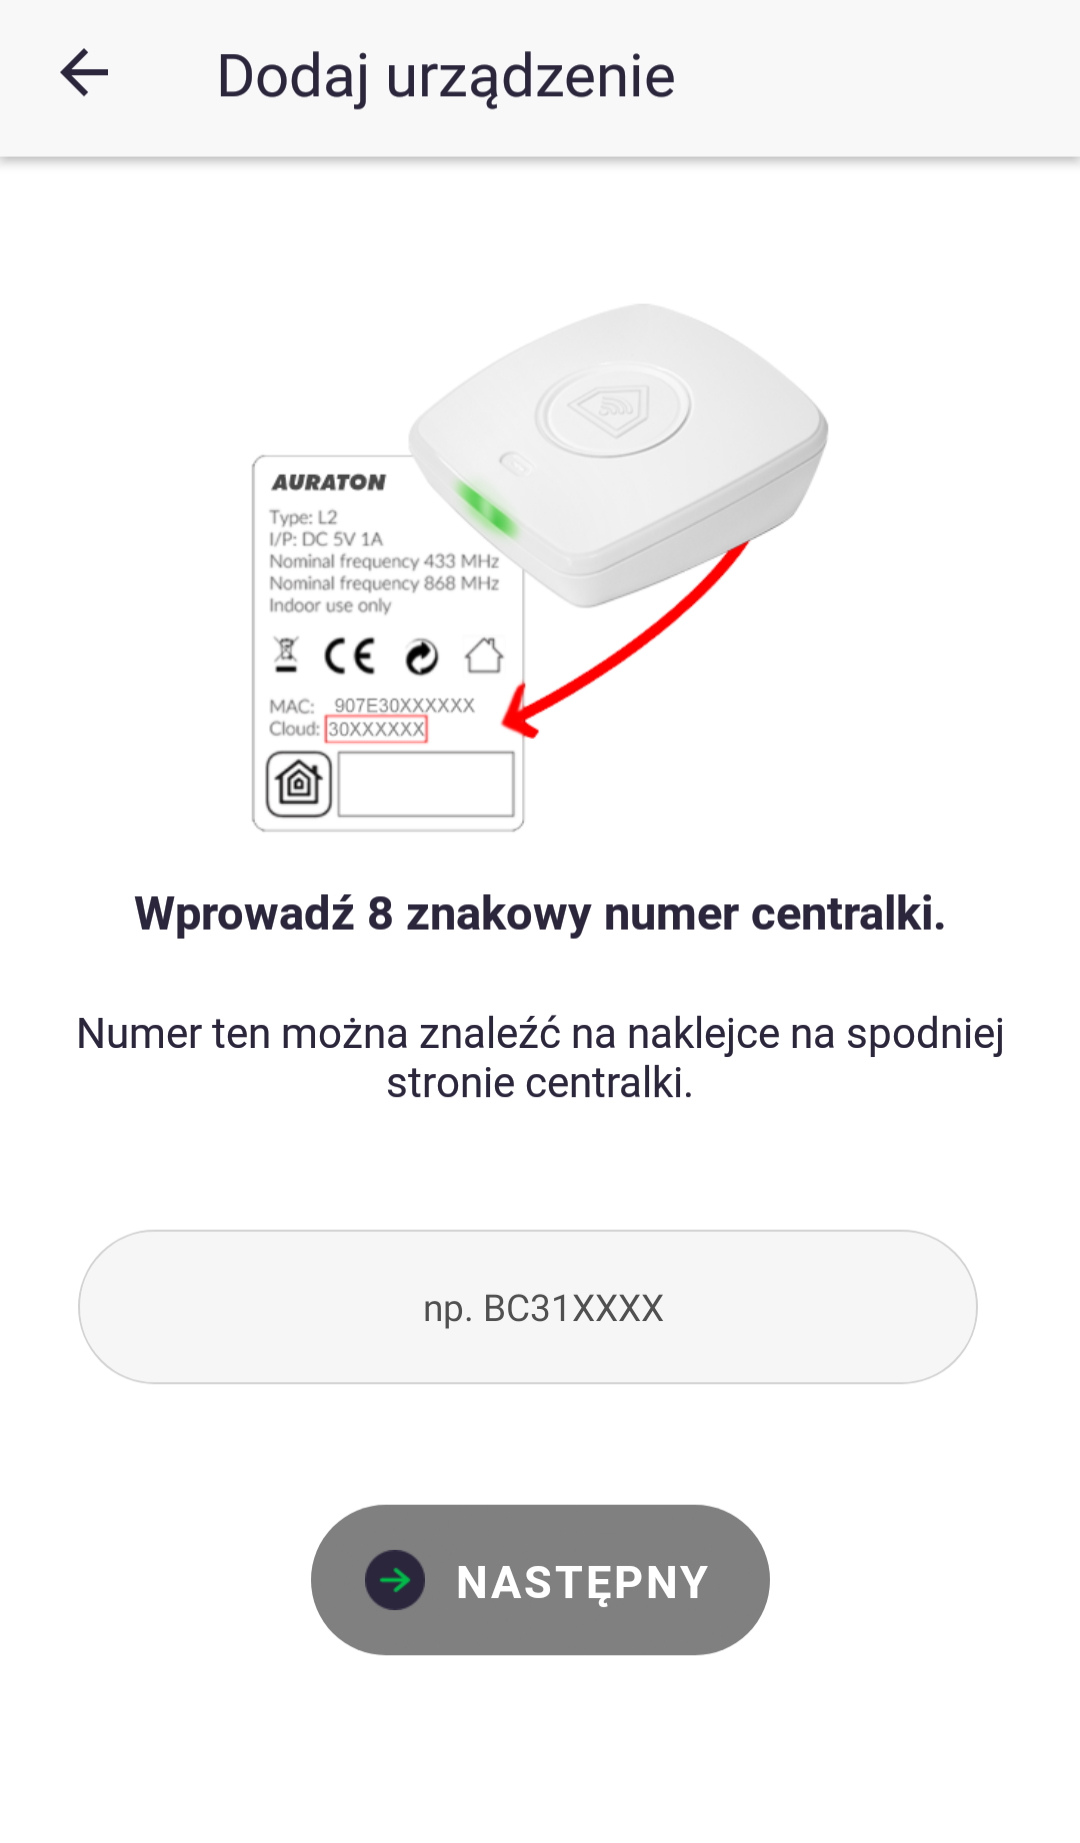
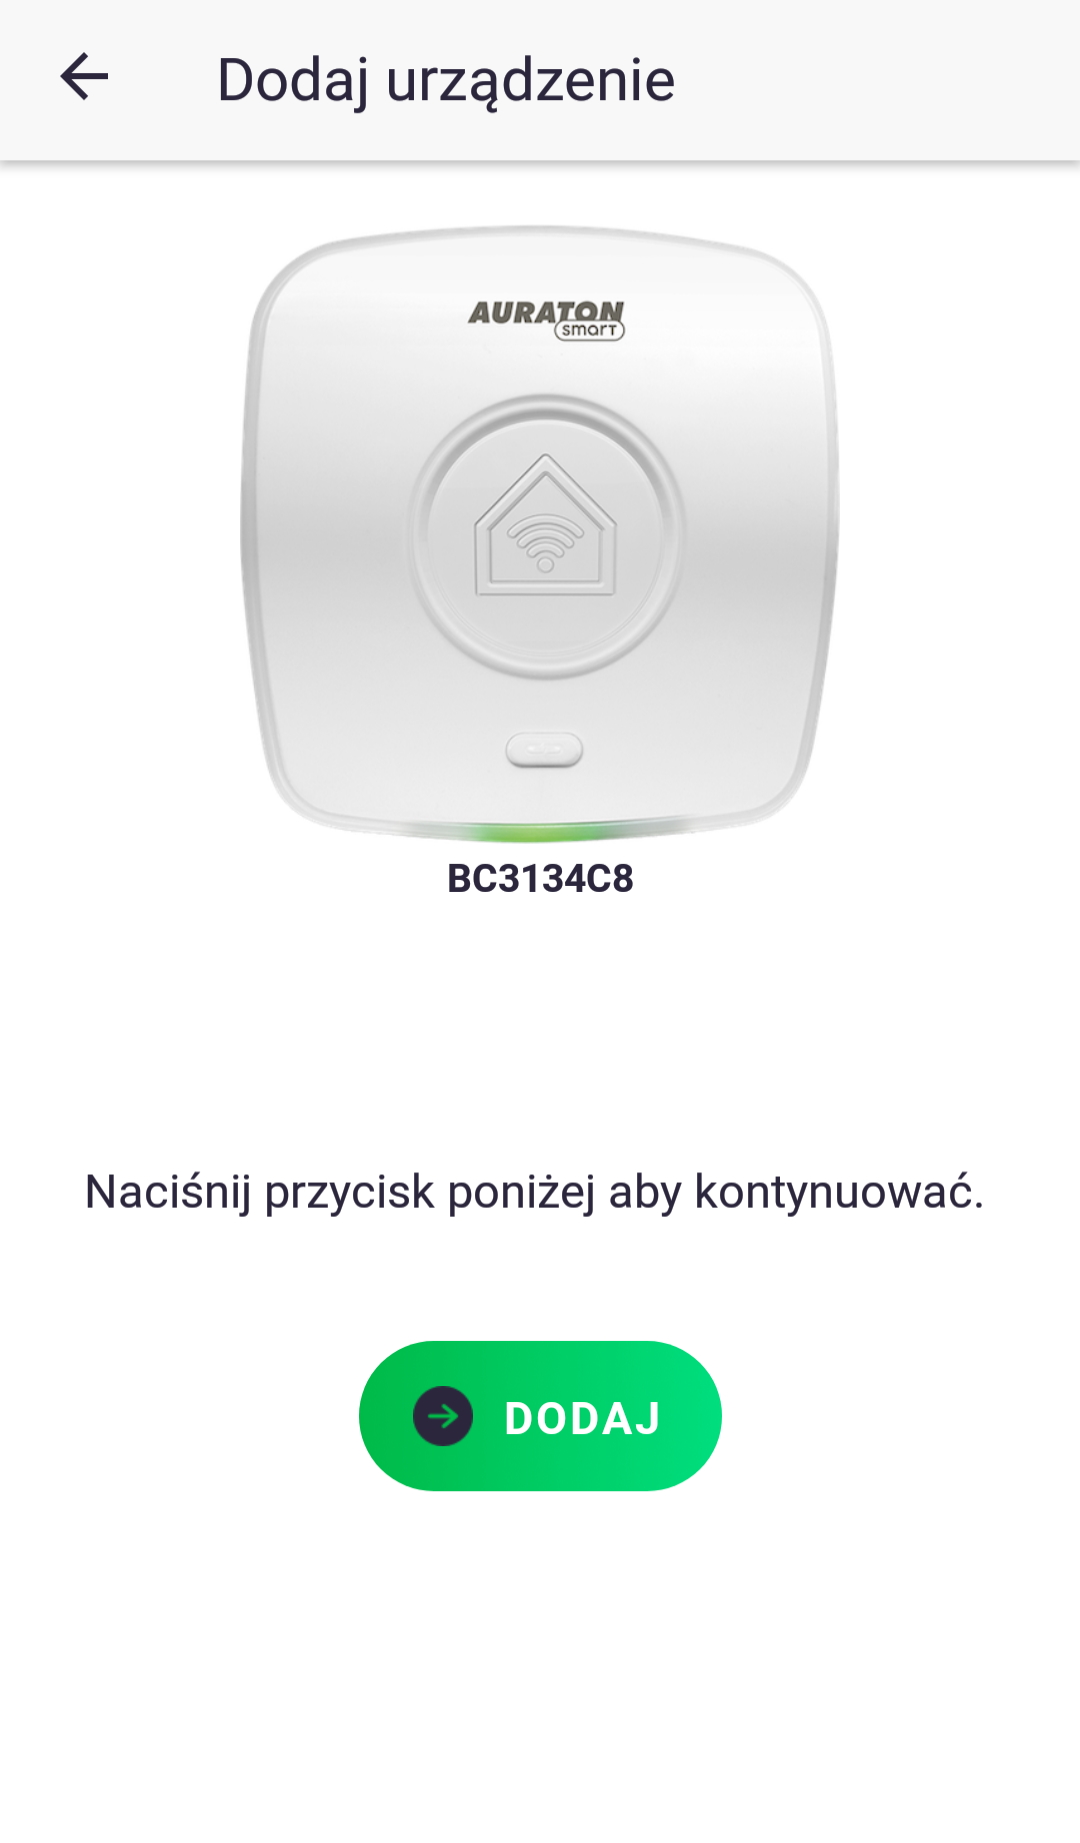
6. After logging in/creating an account, the app will ask you to register the Auraton Pulse control panel. Press the "Add" button. If the device is not found remotely, click the "Add device manually" button. In the next window, enter the 8-digit product number, which can be found on the bottom of the device. Then press the "Add" button.
7. The Auraton Pulse should begin flashing blue. Press the button on top of the casing with the chain symbol. The LED should then stop flashing blue and turn green again.
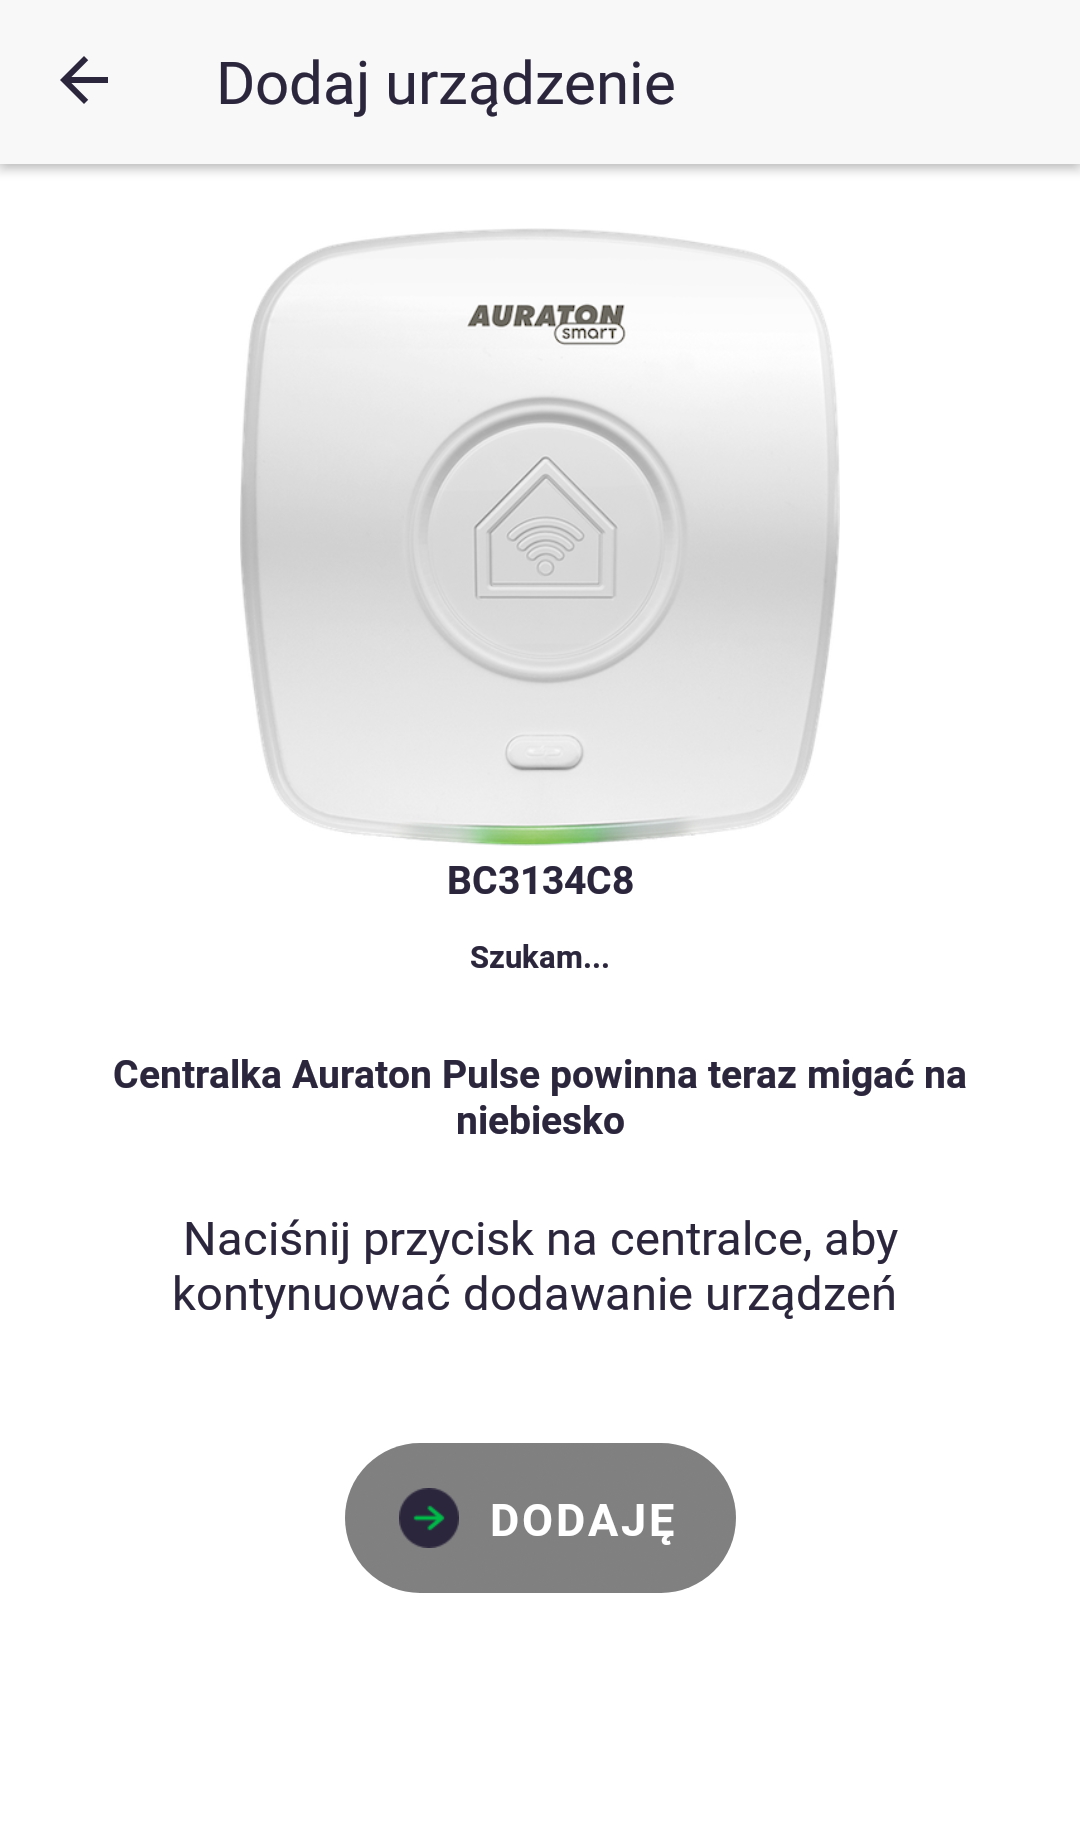
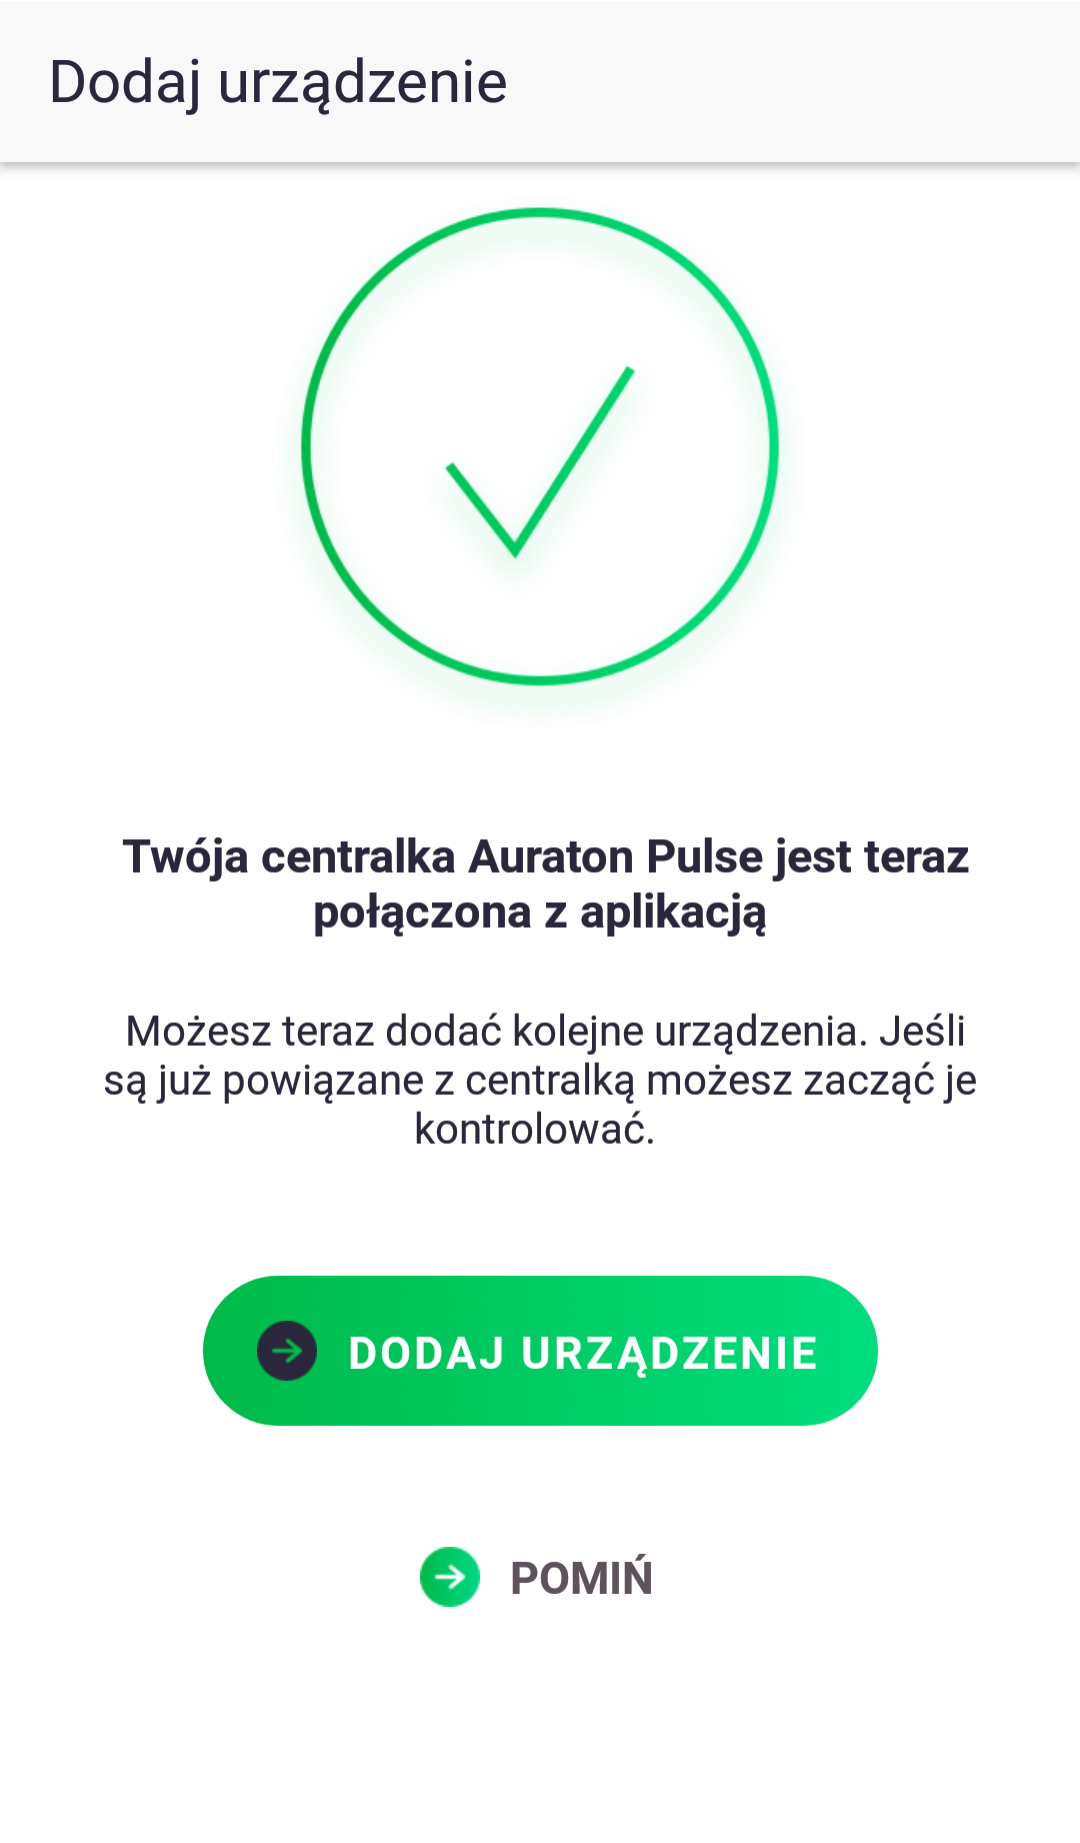
Your account has now been created and linked to your Auraton Pulse hub. You can now start adding your devices.
Basic operations
Adding a device
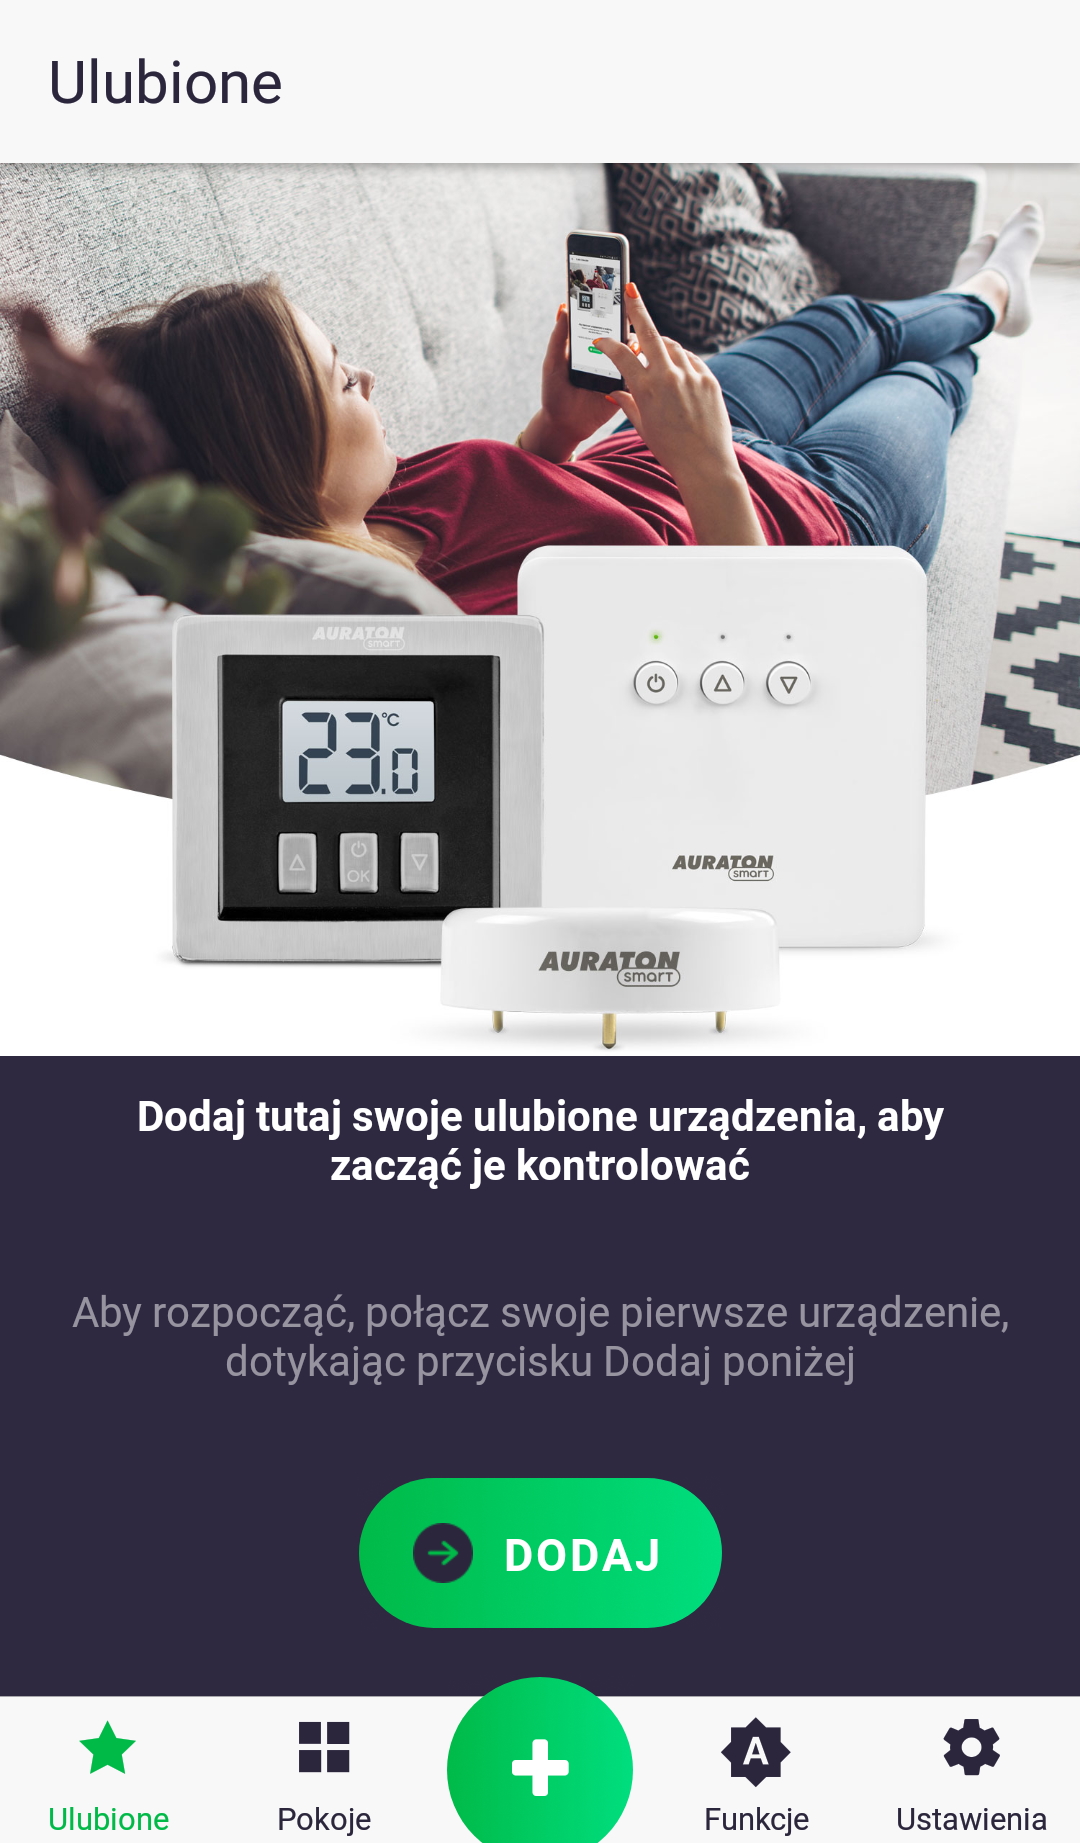
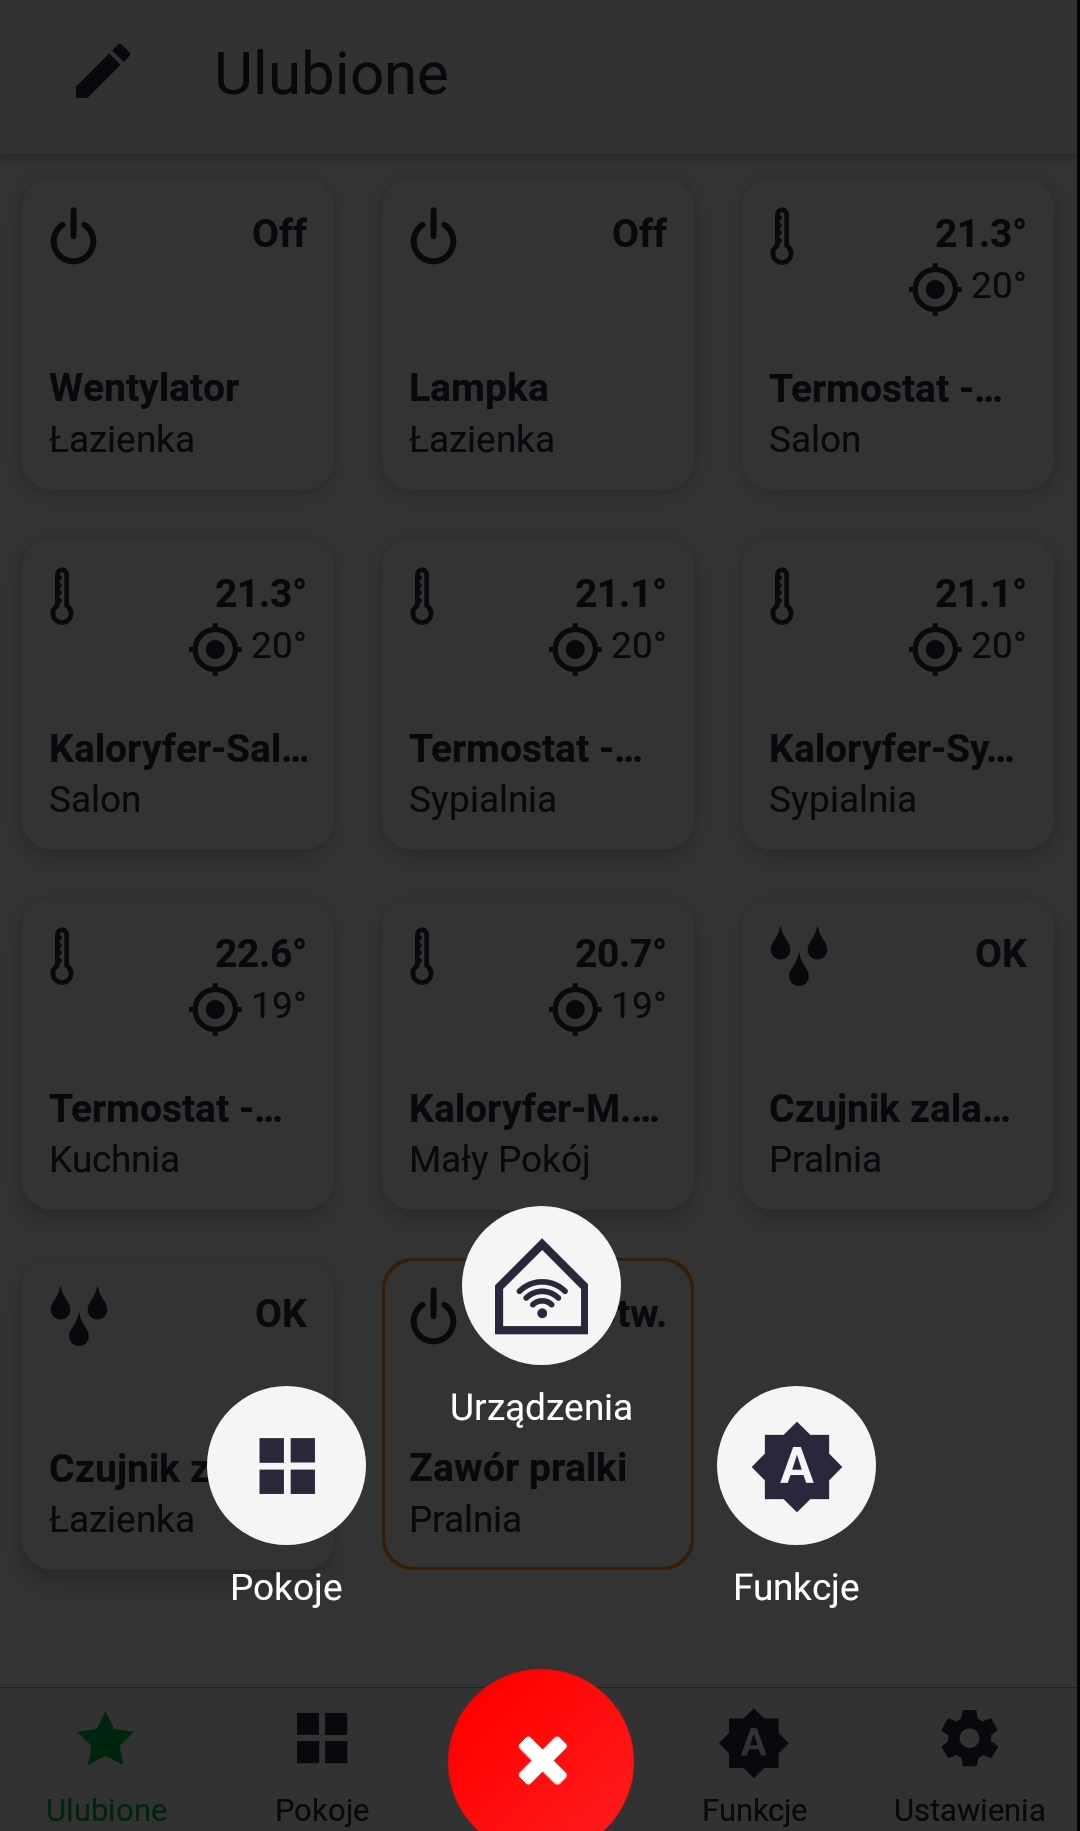
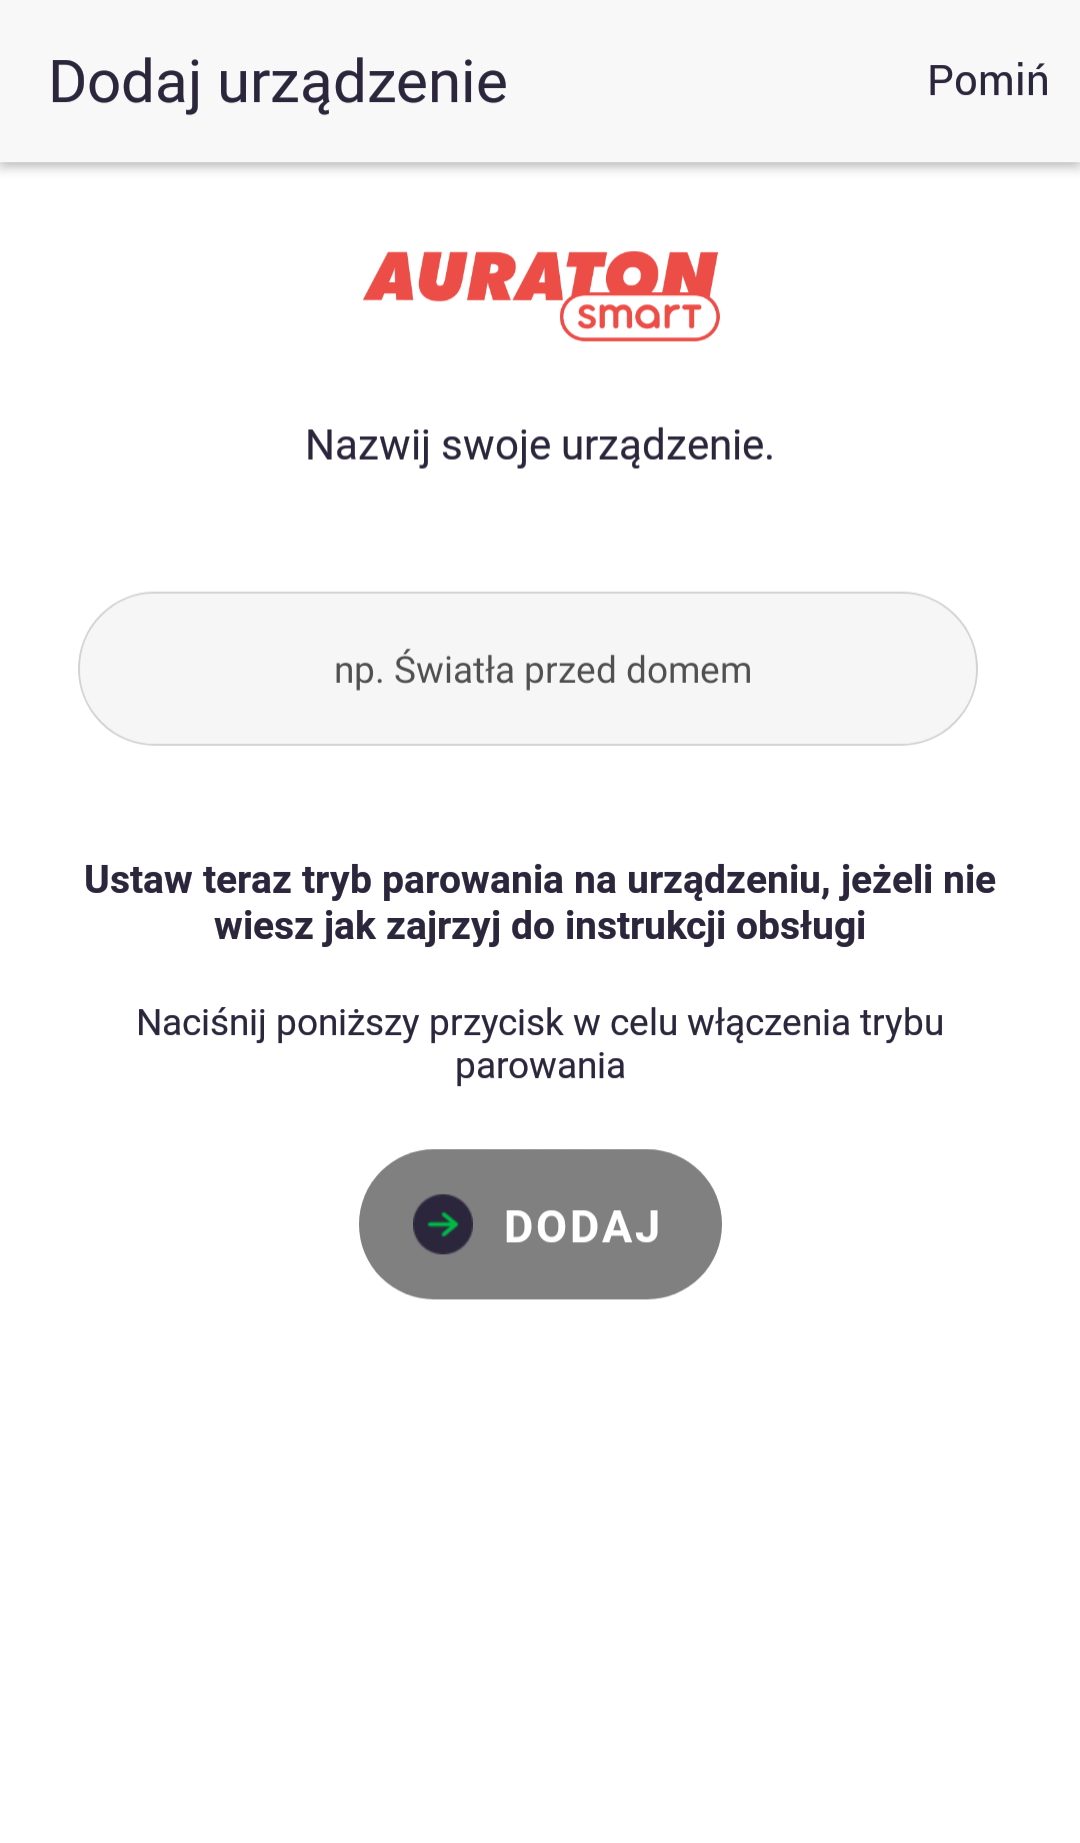
To add a new device, press the green plus button in the center of the screen. When the next screen appears, tap the house icon labeled "Devices." On the next screen, name the device you're adding. After entering the name, press the "Add" button and enable pairing mode on the peripheral device according to its instructions. Once successfully paired, you can place the device in any previously added room and add it to your favorites.
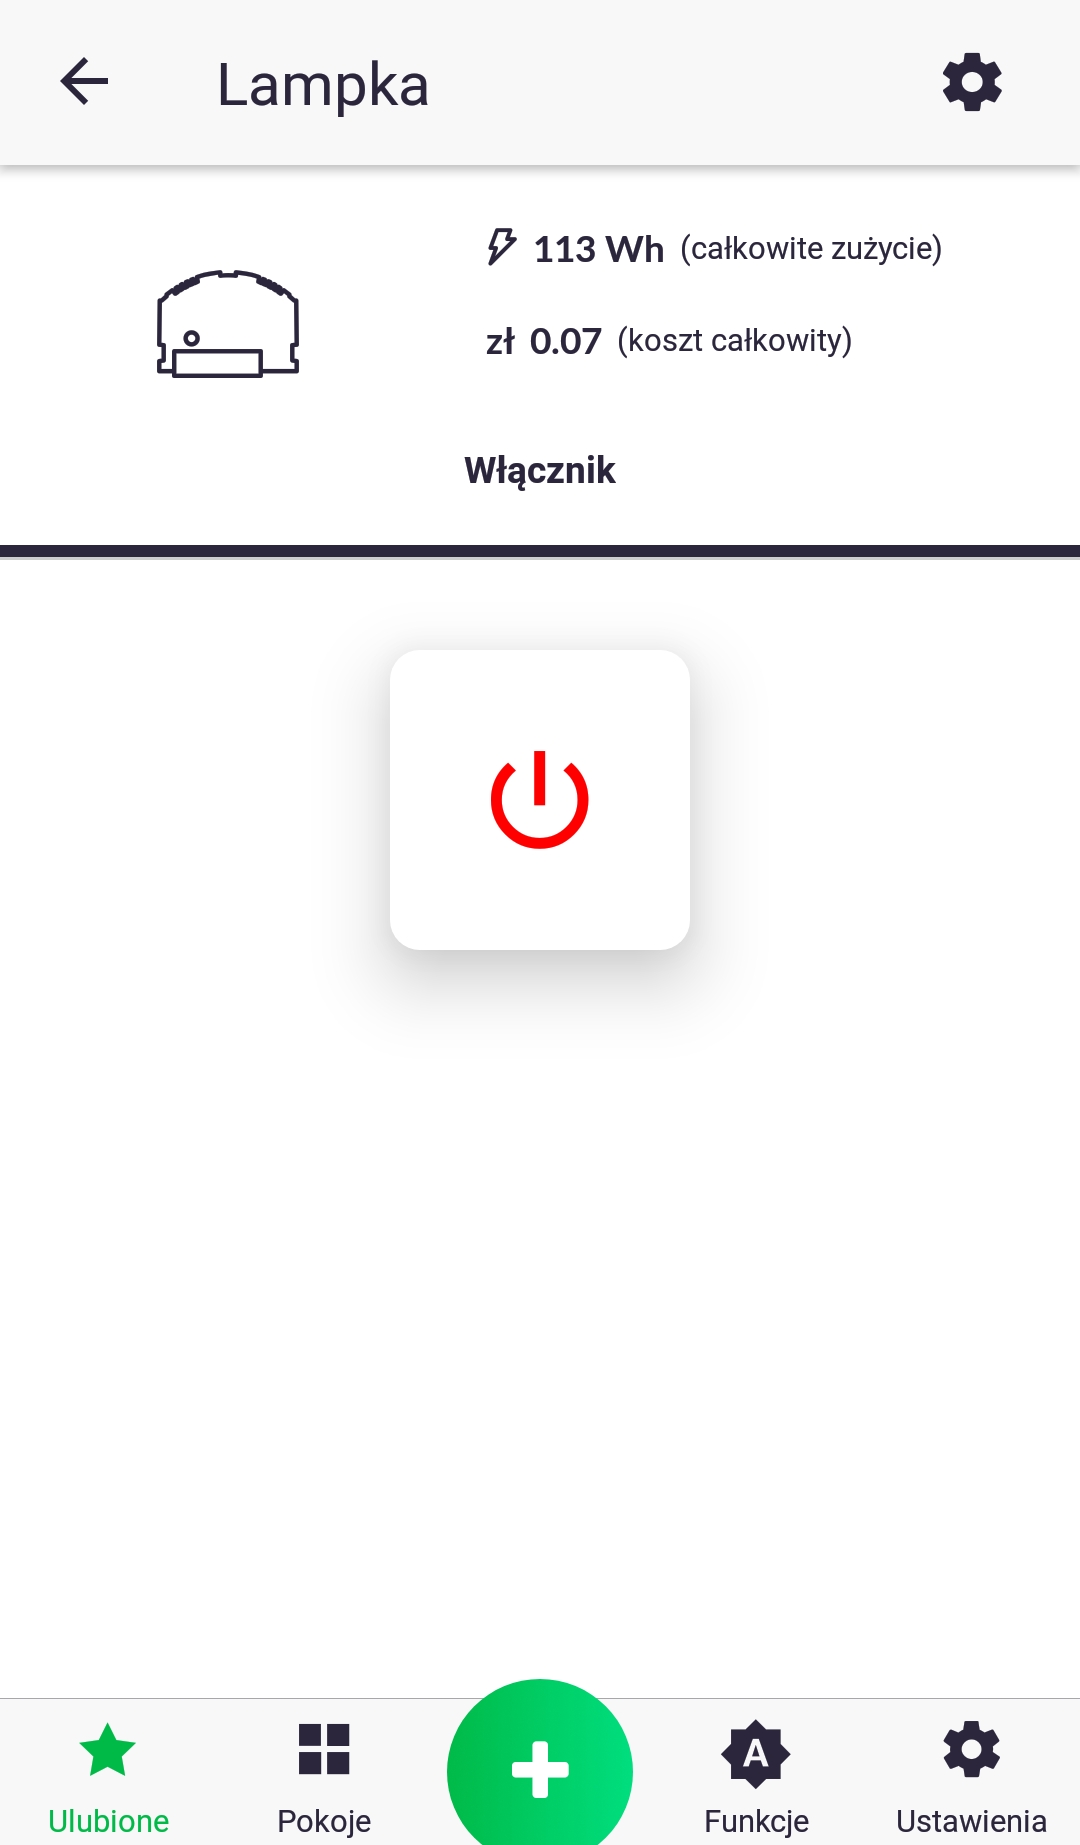
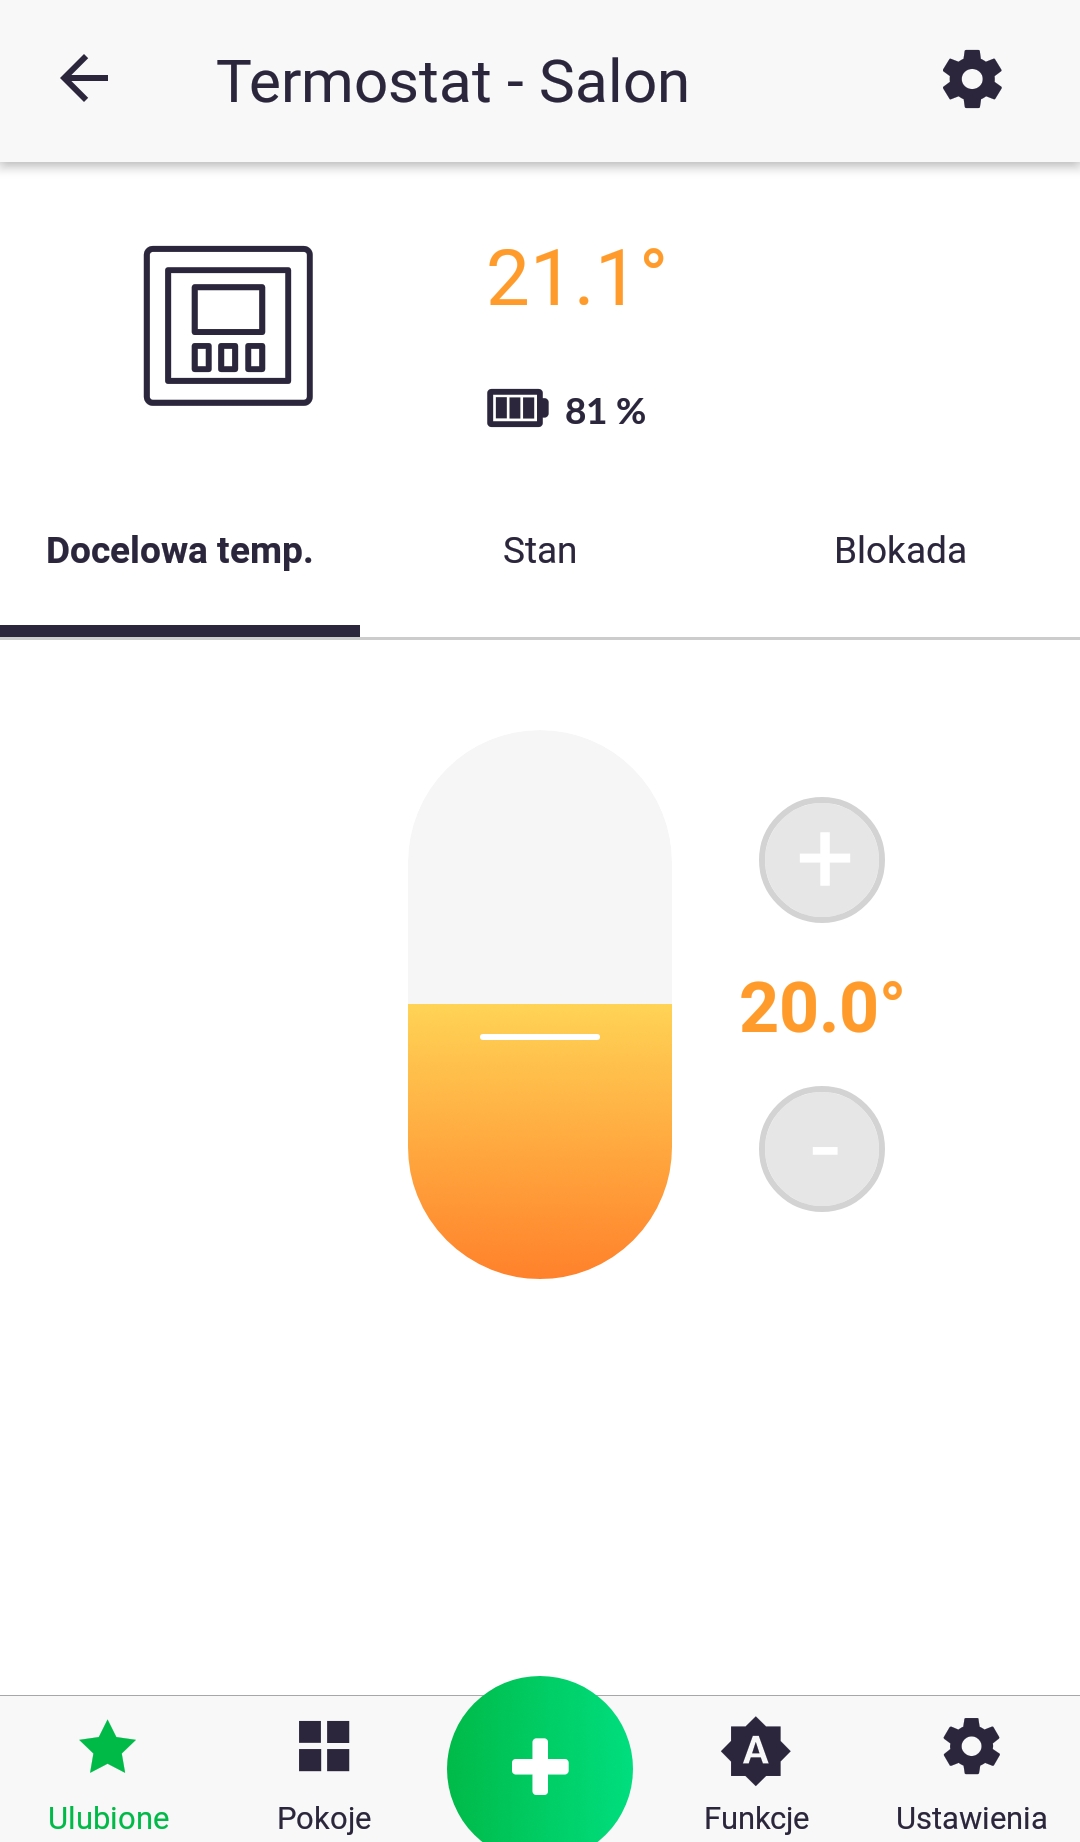
Device control
The device control screen is launched by long-pressing its icon in the "Favorites" tab or in the room to which it is assigned. Control the device according to its instructions.
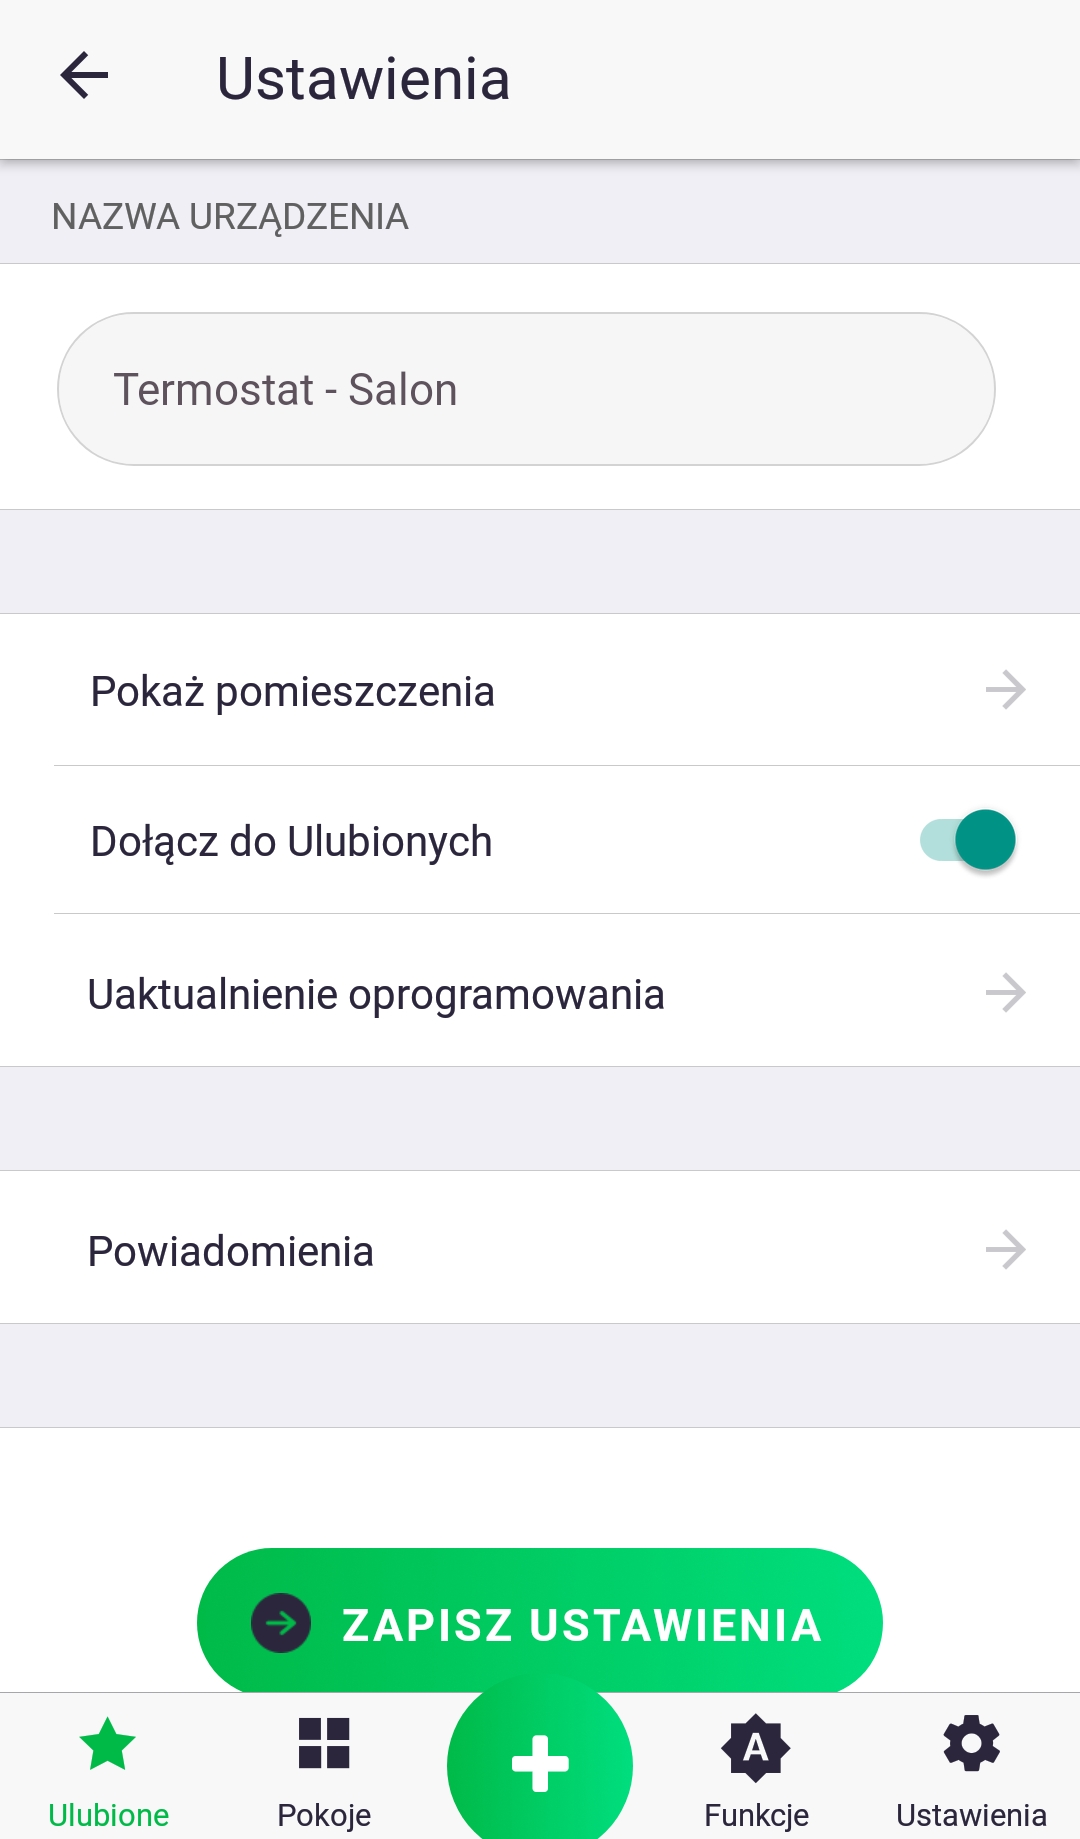
Device configuration
From the device control screen, you can access its settings by pressing the "gear" icon. Depending on the device, there are different configuration options. However, the following options are always available: renaming it, changing its room assignment, adding it to "Favorites," updating its software, and receiving push notifications.
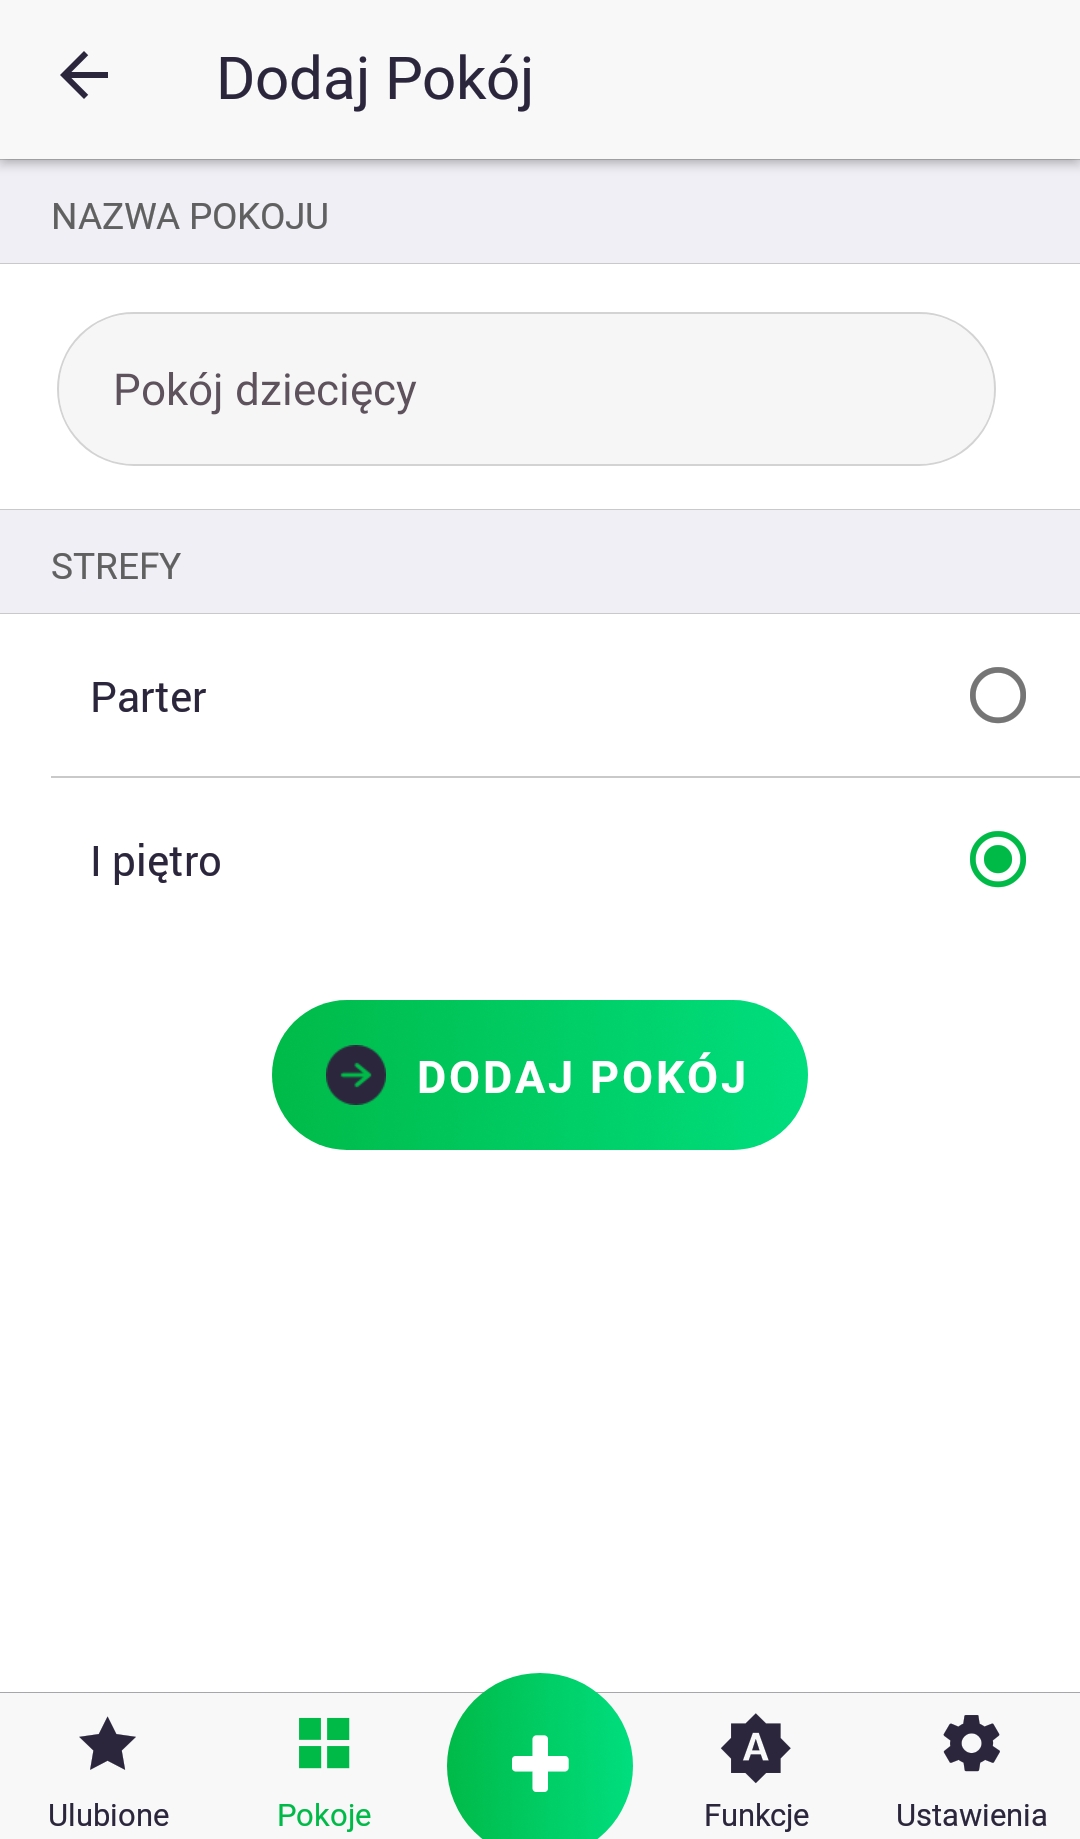
Adding a room
To add a new room, just like adding a new device, click the green plus button in the center of the screen. When the next screen appears, click the "Rooms" icon. Then, name the room, select the zone it should belong to, and click "Add Room."
Adding features
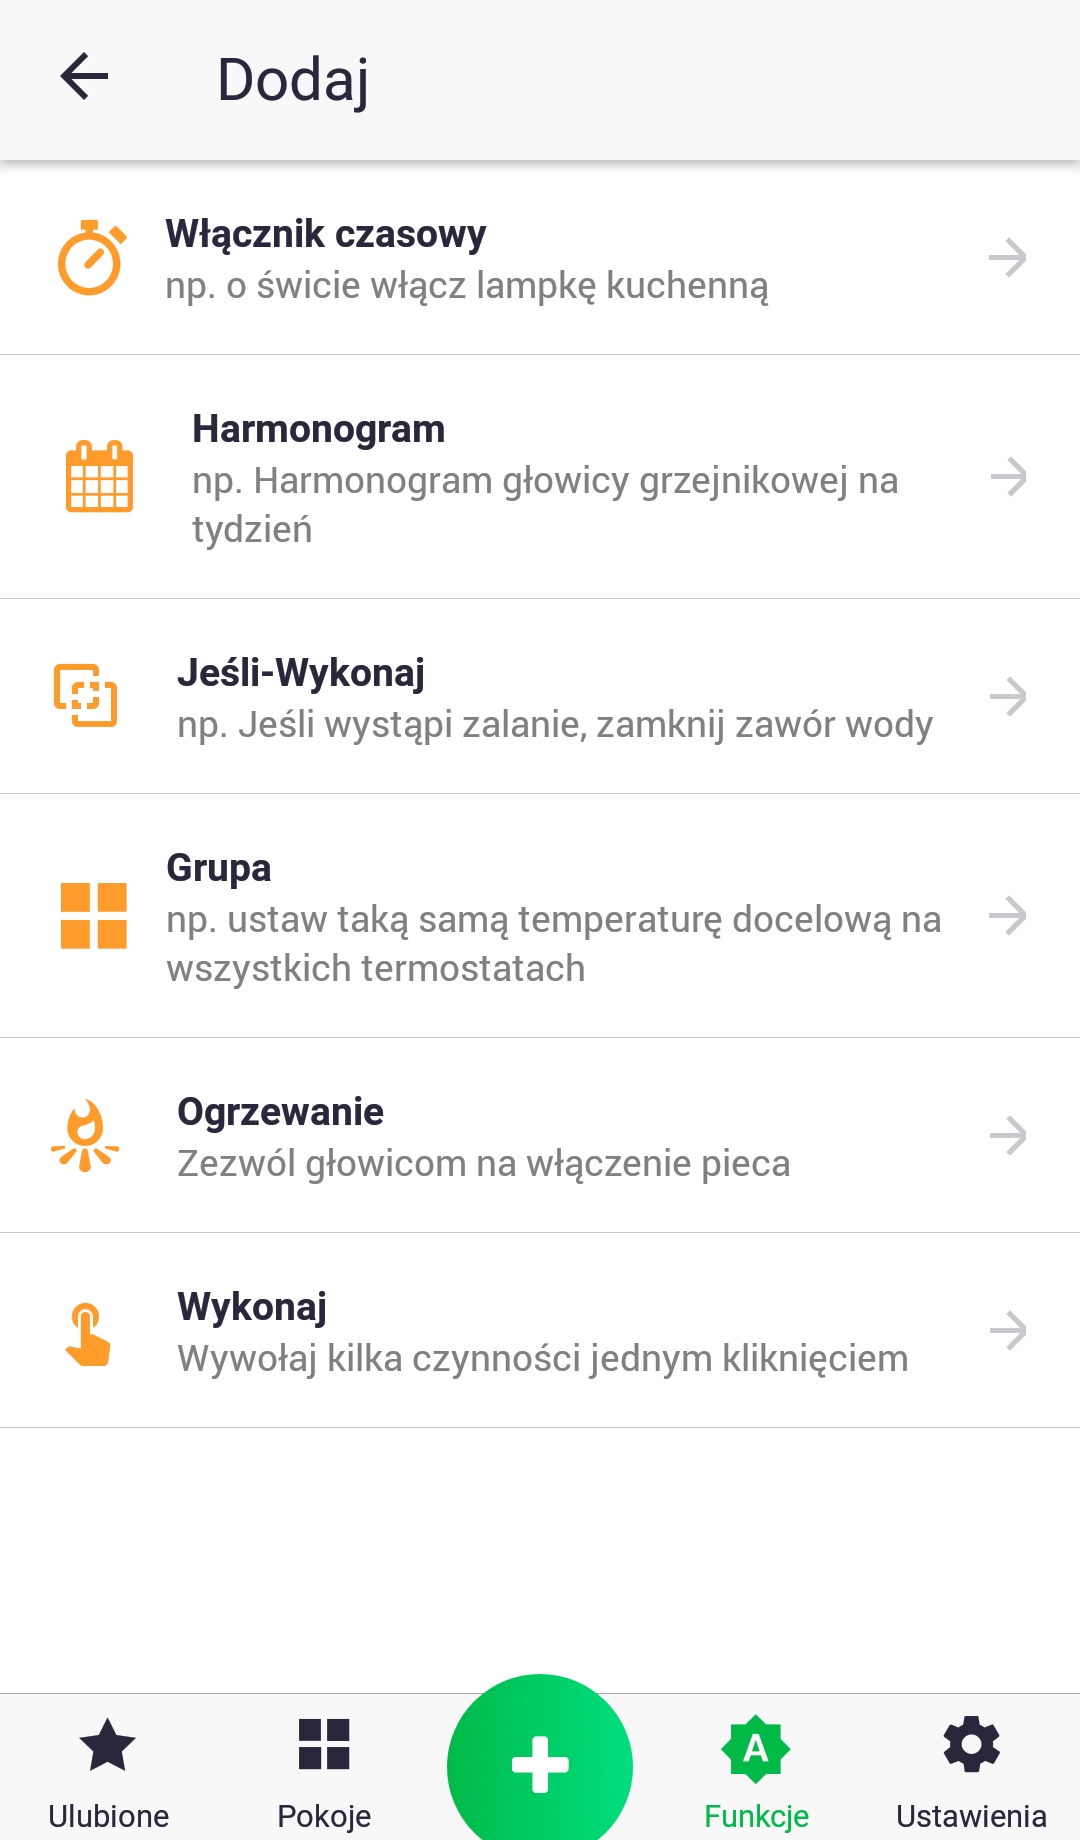
To add a new function, just as you would when adding a new device, press the green plus button in the center of the screen. When the next screen appears, press the "Functions" icon. Each function's name includes an example of its use. More detailed information about each function can be found in the following chapters.
"Rooms" tab
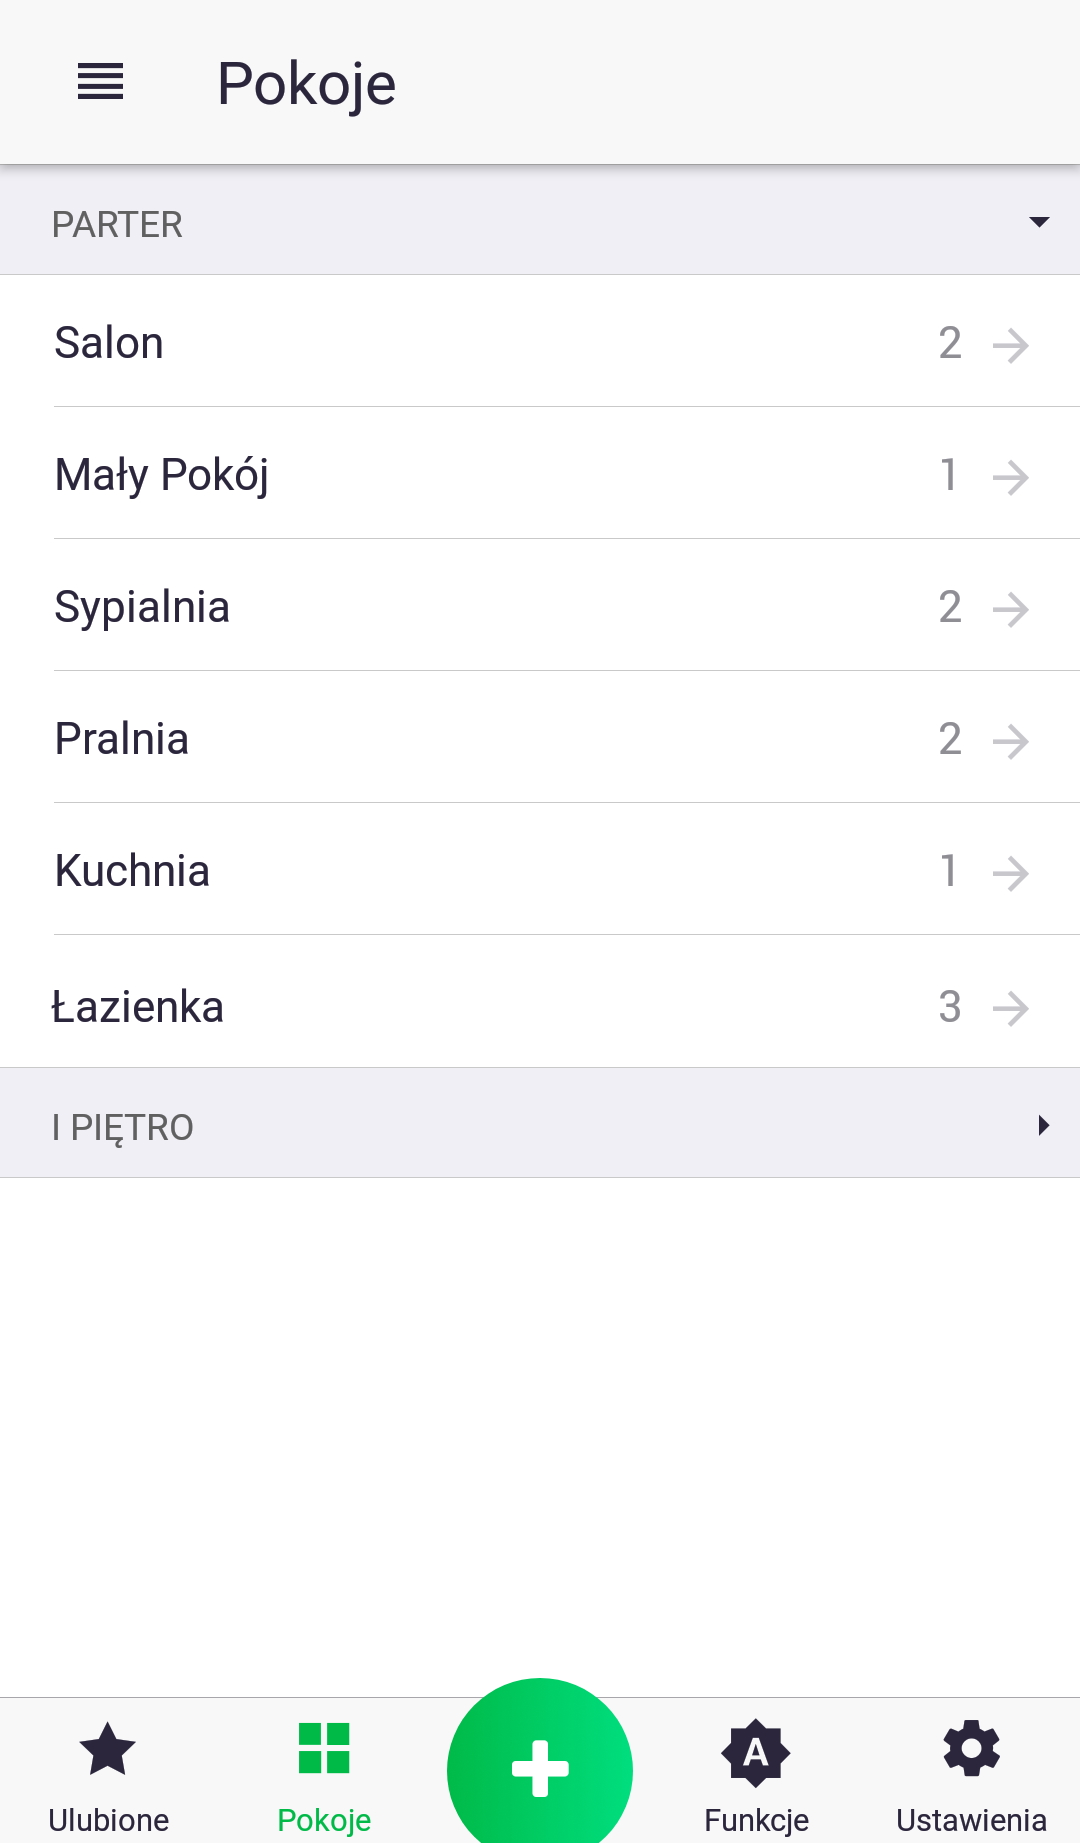
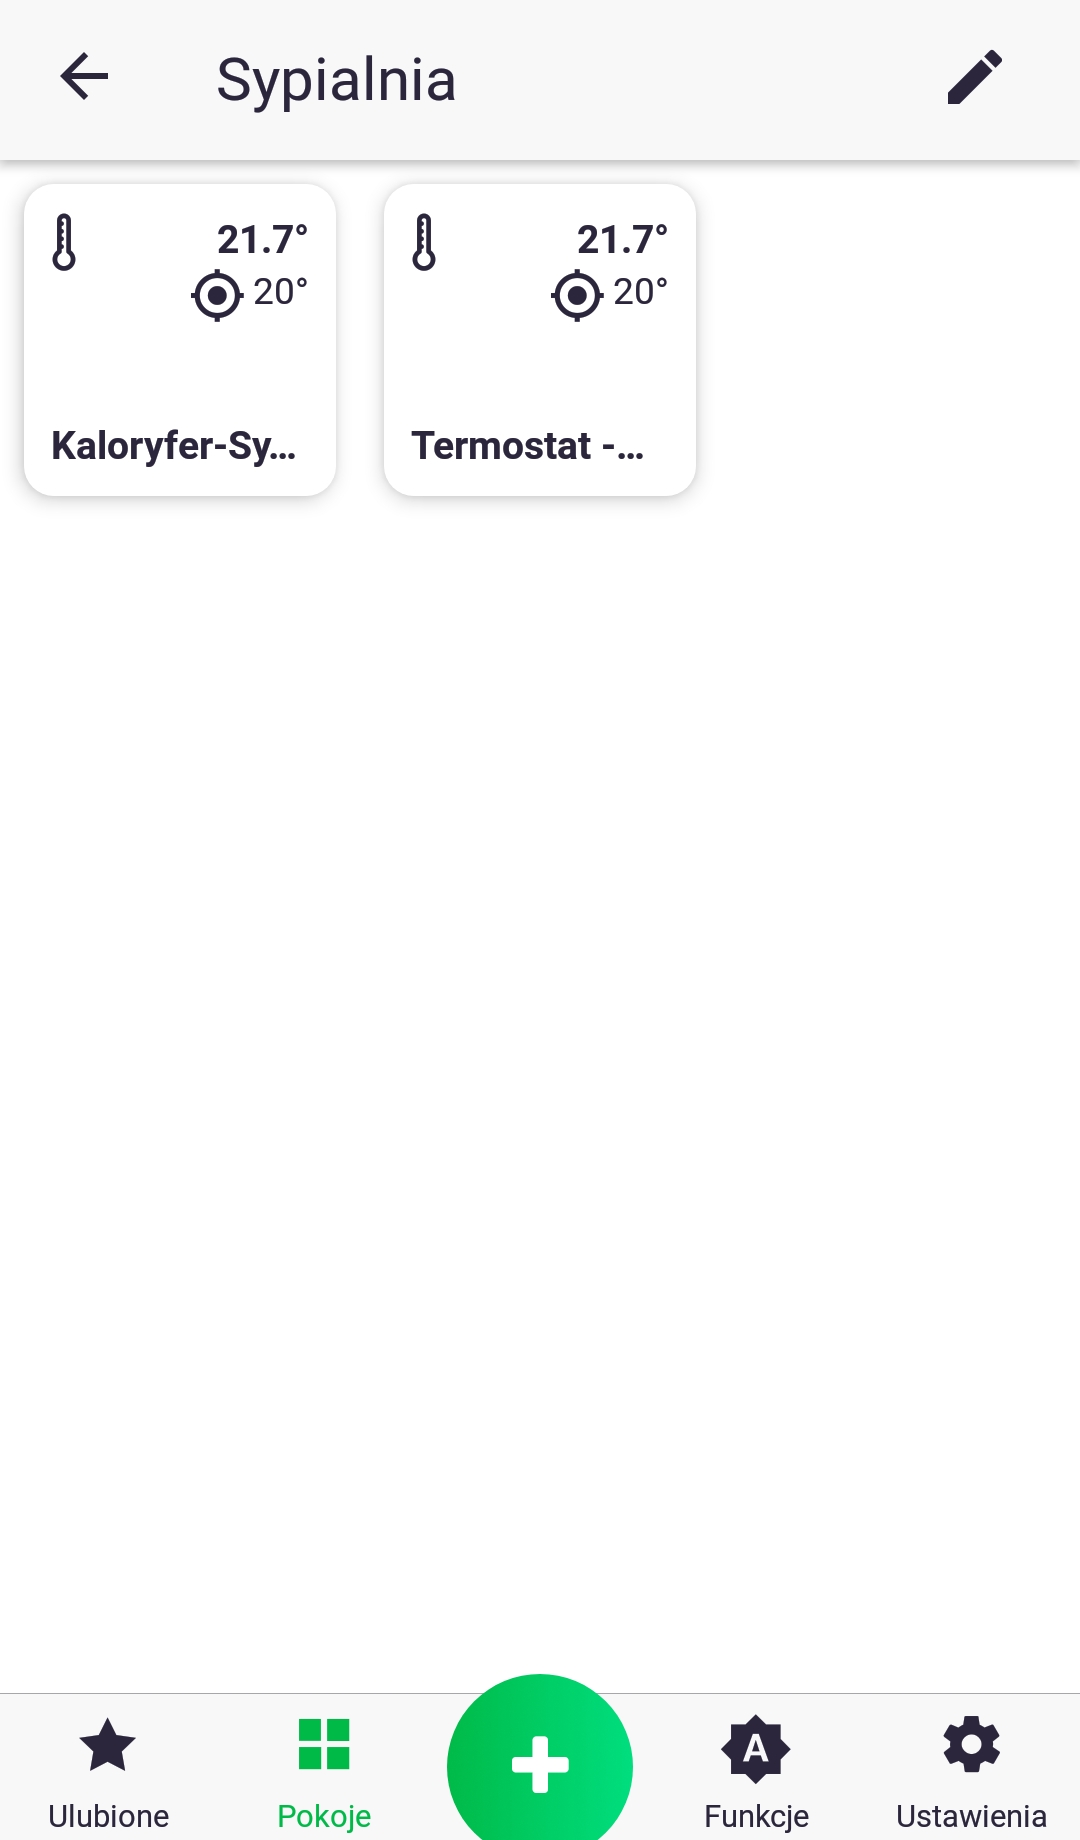
The "Rooms" tab contains a list of added rooms, broken down into zones and the number of devices assigned to each room. Clicking on a specific room name takes you to a screen showing the devices assigned to it.
Zones/rooms
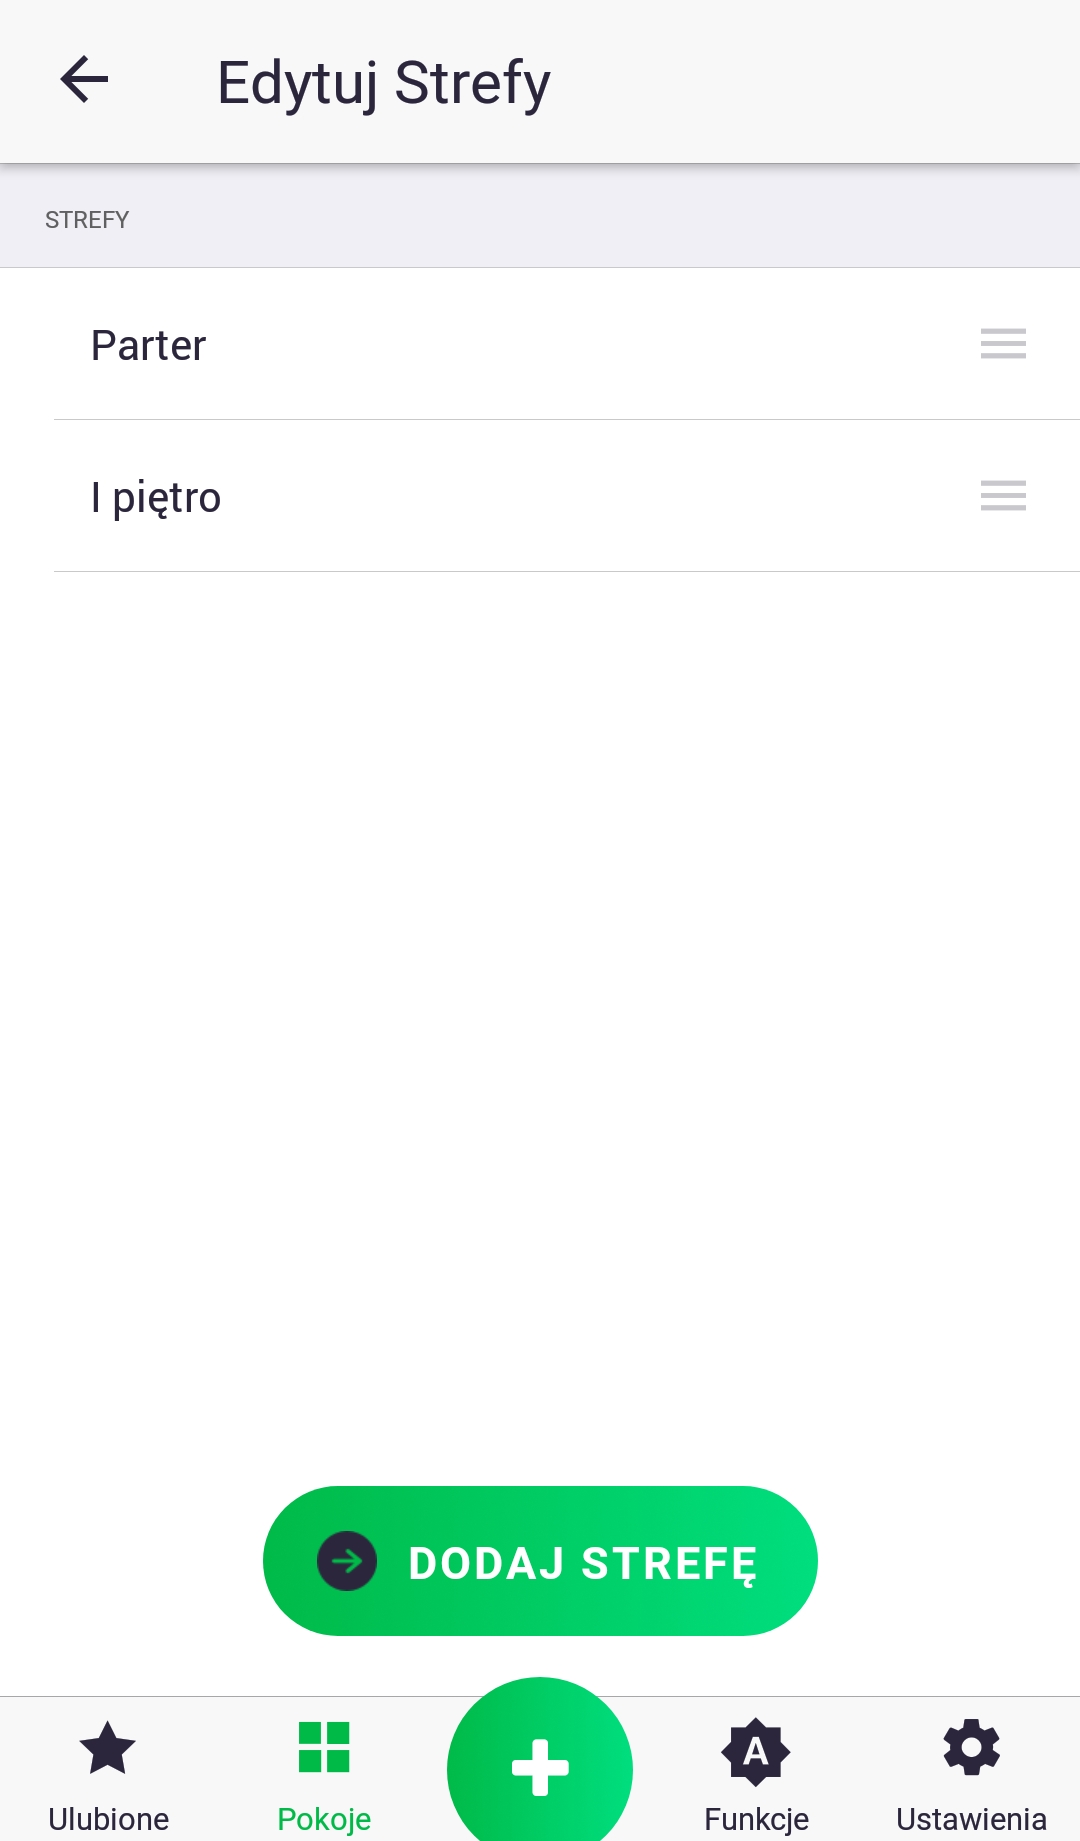
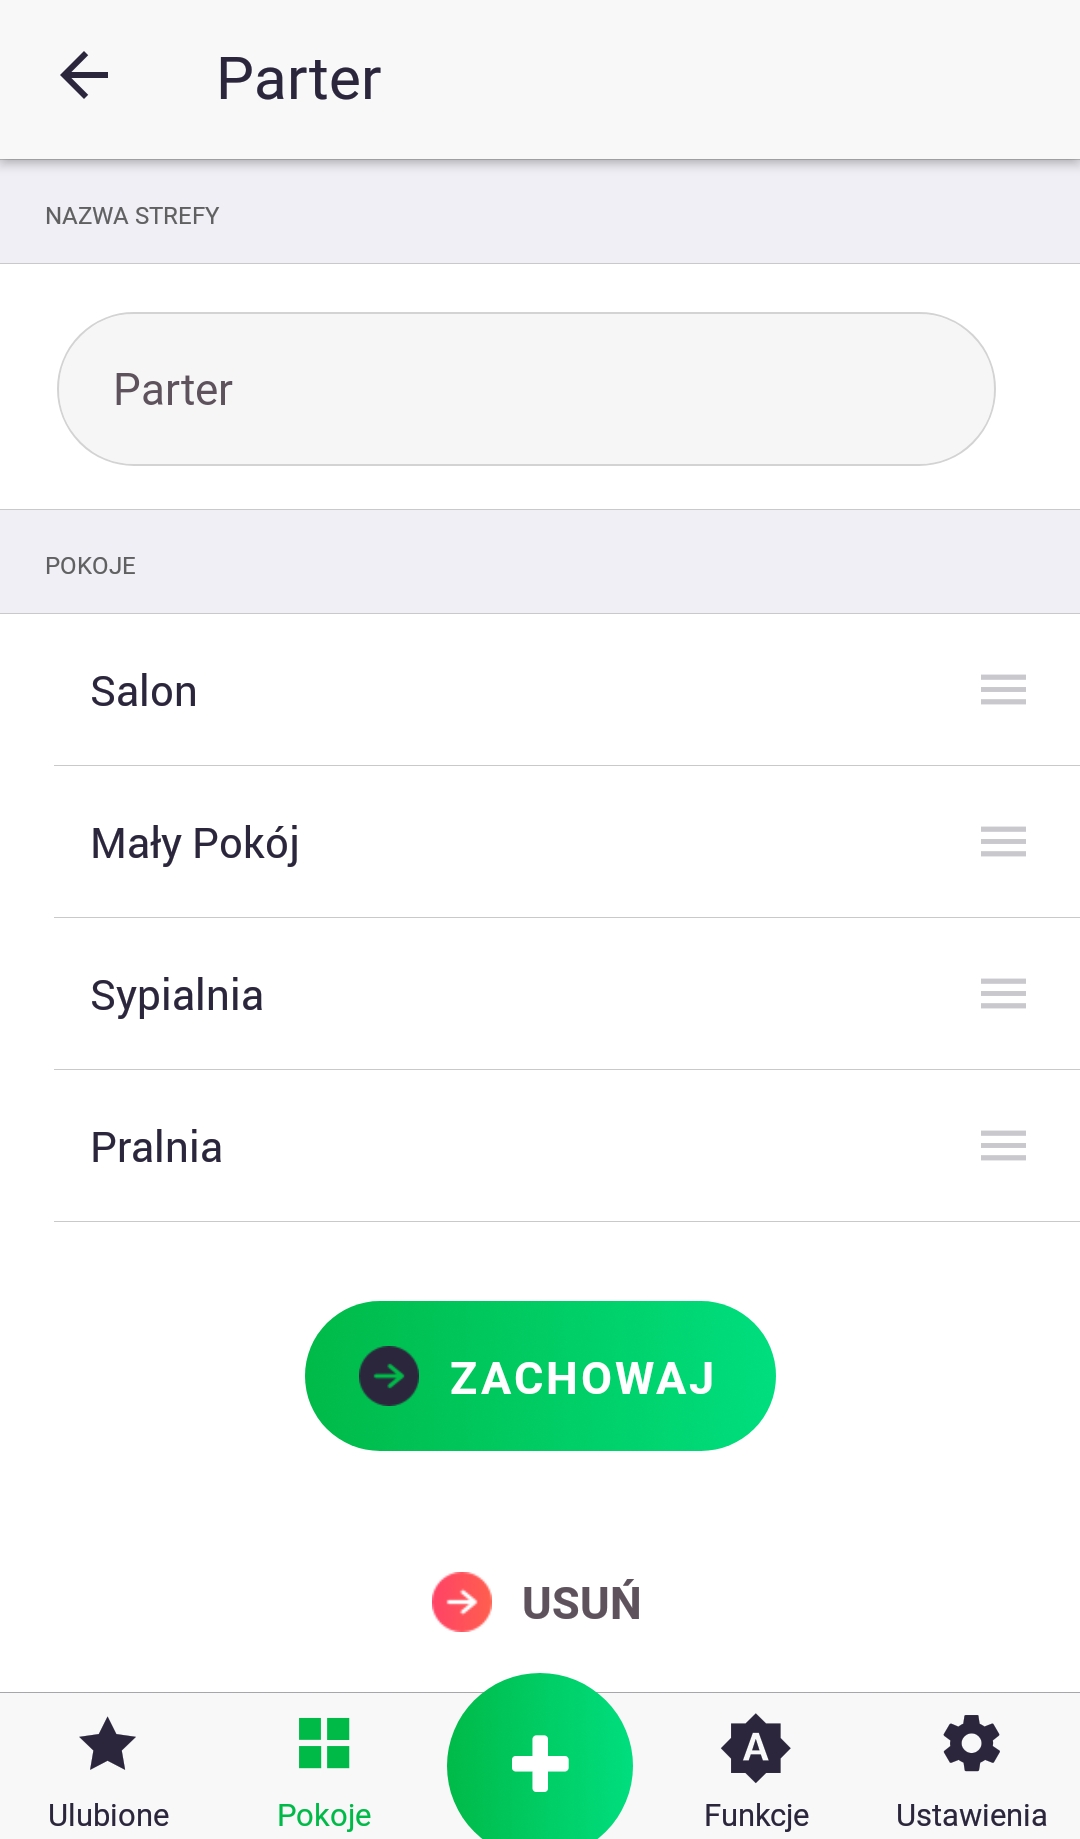
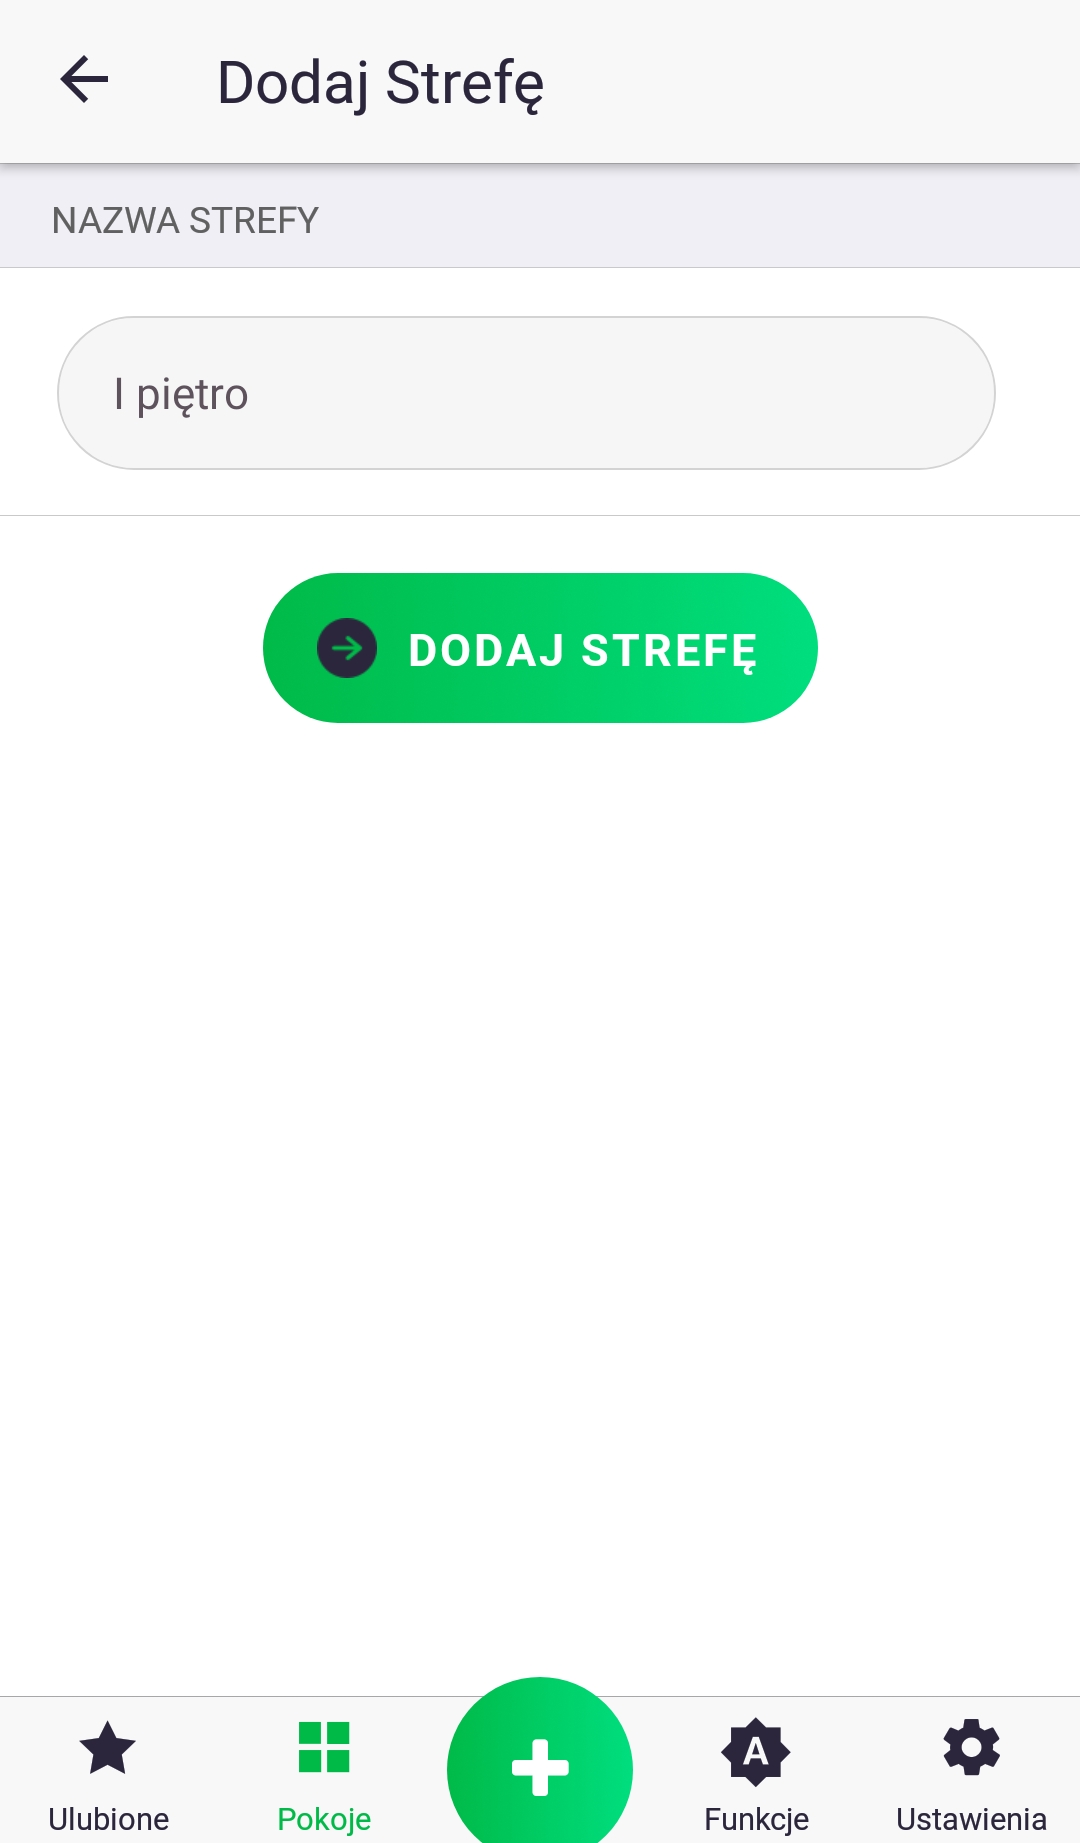
To add a new zone on the "Rooms" screen, click the icon next to the tab name. On the next screen, click the "Add Zone" button, fill in the zone name, and then click the button to add it. On the "Edit Zones" screen, you can change the order of zones by holding down a zone and dragging it to a specific location. You can also do the same with rooms by accessing the room list for a specific zone (short-clicking on the name) and performing the same steps as described earlier.
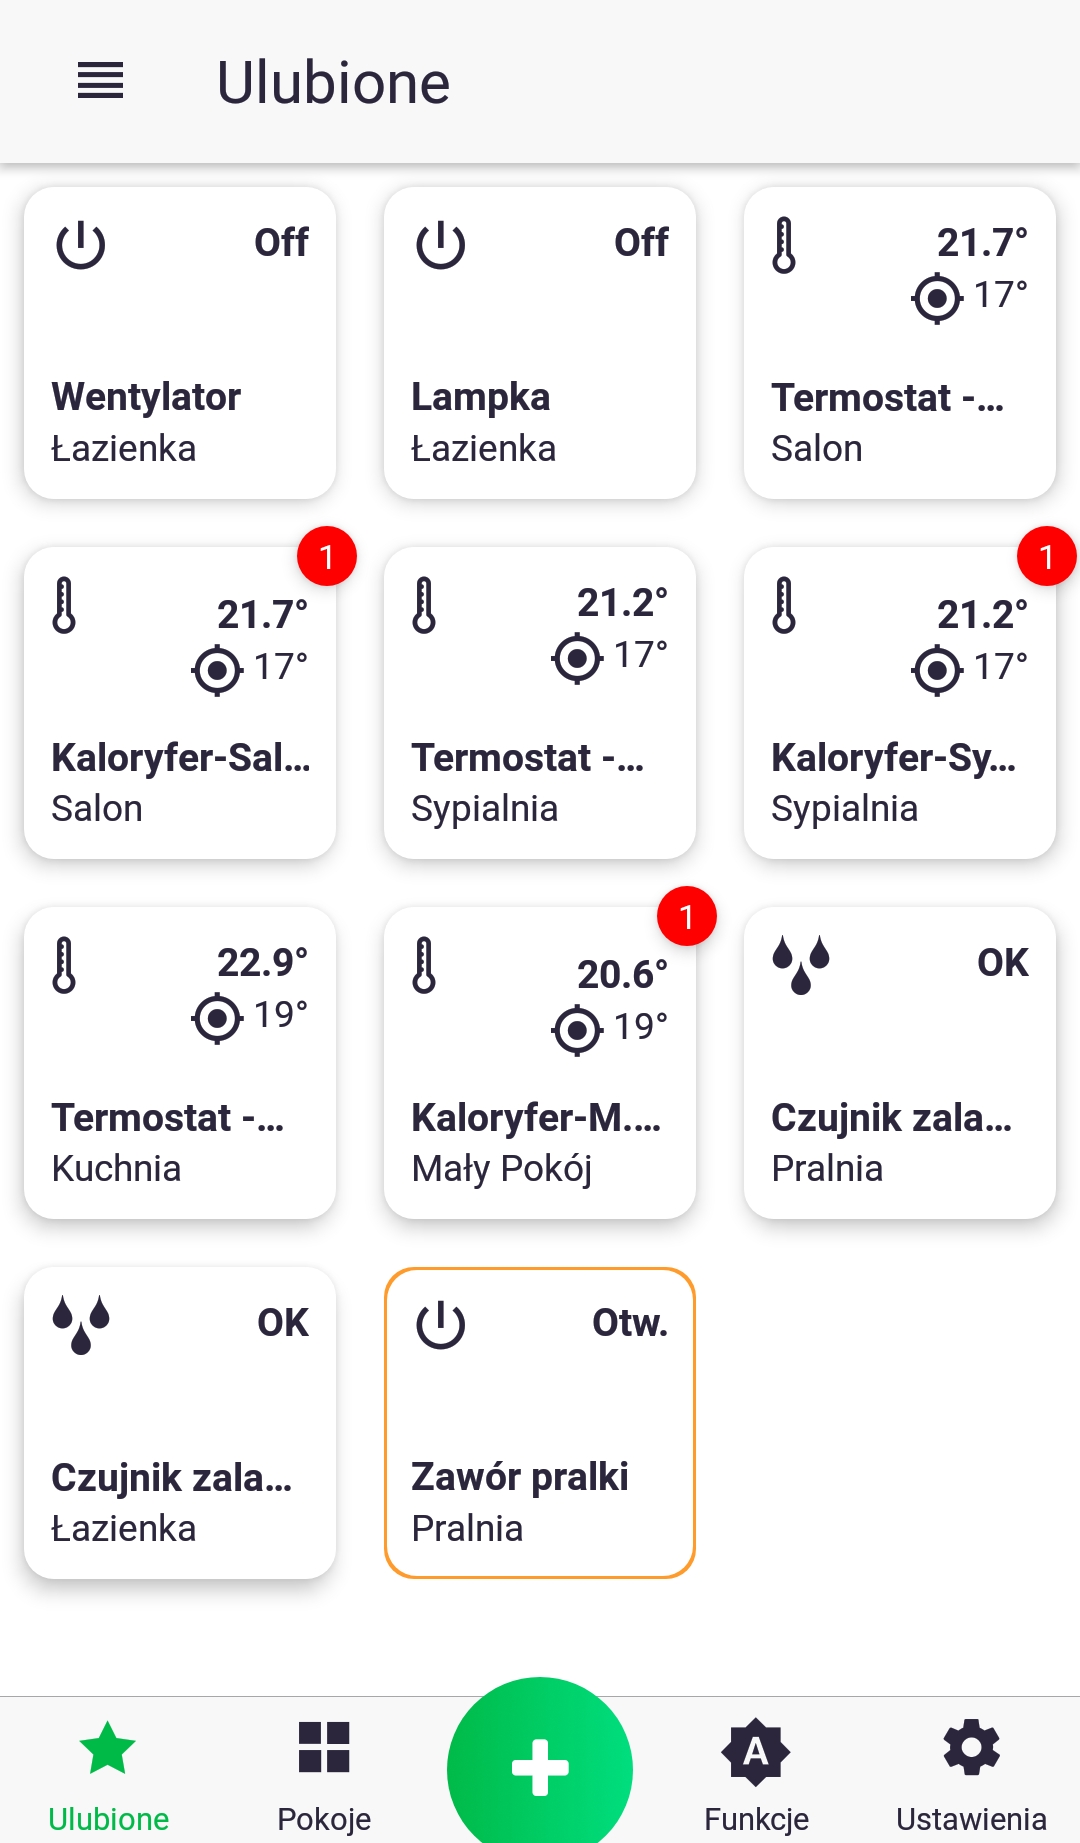
Favorites tab
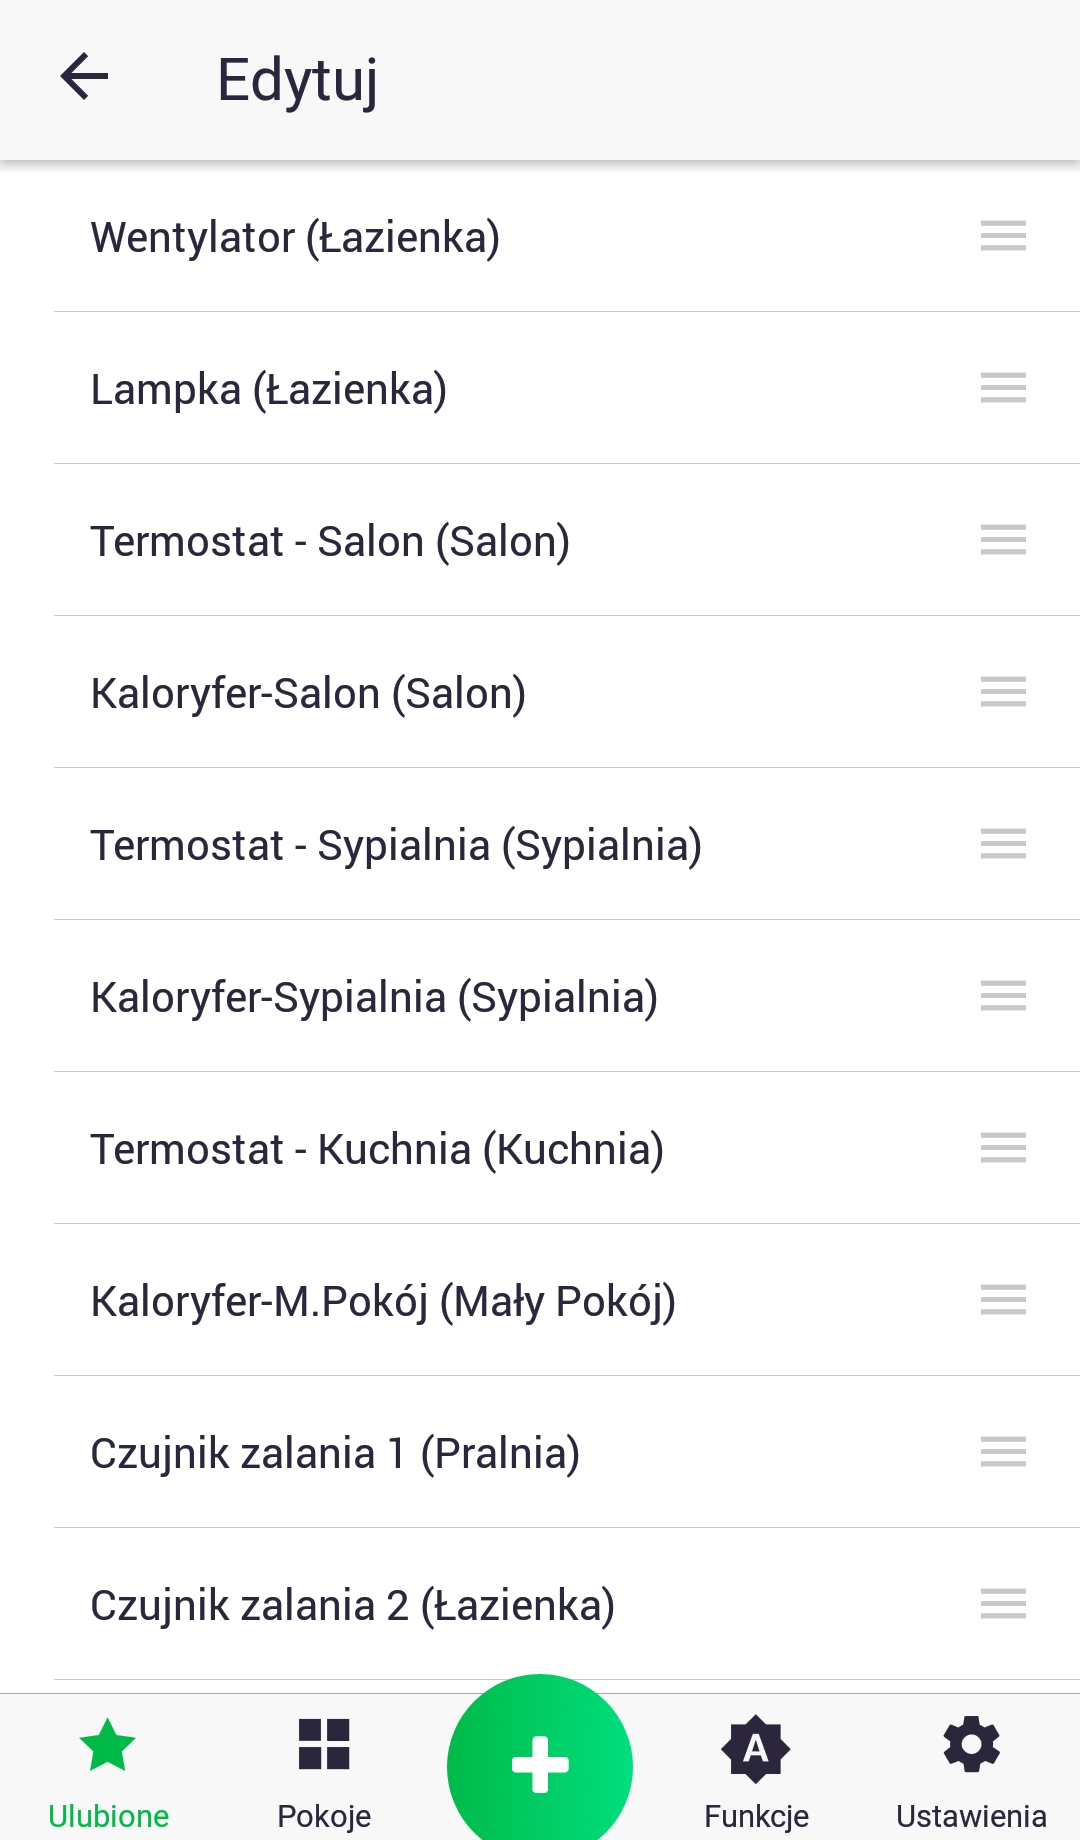
The "Favorites" tab allows you to monitor and control selected devices. To change the parameter values of a given device, access its control screen, as described earlier. If the device is an On/Off device, such as a water valve, you can open/close it directly from the "Favorites" screen by briefly pressing its icon. The order of devices is configurable by pressing the icon at the top of the screen (next to the "Favorites" name) and then going to the edit screen. Changing the order is done by long-pressing the device and dragging it to the desired location.

How do functions work?
Functions allow you to automate the operation of devices by, for example, setting a heating schedule for the entire week, turning on garden watering one hour after sunset, etc. Currently, there are several types of functions, which will be described in the following chapters. It's important to remember that functions connect devices into an entire system; without preset functions, each paired accessory operates independently according to its internal program. For example, to ensure cooperation between a thermostat and a radiator head, it's recommended to exchange two parameters between these devices: the current room temperature and the target temperature. This exchange can be set using the "Group" function. In the event of an internet connection failure, and therefore a loss of communication between the Auraton Pulse control unit and the server, there's no need to worry about the entire system suddenly stopping. In such a situation, you only temporarily lose the ability to control the system via the app, as the functions are stored in the control unit and will continue to run as long as the Auraton Pulse is connected to the power grid.
Function – Timer
The "Timer" function is used to group simple actions that occur at similar times, such as turning on several lights at once. It's also possible to add a delay between added actions.
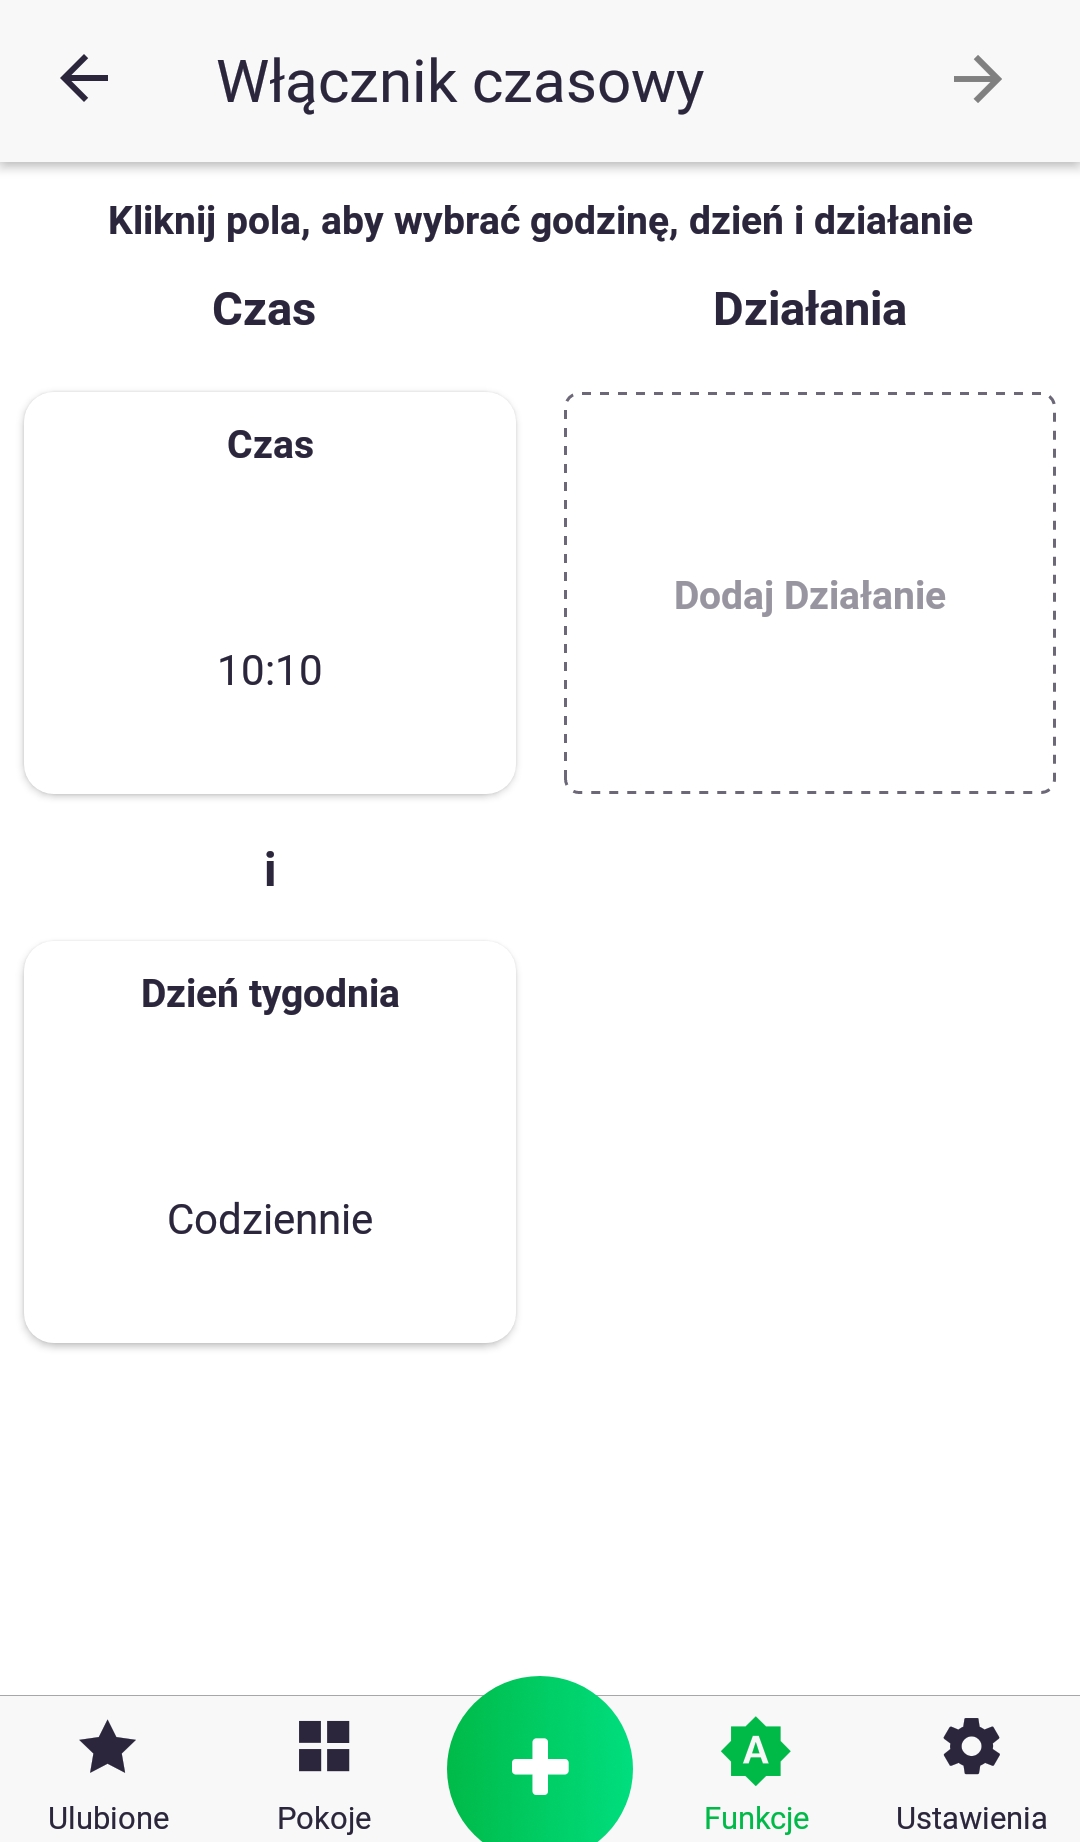
- First, we need to set the time and day of the week for which we've scheduled the event. We do this by briefly clicking on the "Time" and "Day of the Week" icons.
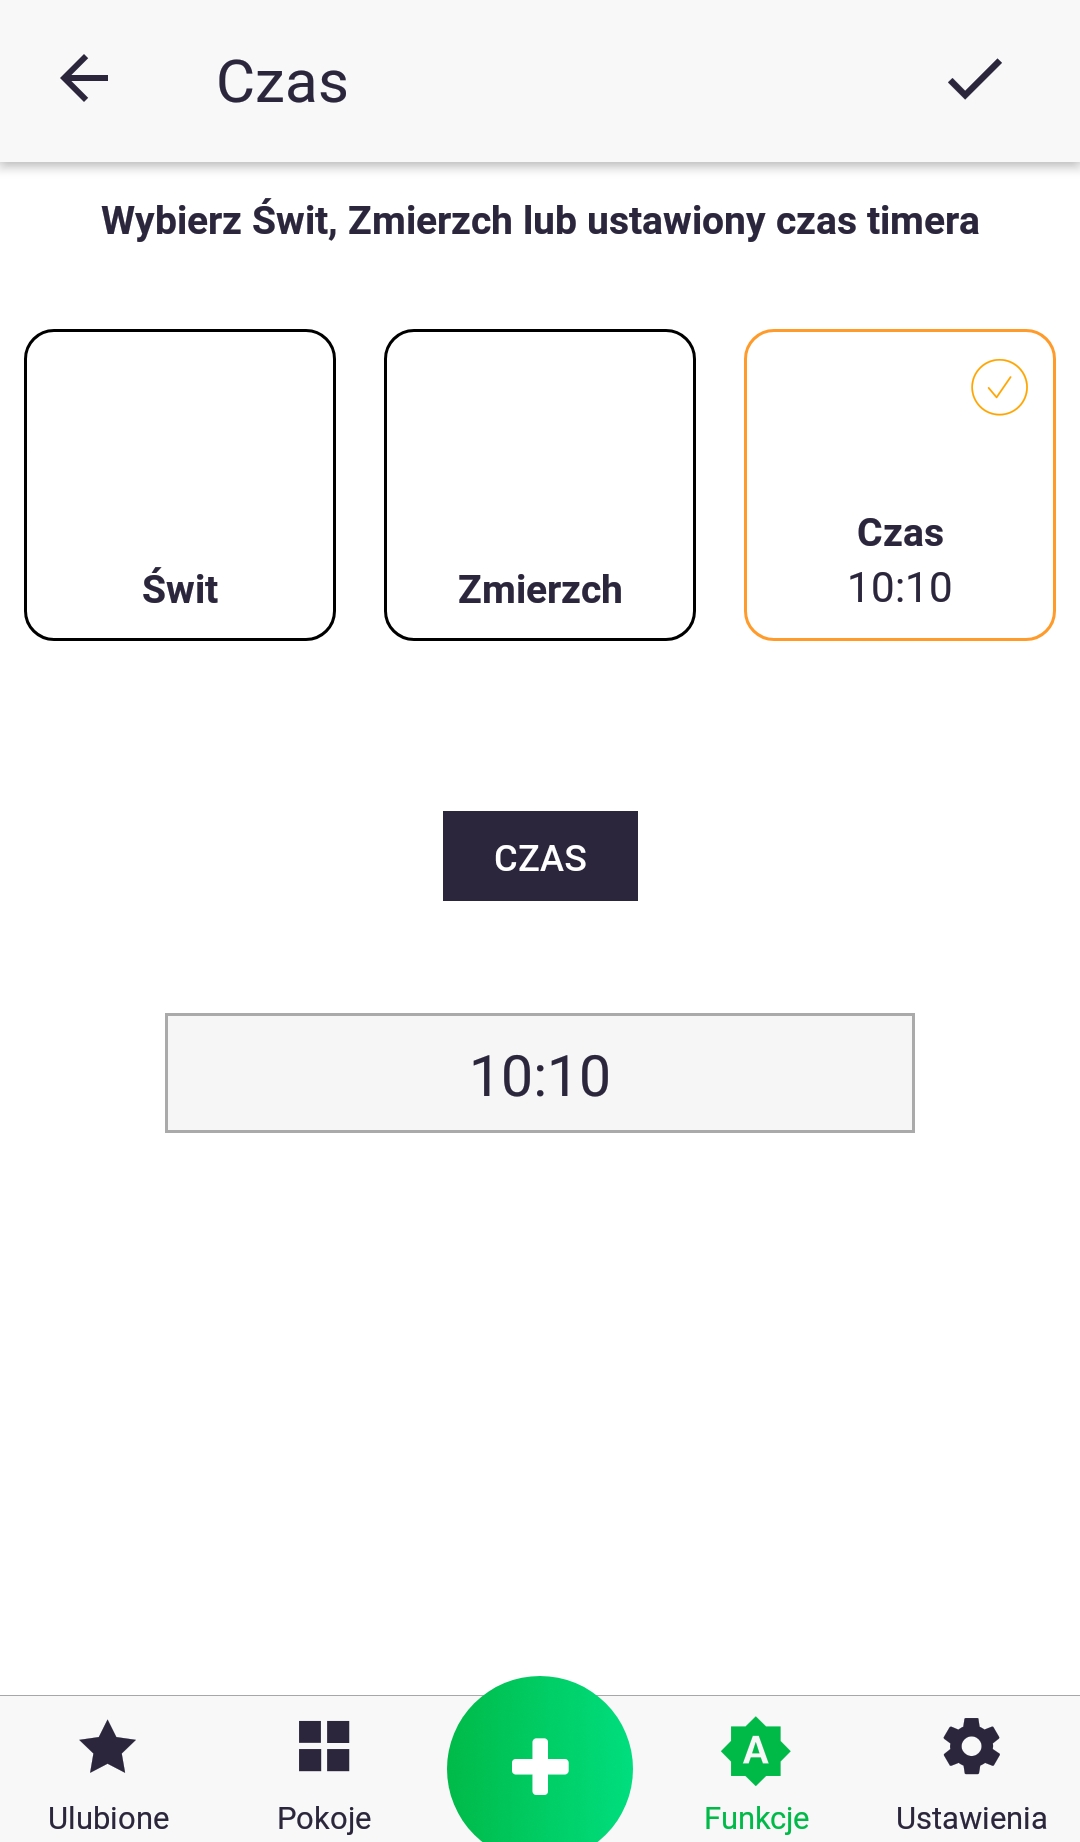
2. When setting the time, we can choose between a specific hour (which we set by clicking on the field below the "Time" text) and linking our function to sunrise or sunset.
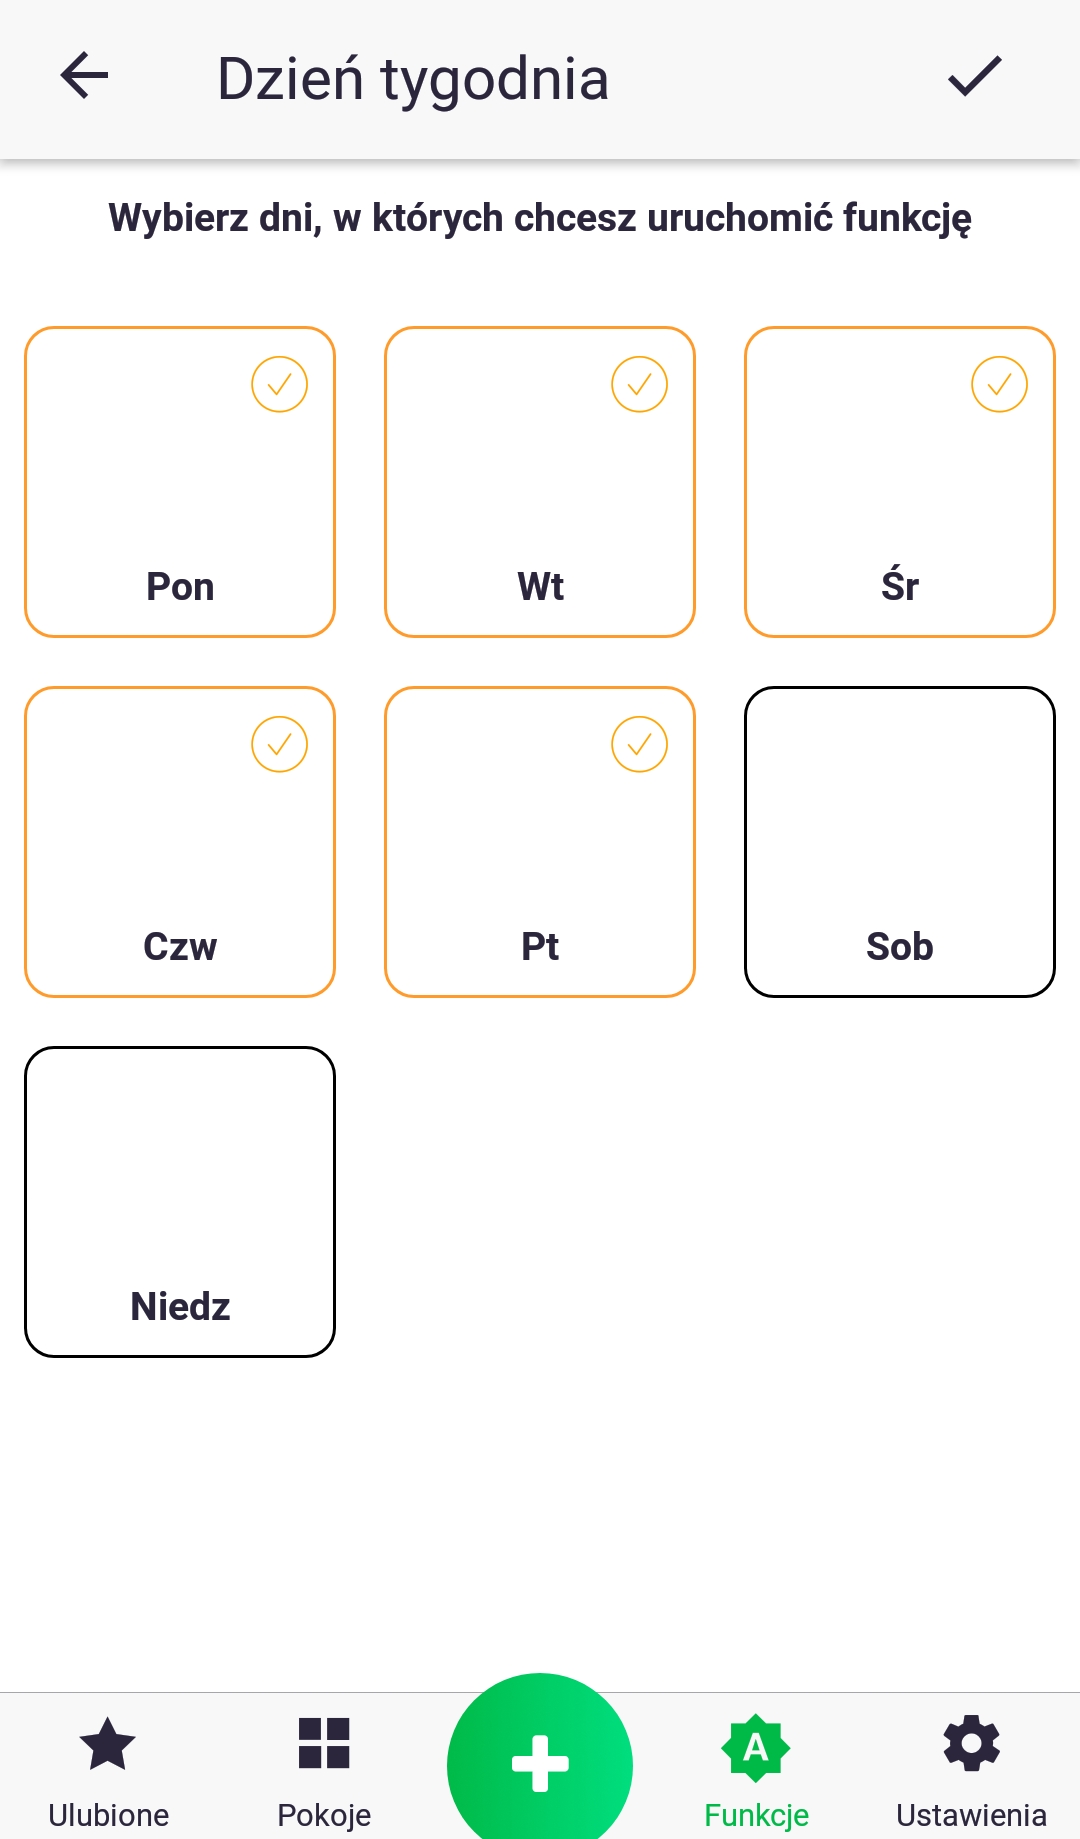
3. Set the day of the week by briefly pressing the appropriate icon.
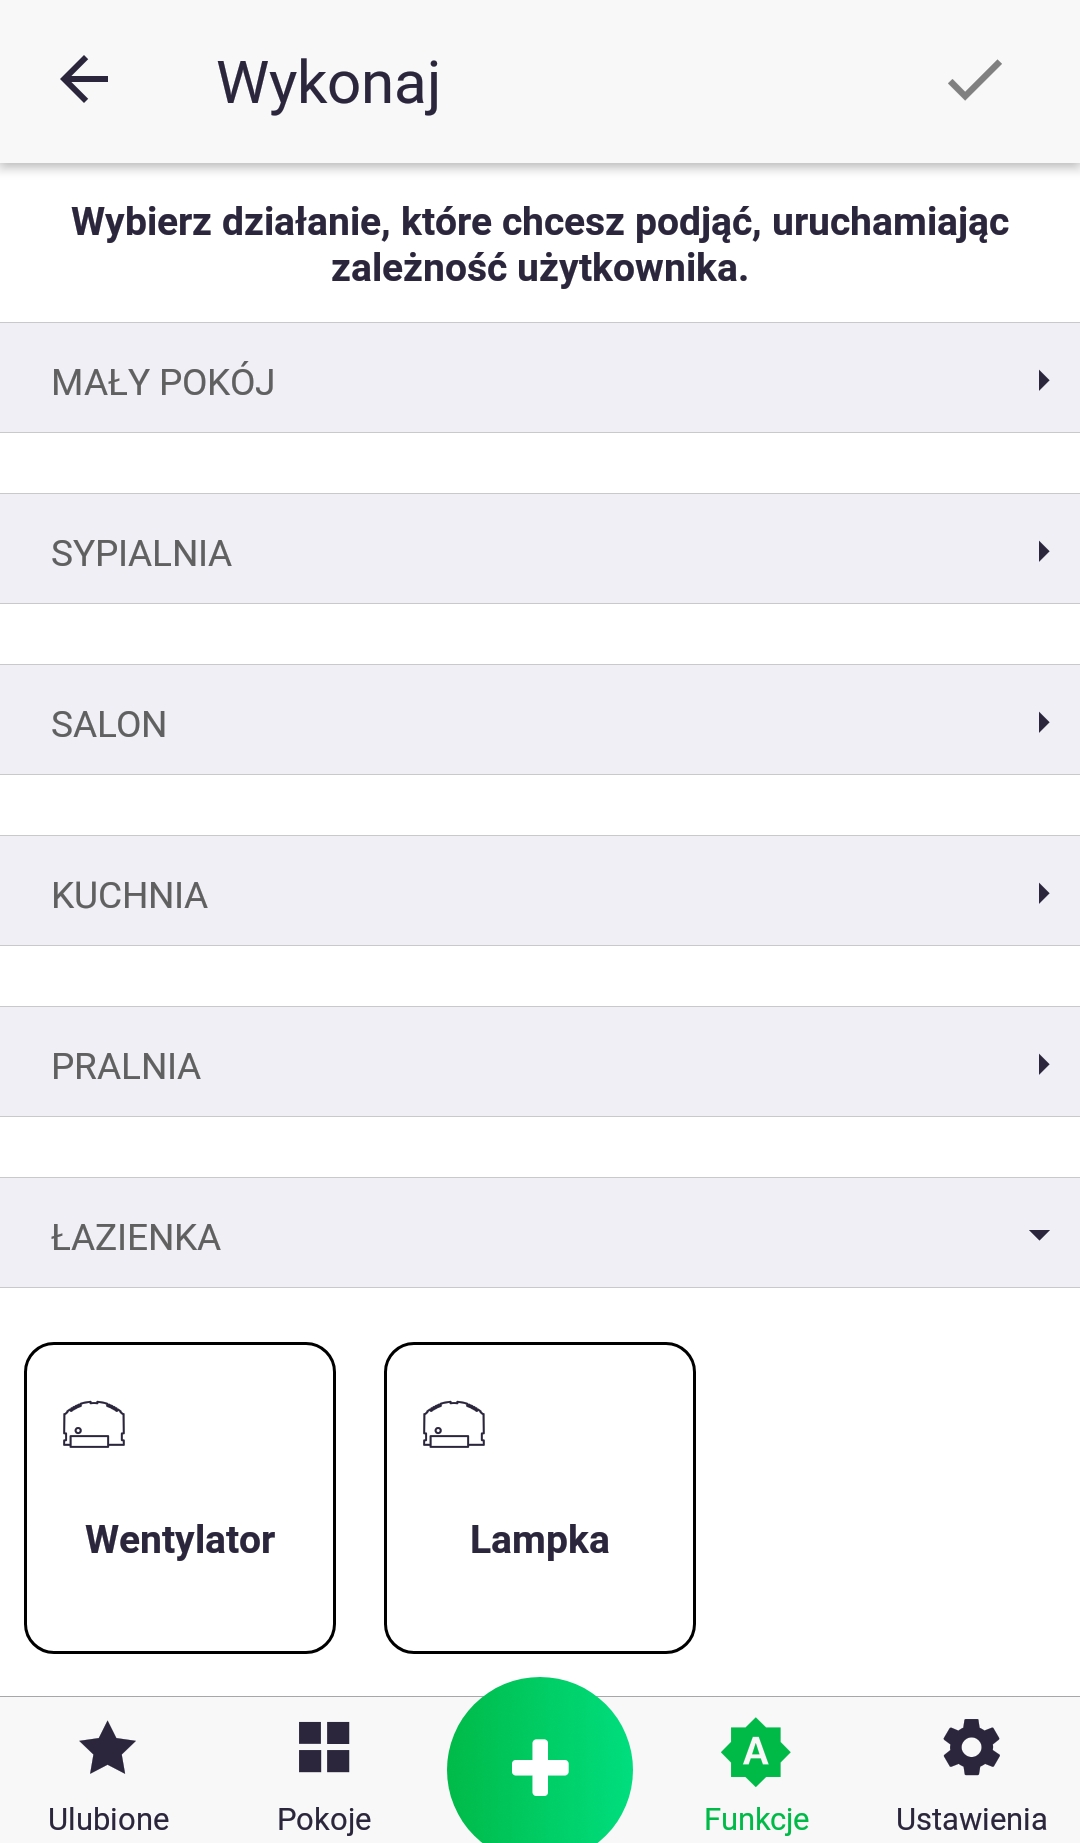
4. We add an action to our function by clicking "Add action" from the screen from point 1. In the list of devices, we find the one we are interested in and briefly press its icon.
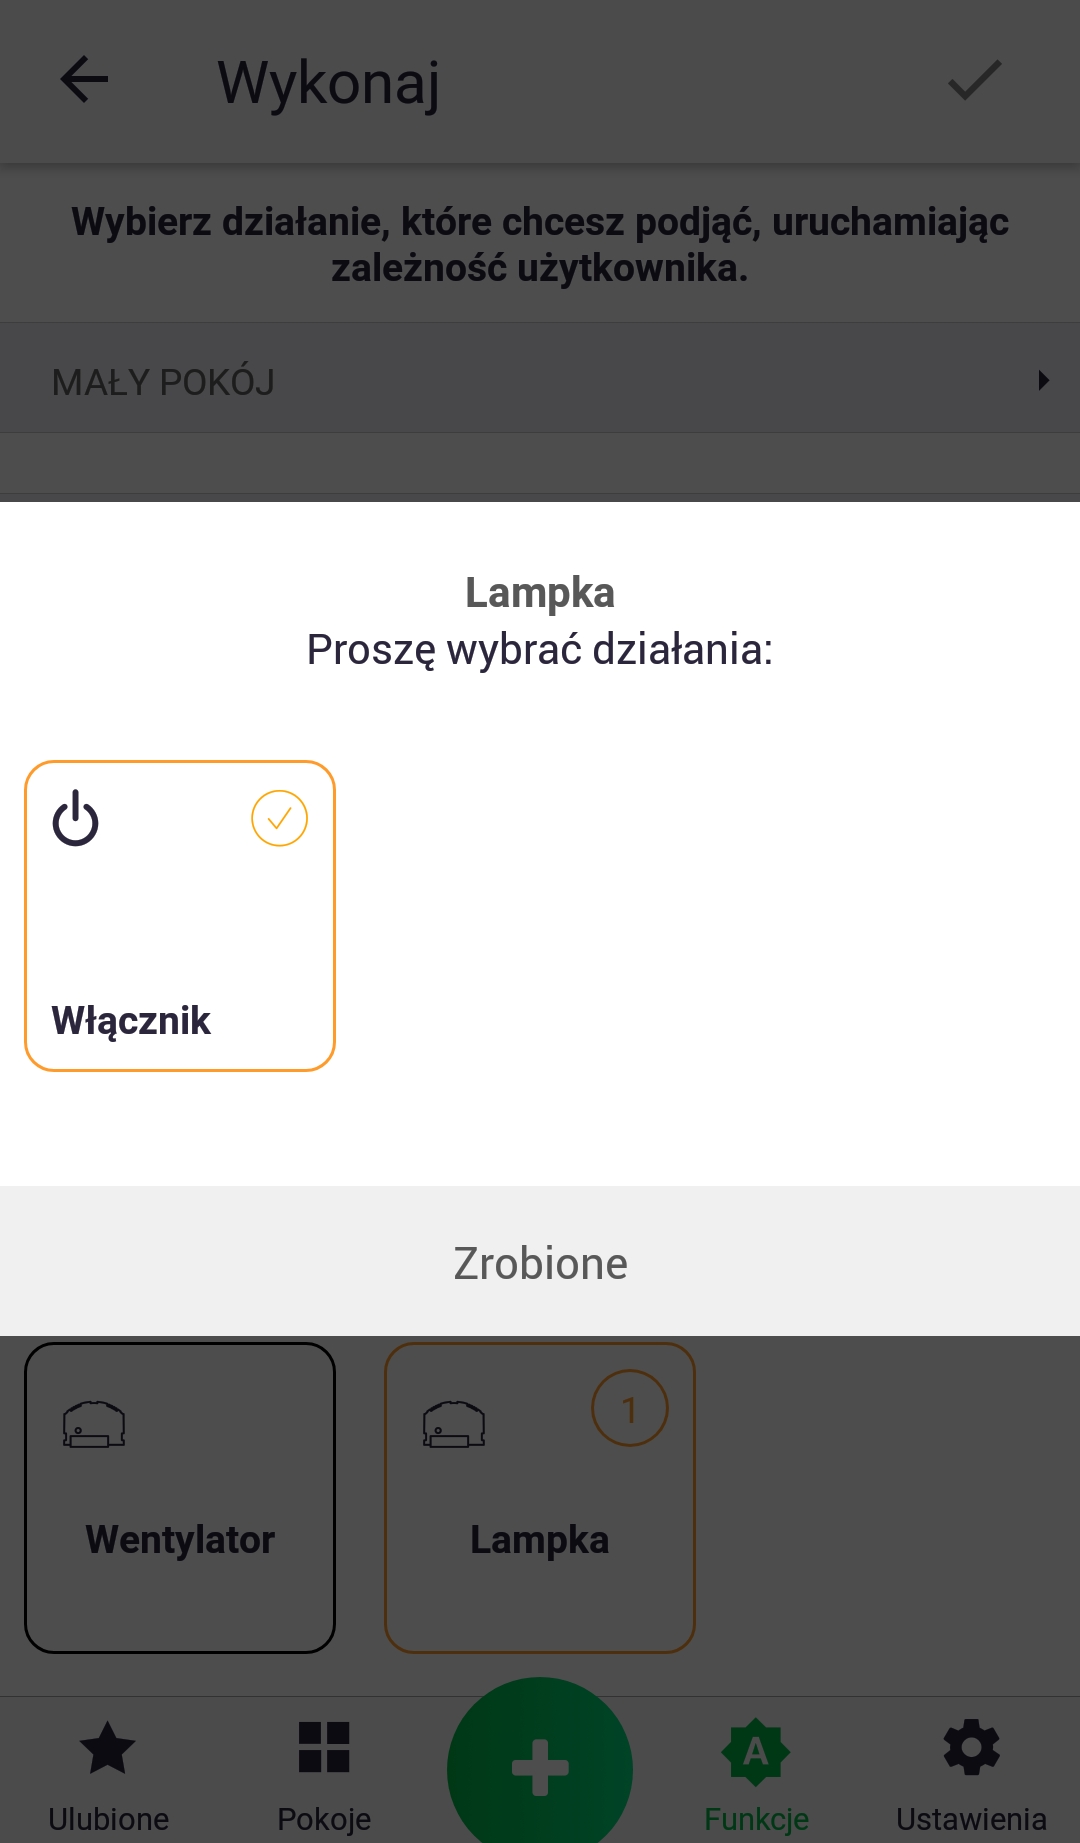
5. After selecting the device, select the parameter to be changed at the selected time.
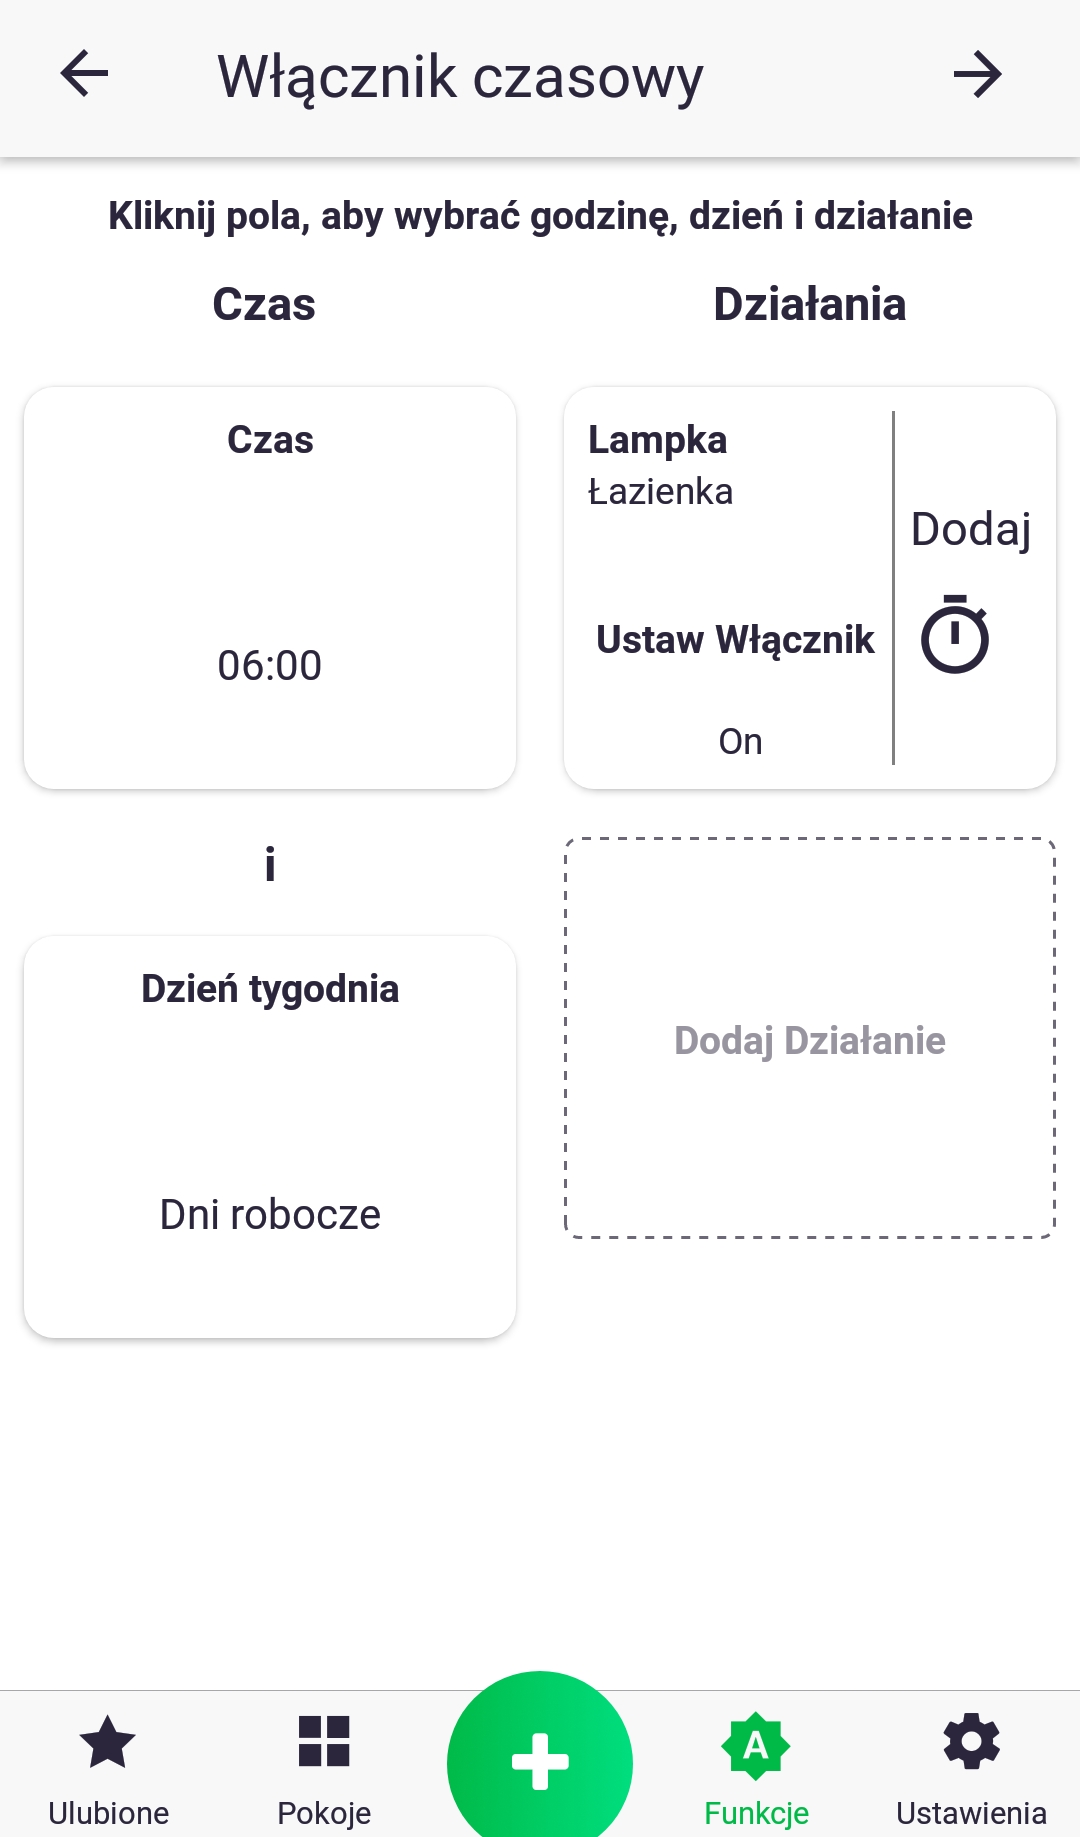
6. In the example shown, the "Lamp" in the "Bathroom" room will be turned on at 6:00 a.m. on all weekdays (Mon.-Fri.). We can add another action on another device or an additional delay of the action from the set time (6:00 a.m.) by clicking the "Add" button with the stopwatch icon.
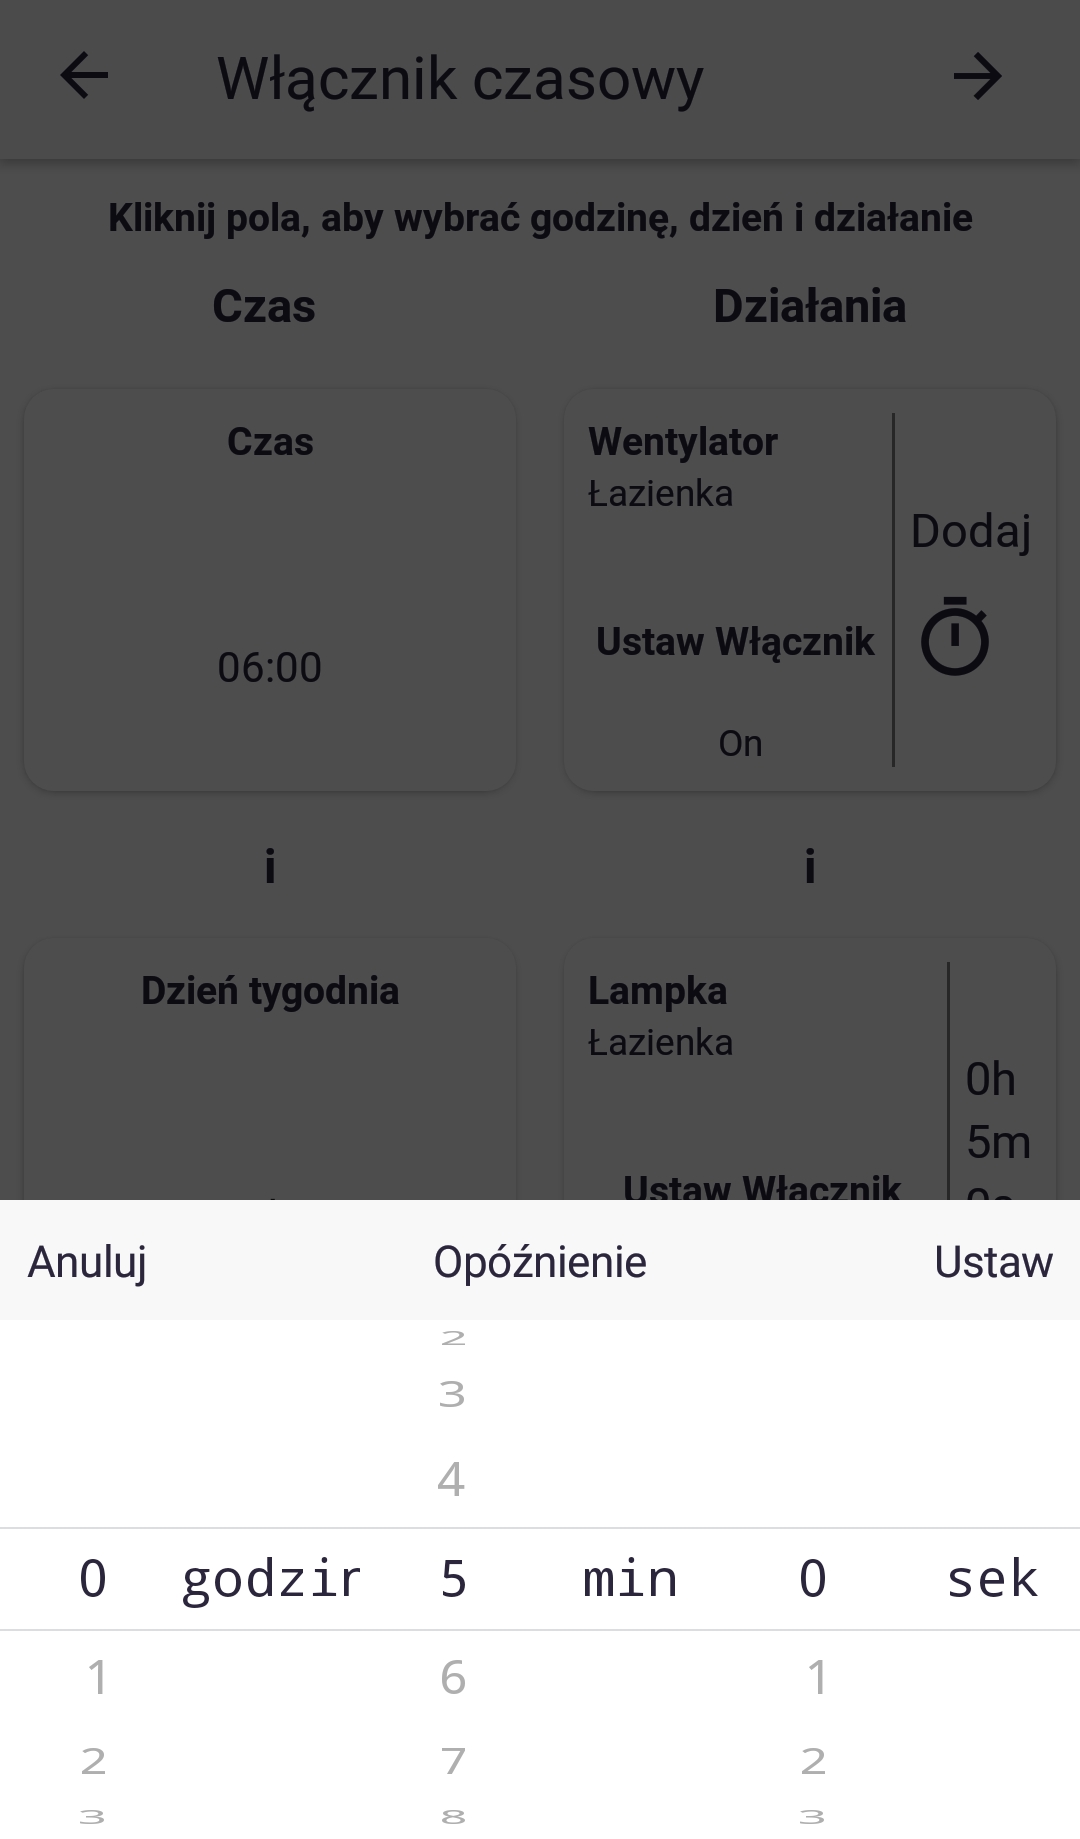
7. Setting the delay.
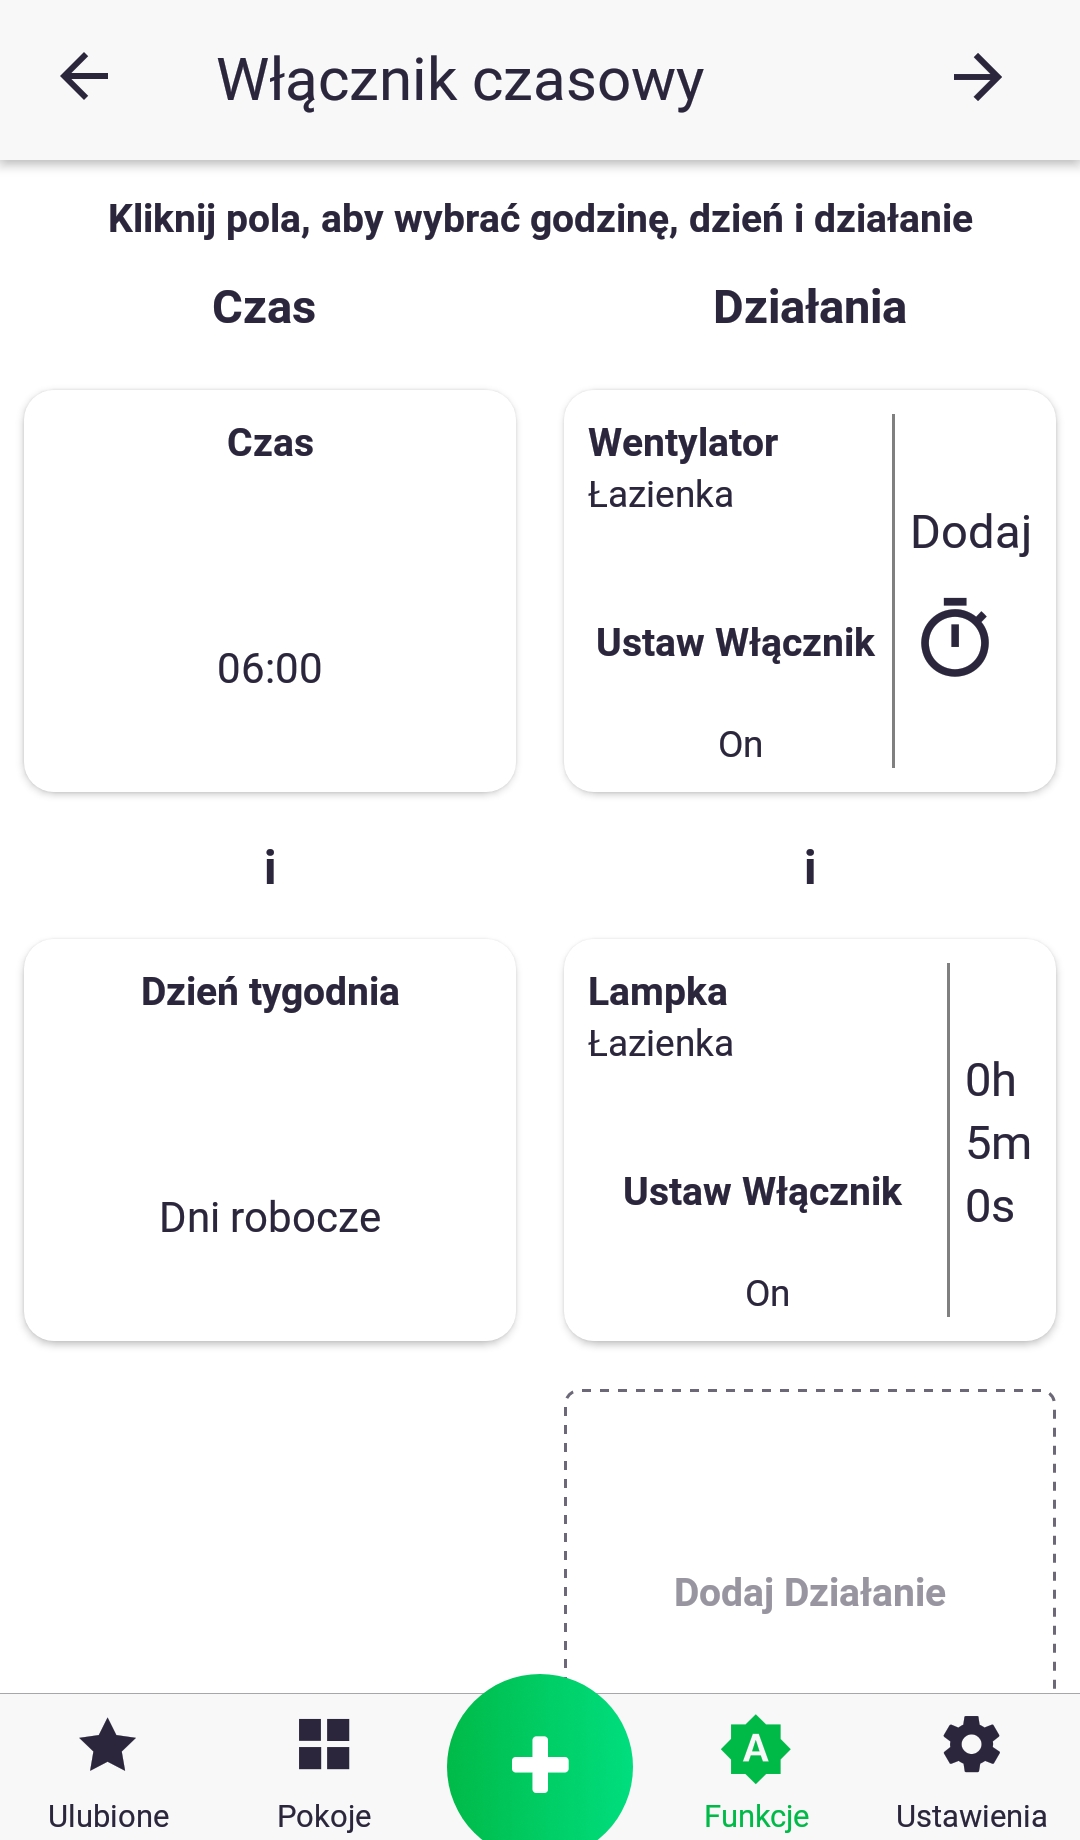
8. In the example shown, the "Lamp" in the "Bathroom" room will be turned on at 6:05 a.m. on all weekdays (Monday-Friday), and the "Fan" will also be turned on at 6:00 a.m. The value of the parameter used in the action can be changed by briefly pressing the icon of any of the added actions. So, if we want the "Fan" to be turned off, for example, we should press its icon; the text will change to "Set Switch Off." Once we've determined that we've set what we wanted, click the arrow at the top to proceed.
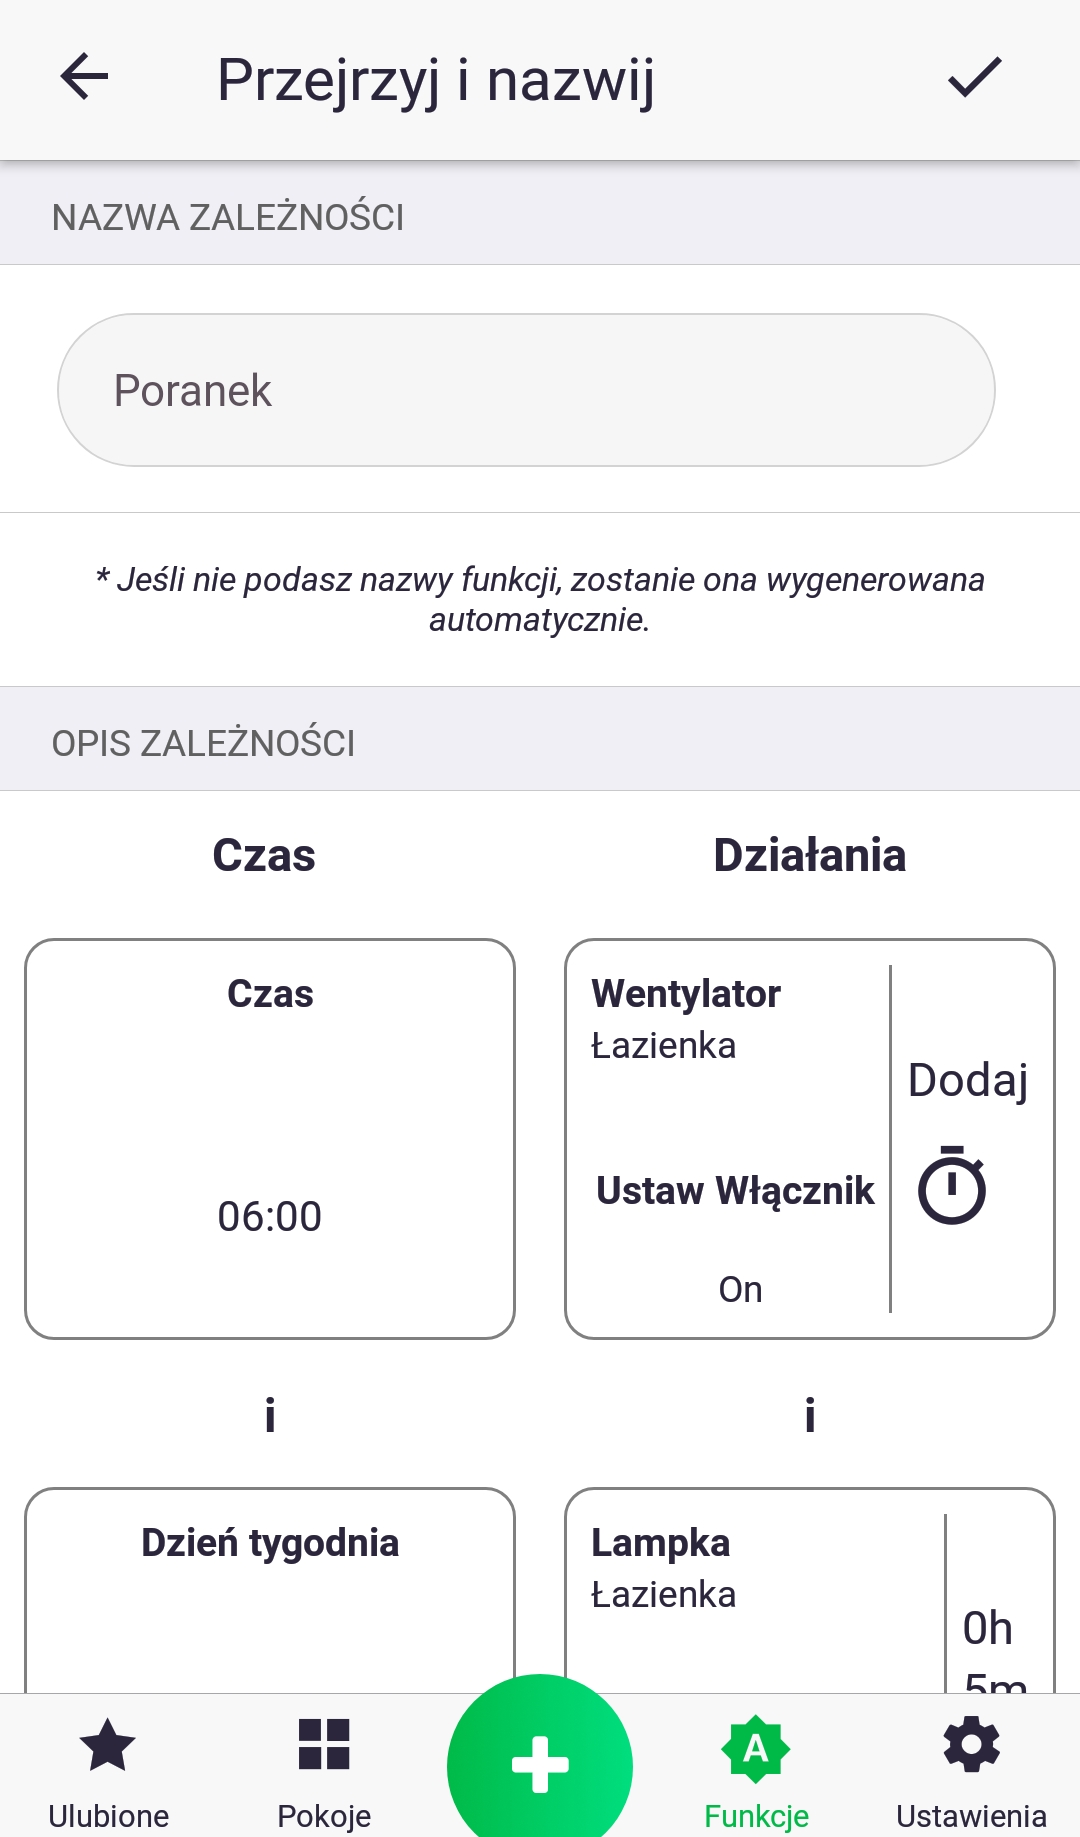
9. Finally, we check that everything is correct and name our function appropriately. We accept the changes using the button at the top of the screen. We've just created our function!
Function – Schedule
The "Schedule" function is used to set changes to a device parameter on a weekly basis, e.g. the target temperature in the thermostat.
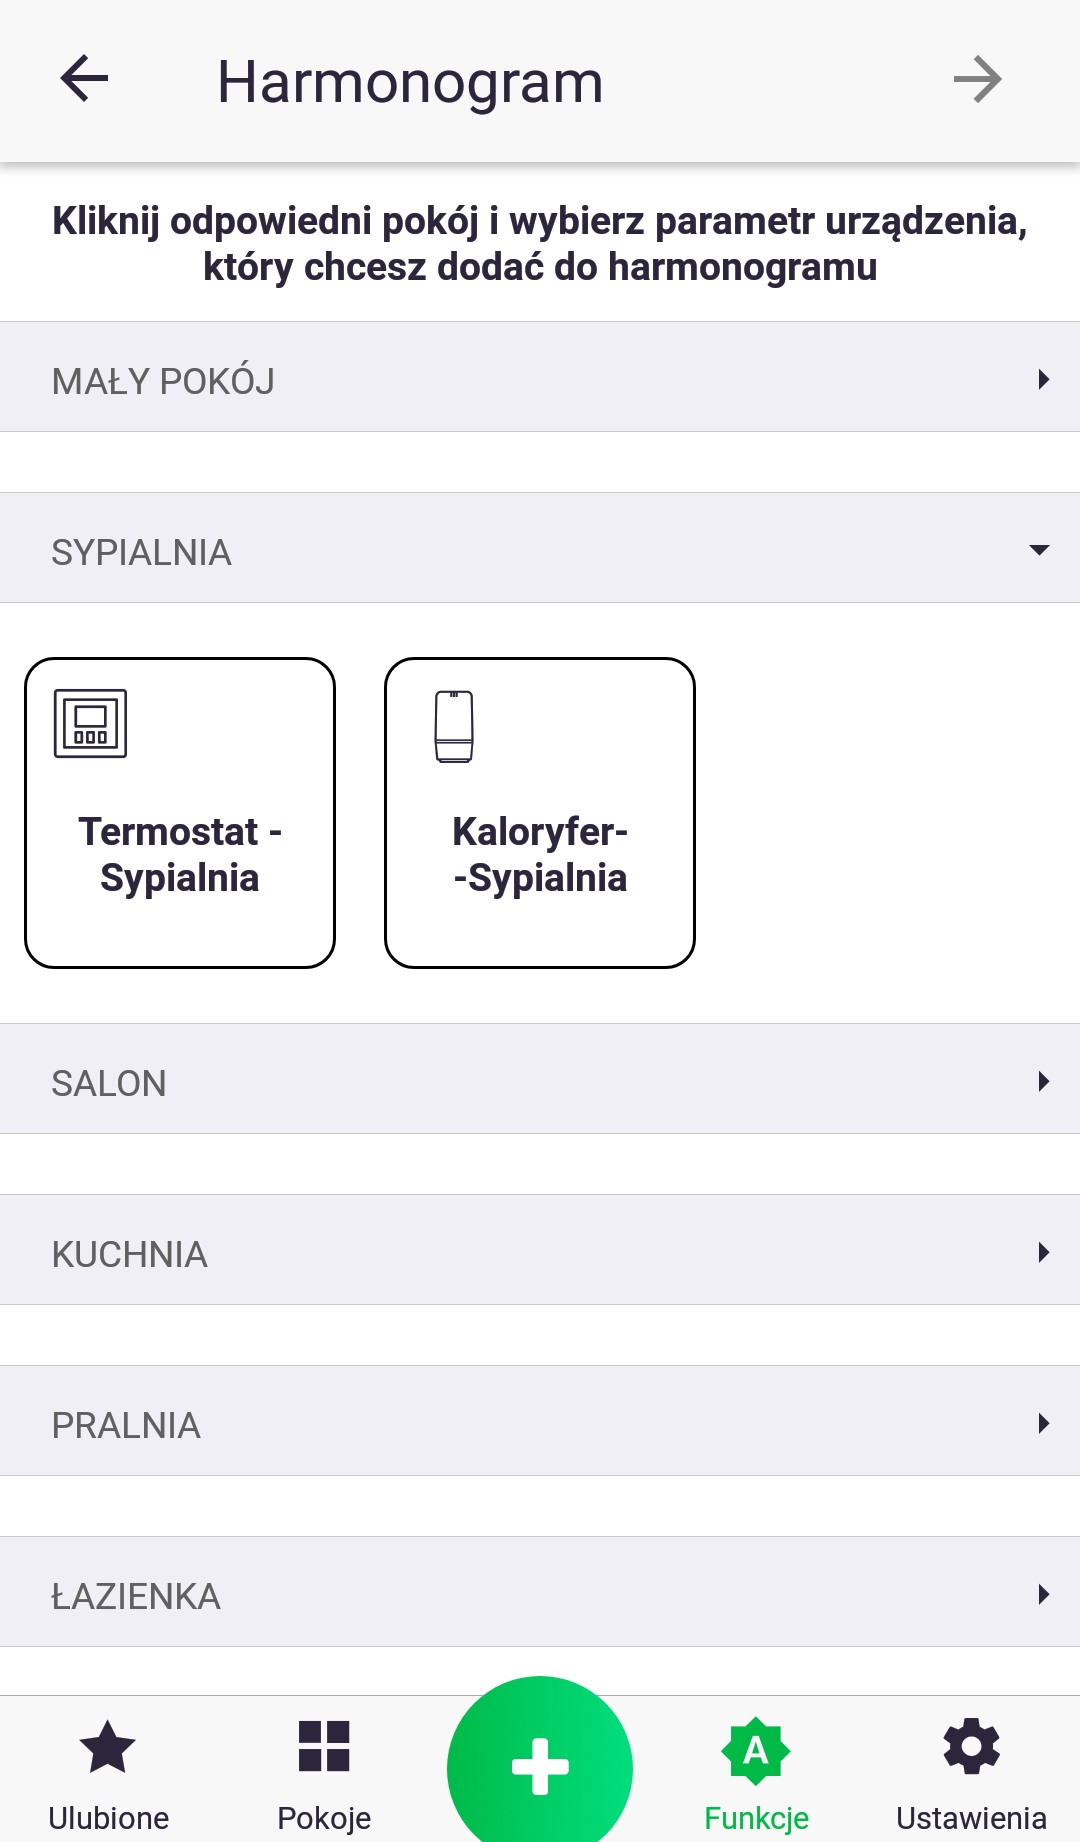
- First, we select the type of parameter that the schedule will apply to by briefly pressing the device we are interested in.
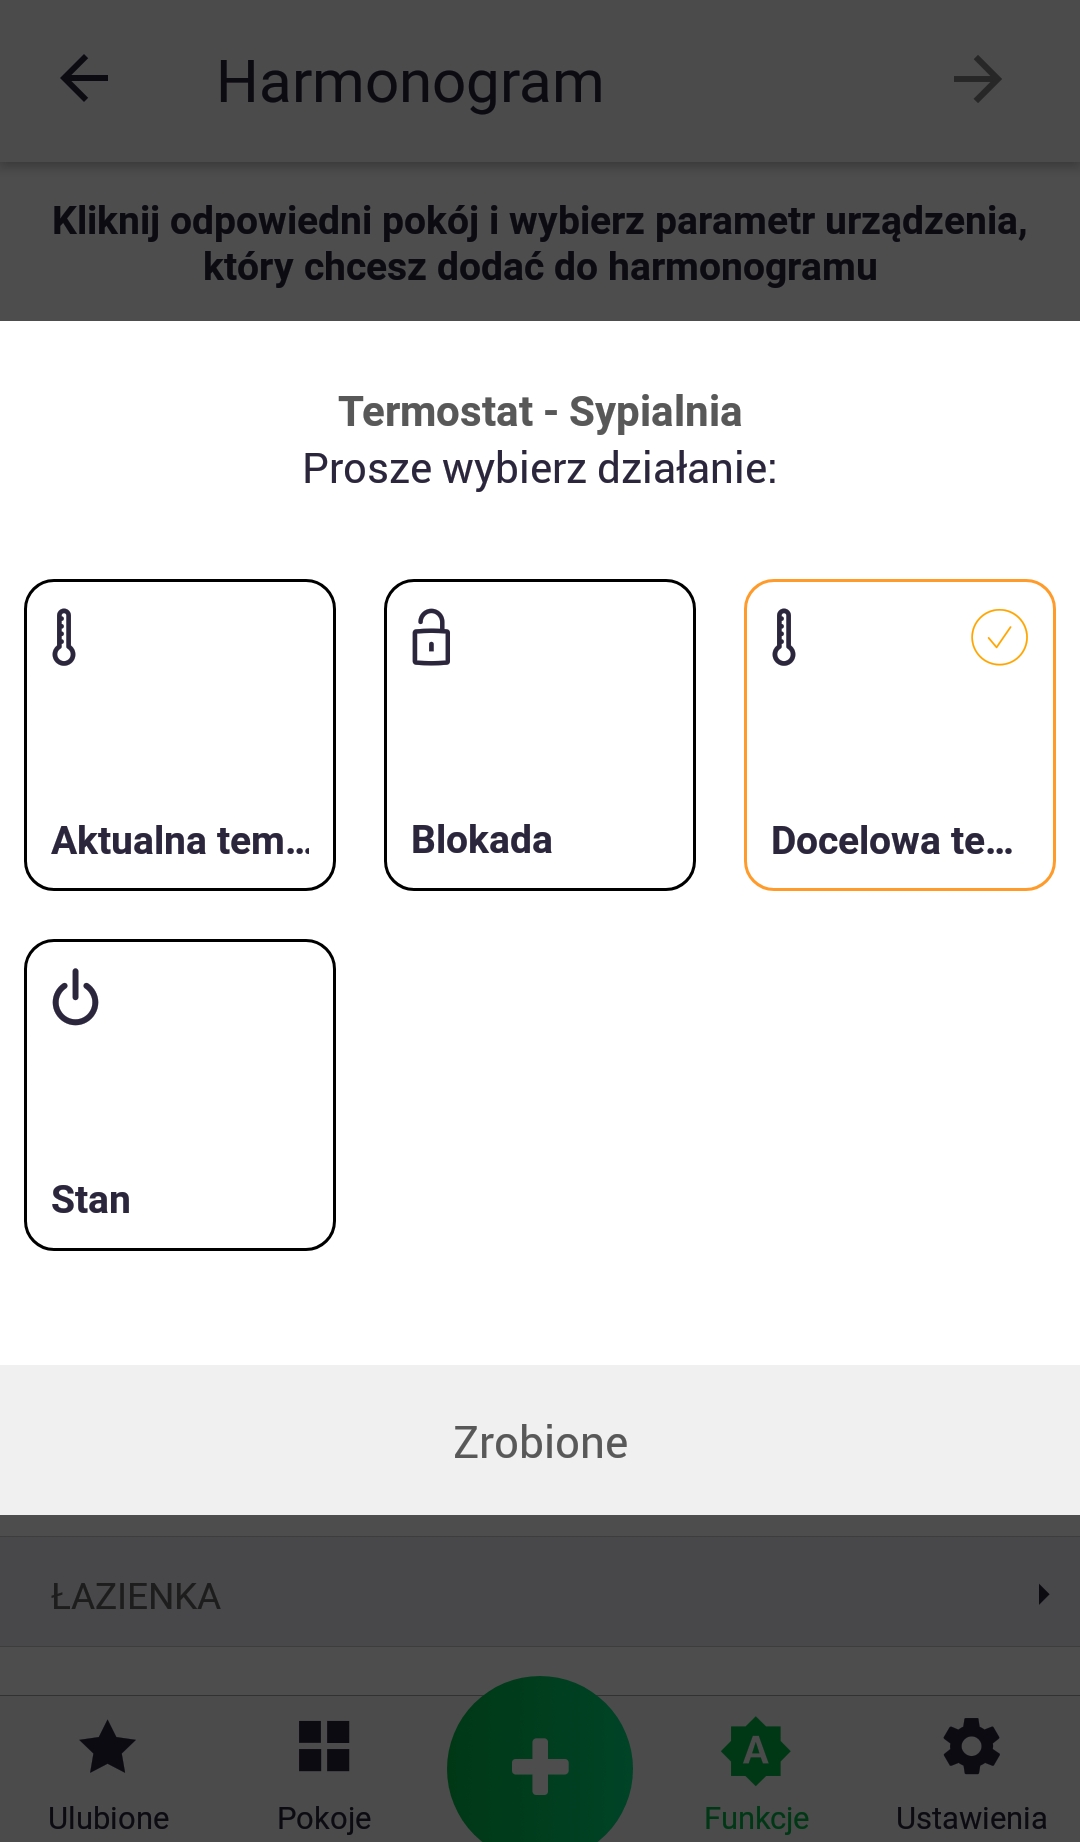
2. Select the appropriate parameter and click the "Done" button. On the next screen, proceed using the arrow button.
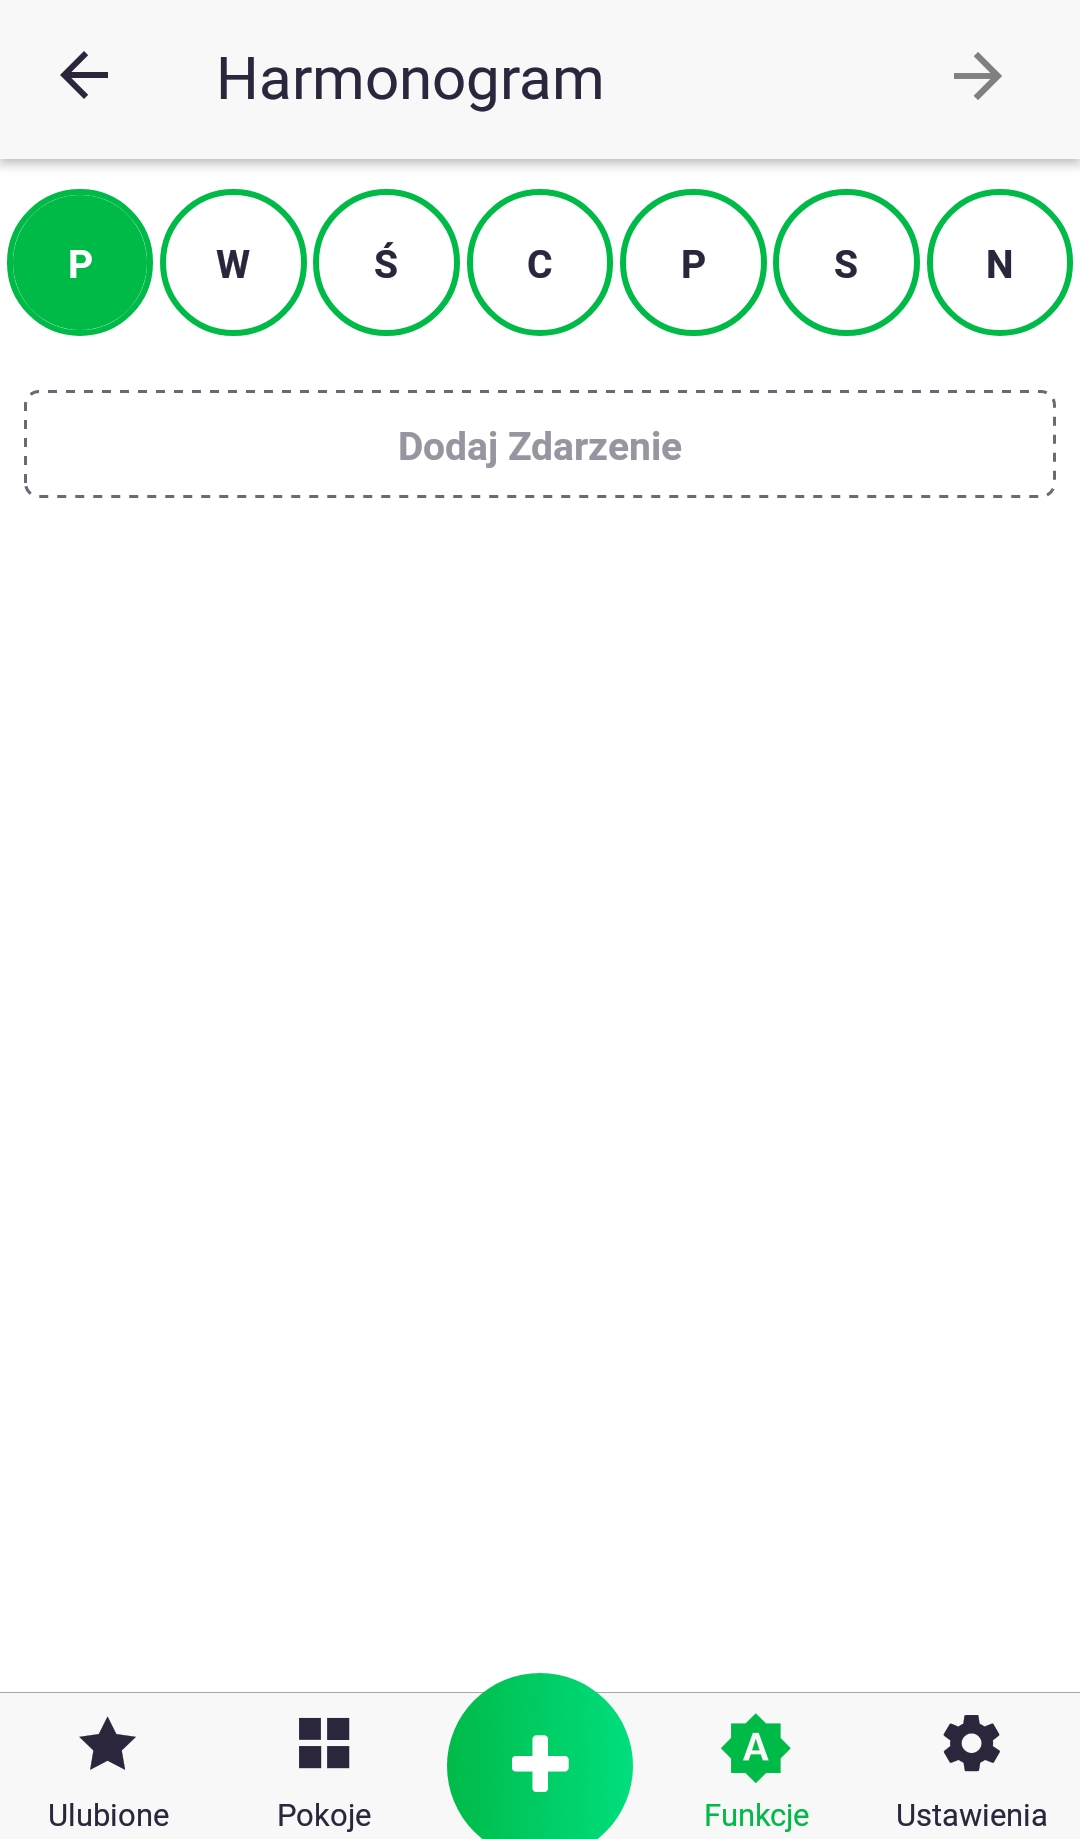
3. First, select the day of the week by clicking on the appropriate letter and add an event.
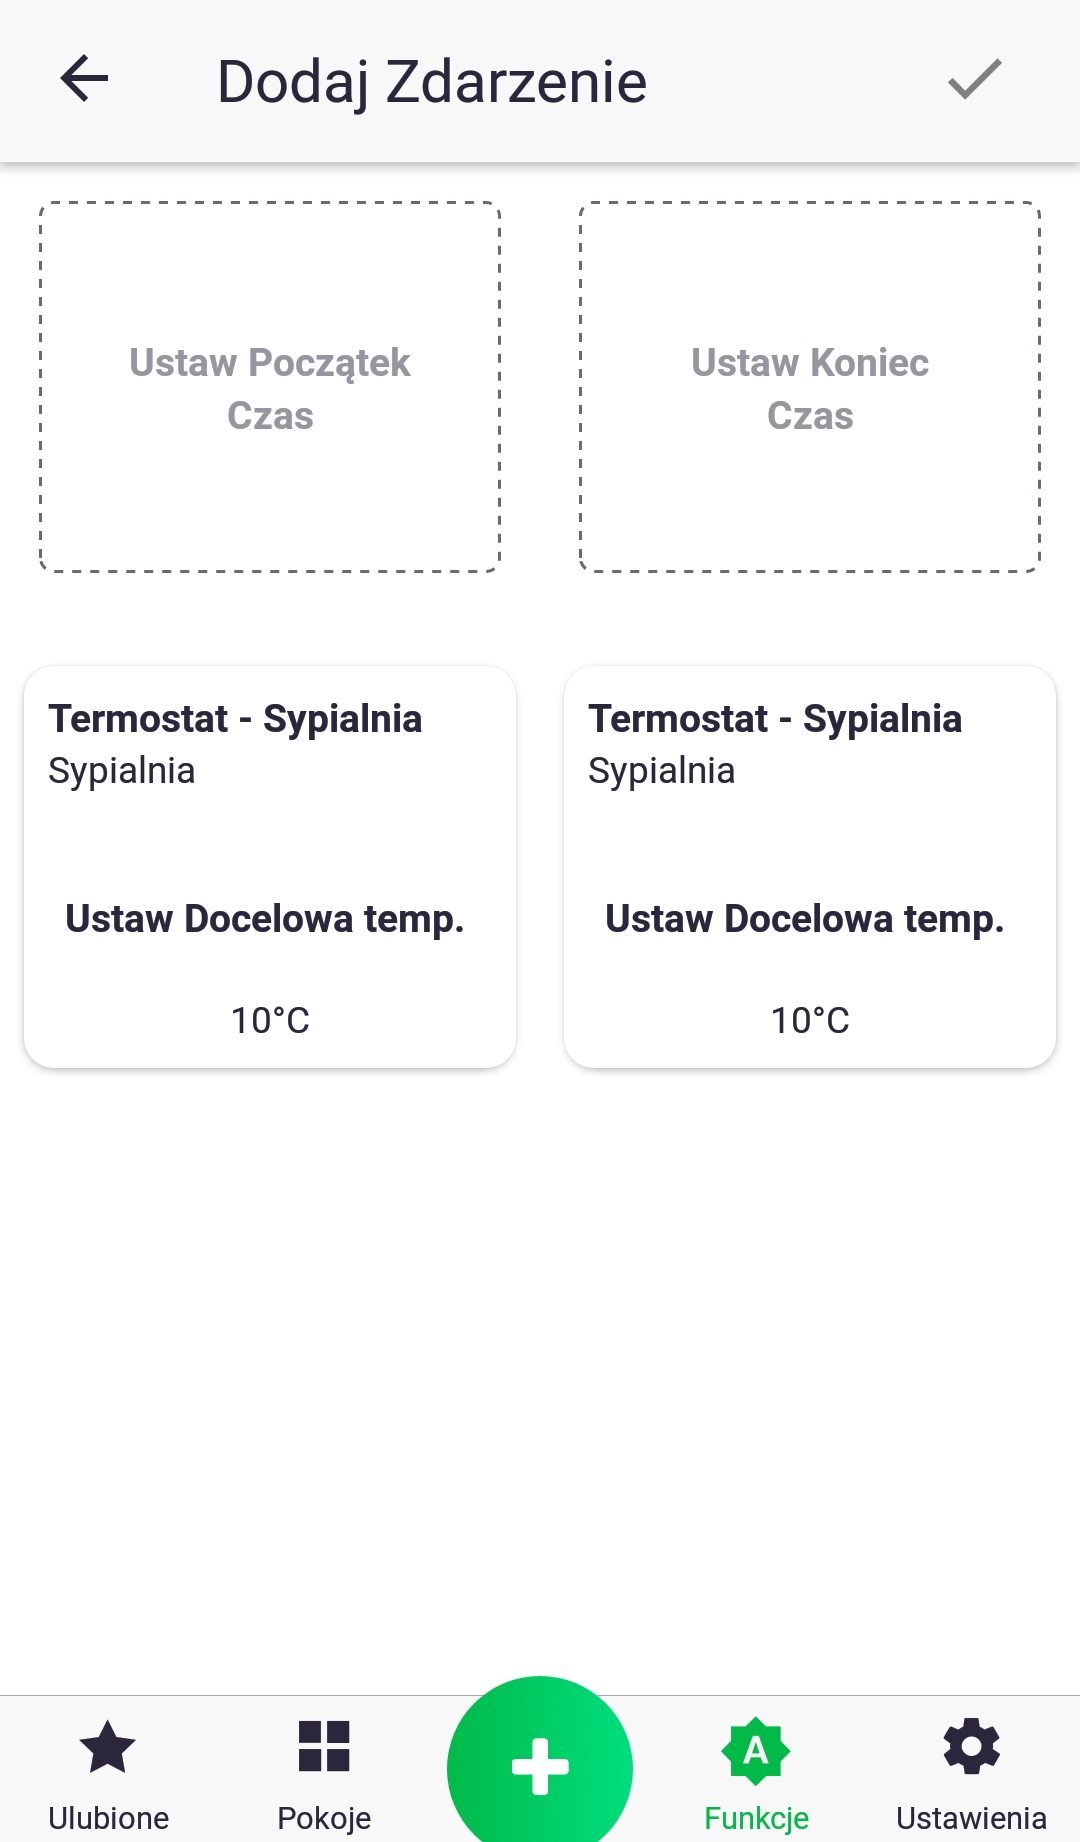
4. When adding an event, you need to set when it starts and ends, as well as how the associated parameter changes. To set the time, click the "Set Start Time" and "Set End Time" icons. Changes to a parameter are made by briefly pressing the associated icon.
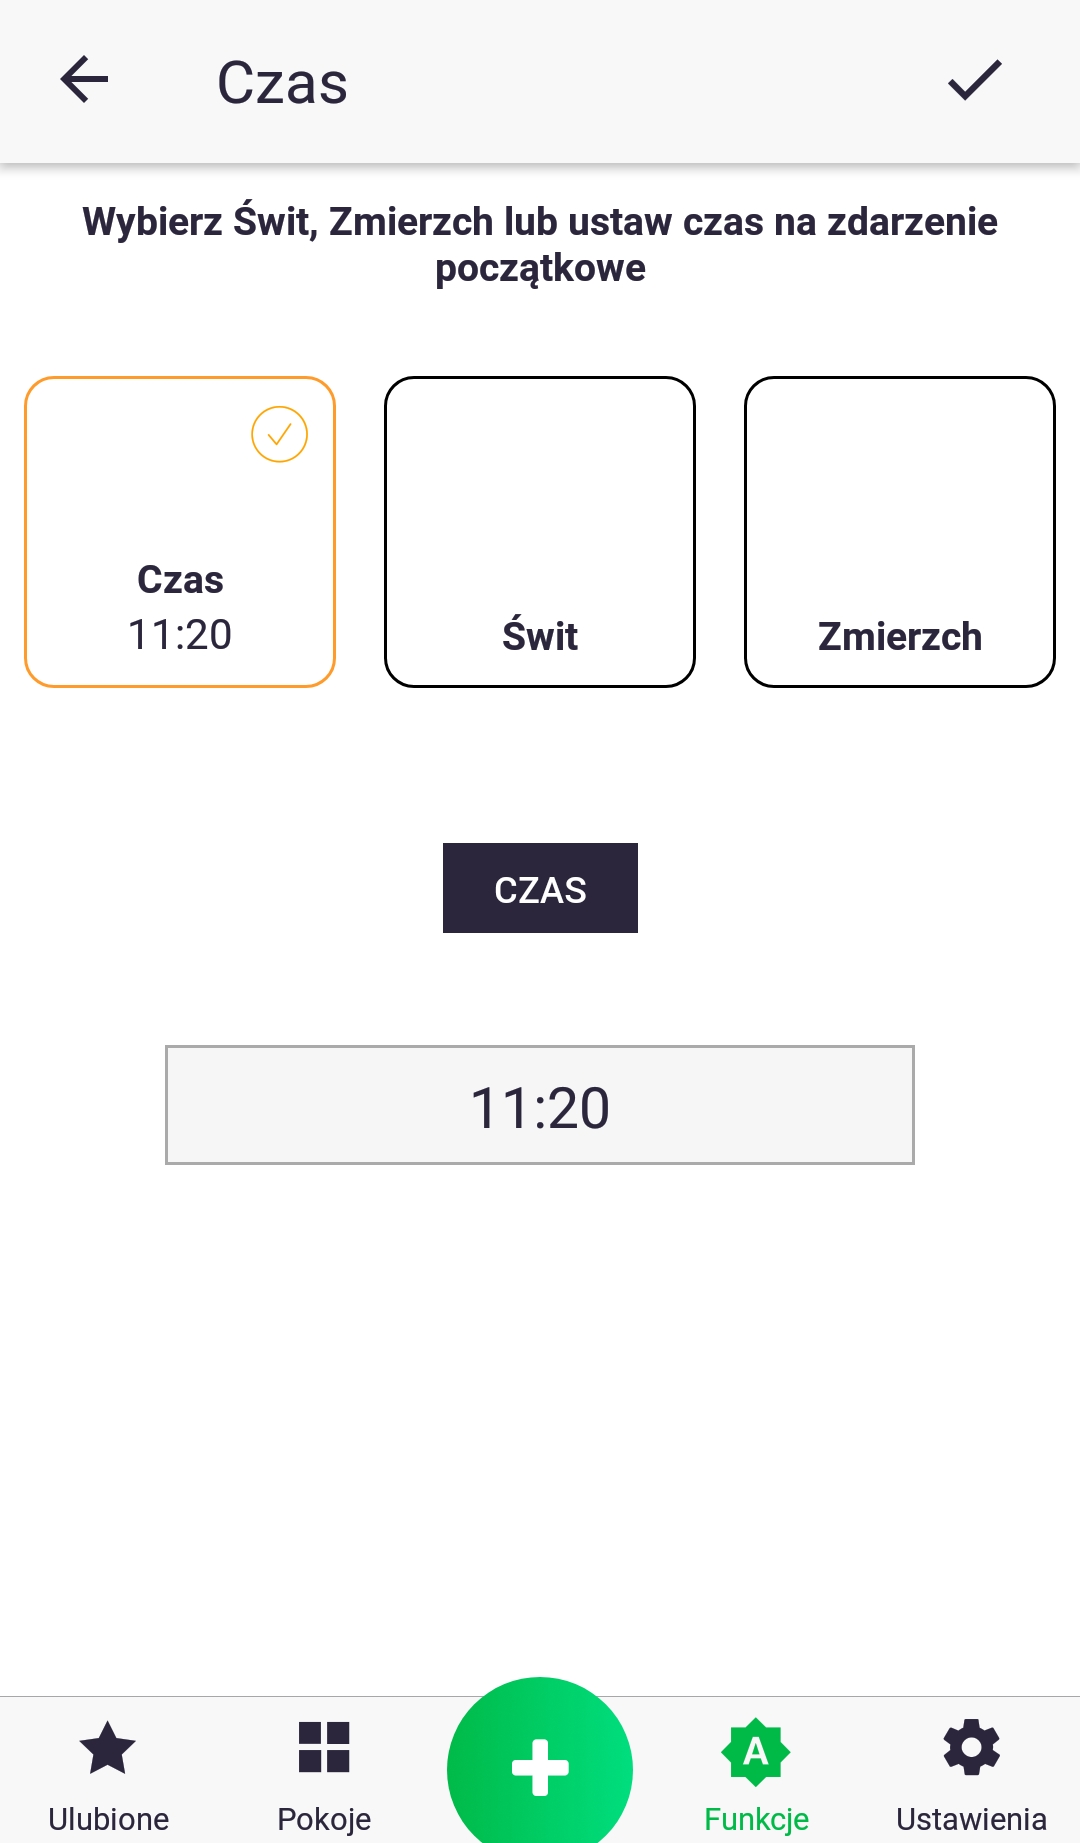
5. When setting the time, we can choose between a specific hour (which we set by clicking on the field below the "Time" text) and linking our function to sunrise or sunset.

6. Set the value of the selected parameter. For example, in the case of the target temperature, changes are made by moving the slider or pressing the plus and minus buttons.
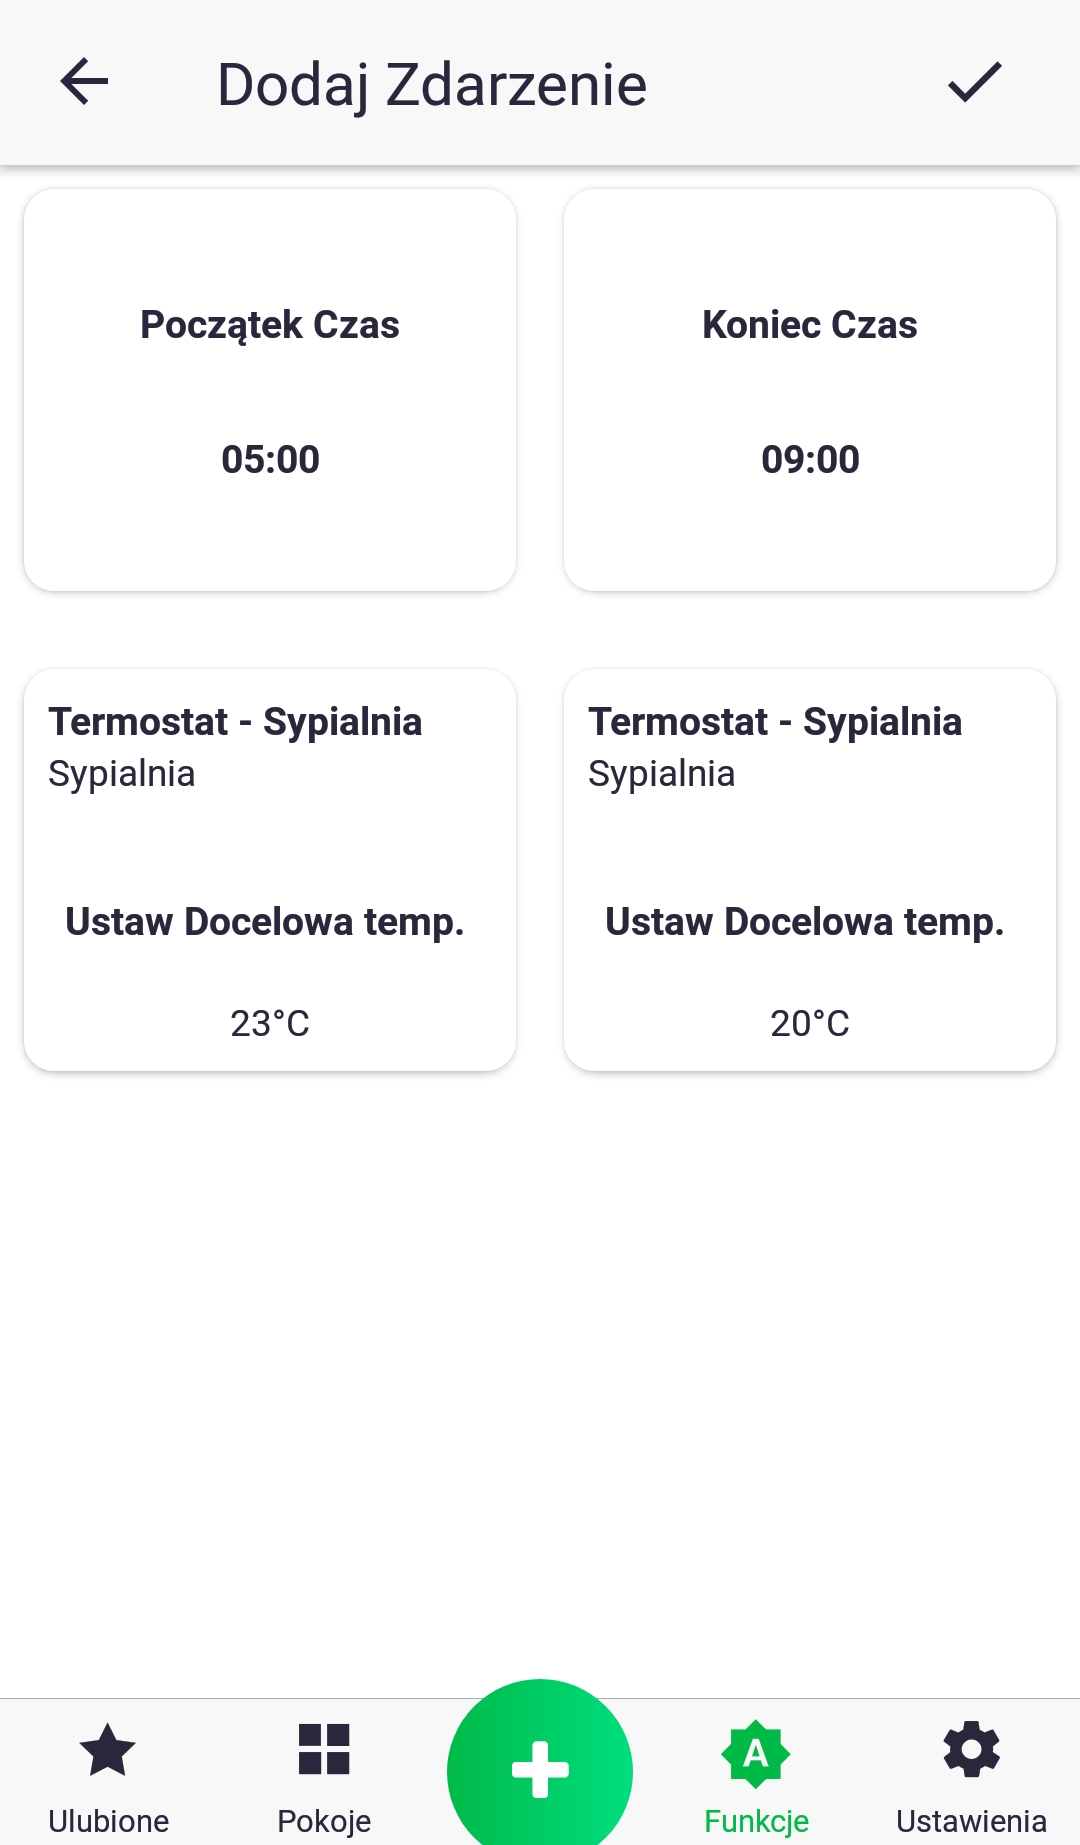
7. An example screen of a set event, which states that at 5:00 a.m. the target temperature on the thermostat will be set to 23 C, and at 9:00 a.m. it will be changed to 20 C. The event is finally added using the button at the top of the screen.
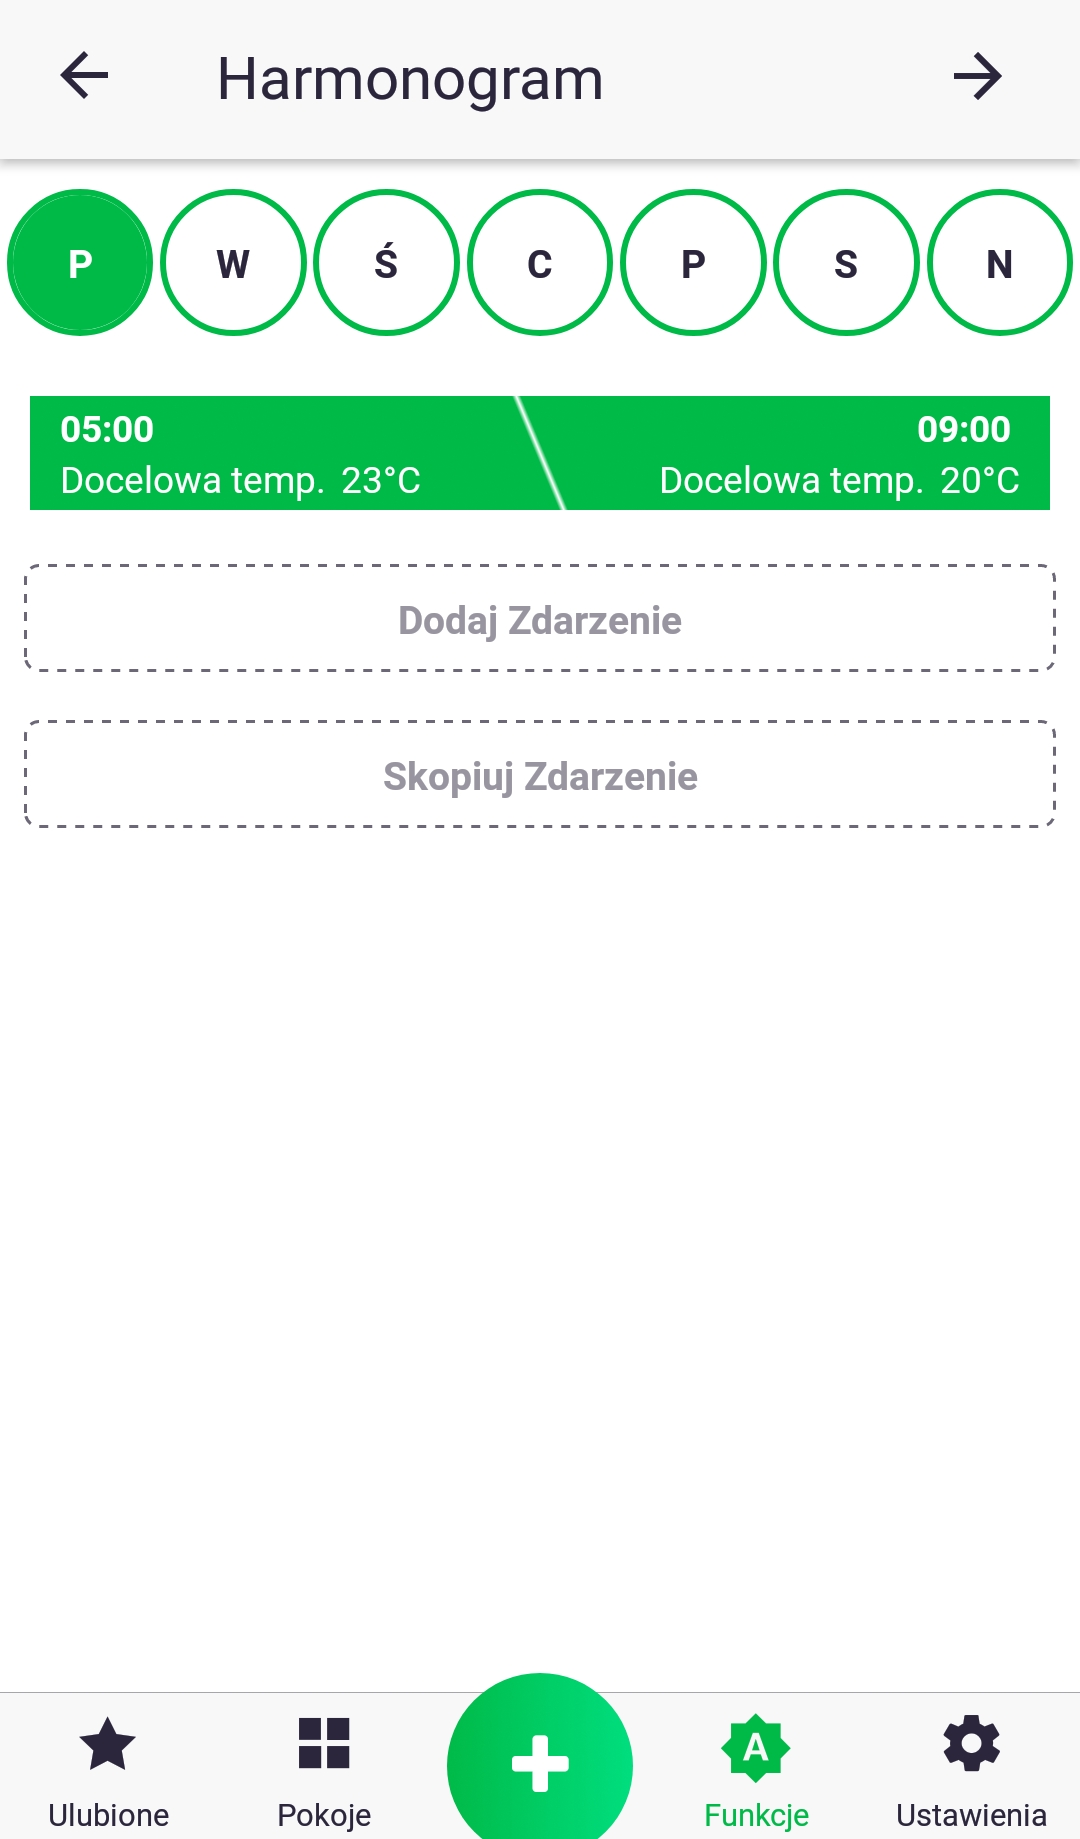
8. The event has been added and we can now add another one or copy the existing one to other days of the week.
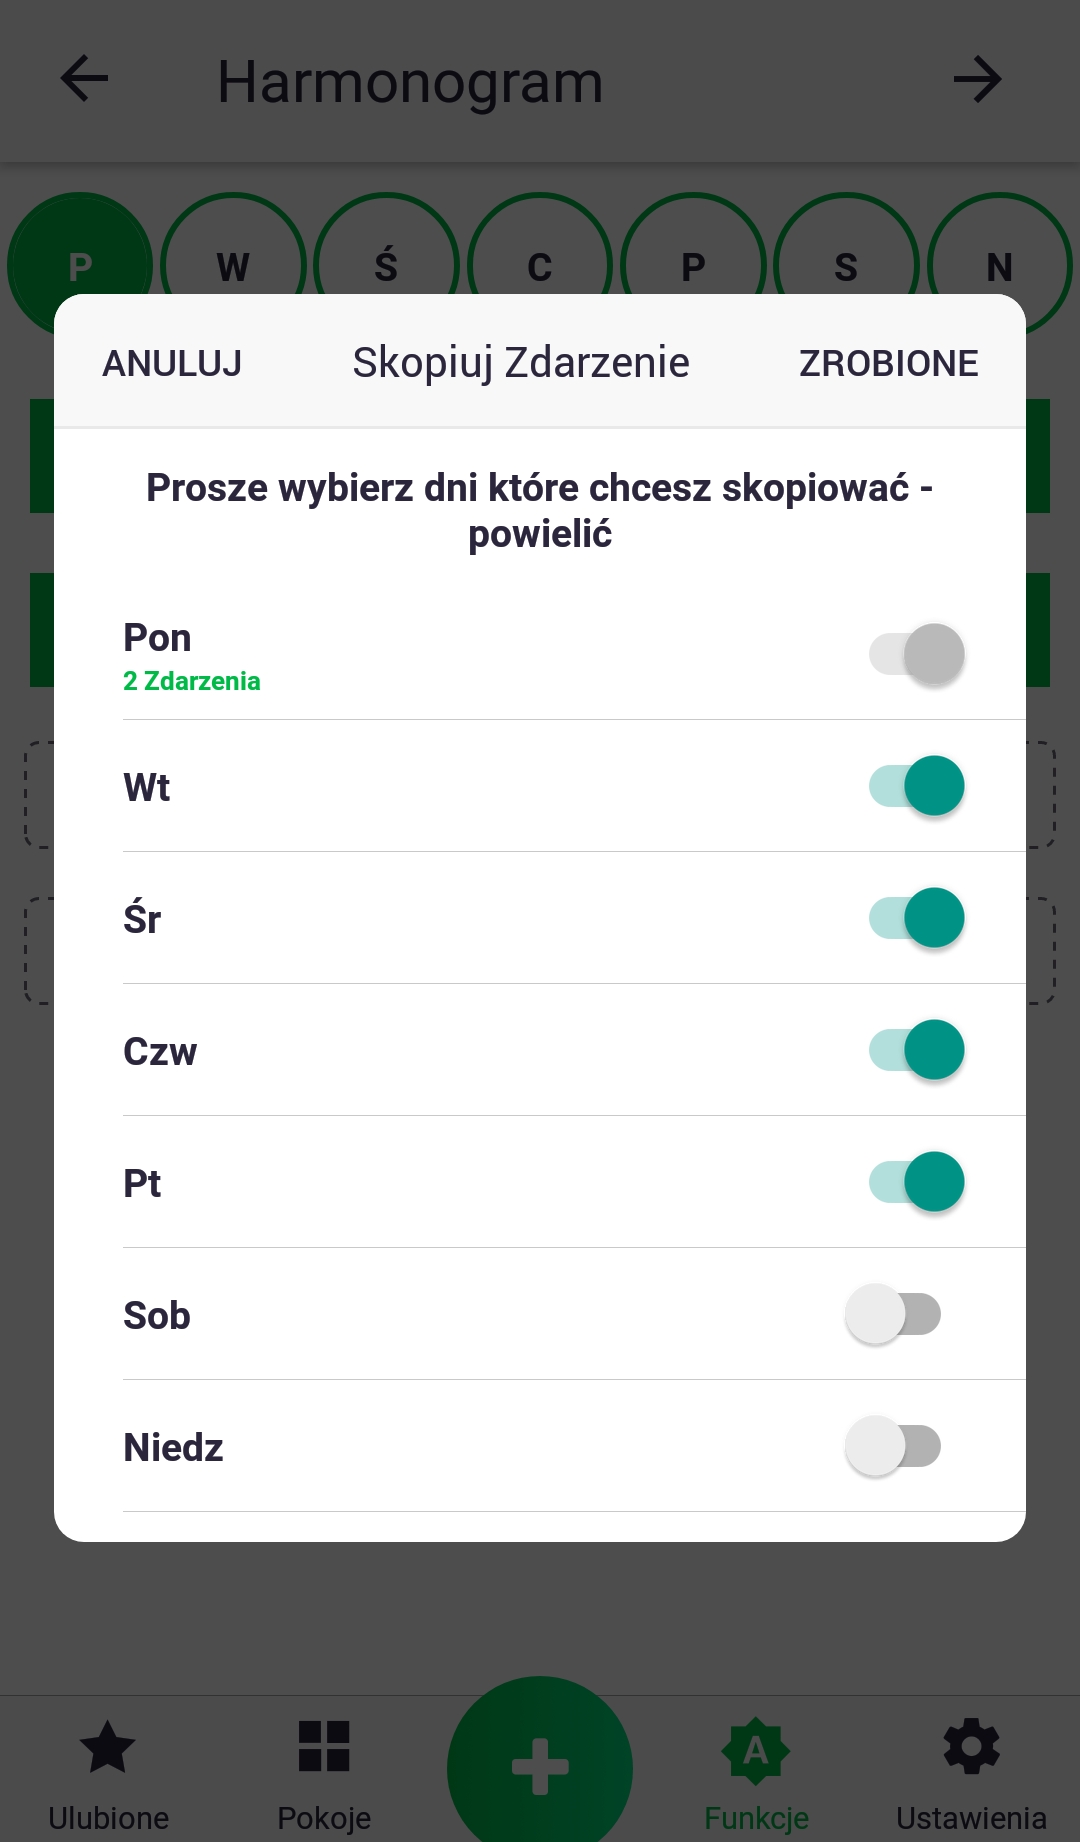
9. In the example shown, a second event was added using the procedure described earlier. In the next step, both events are copied to other days of the week using the "Copy Event" button. In the next window, select the days of interest by adjusting the appropriate sliders.
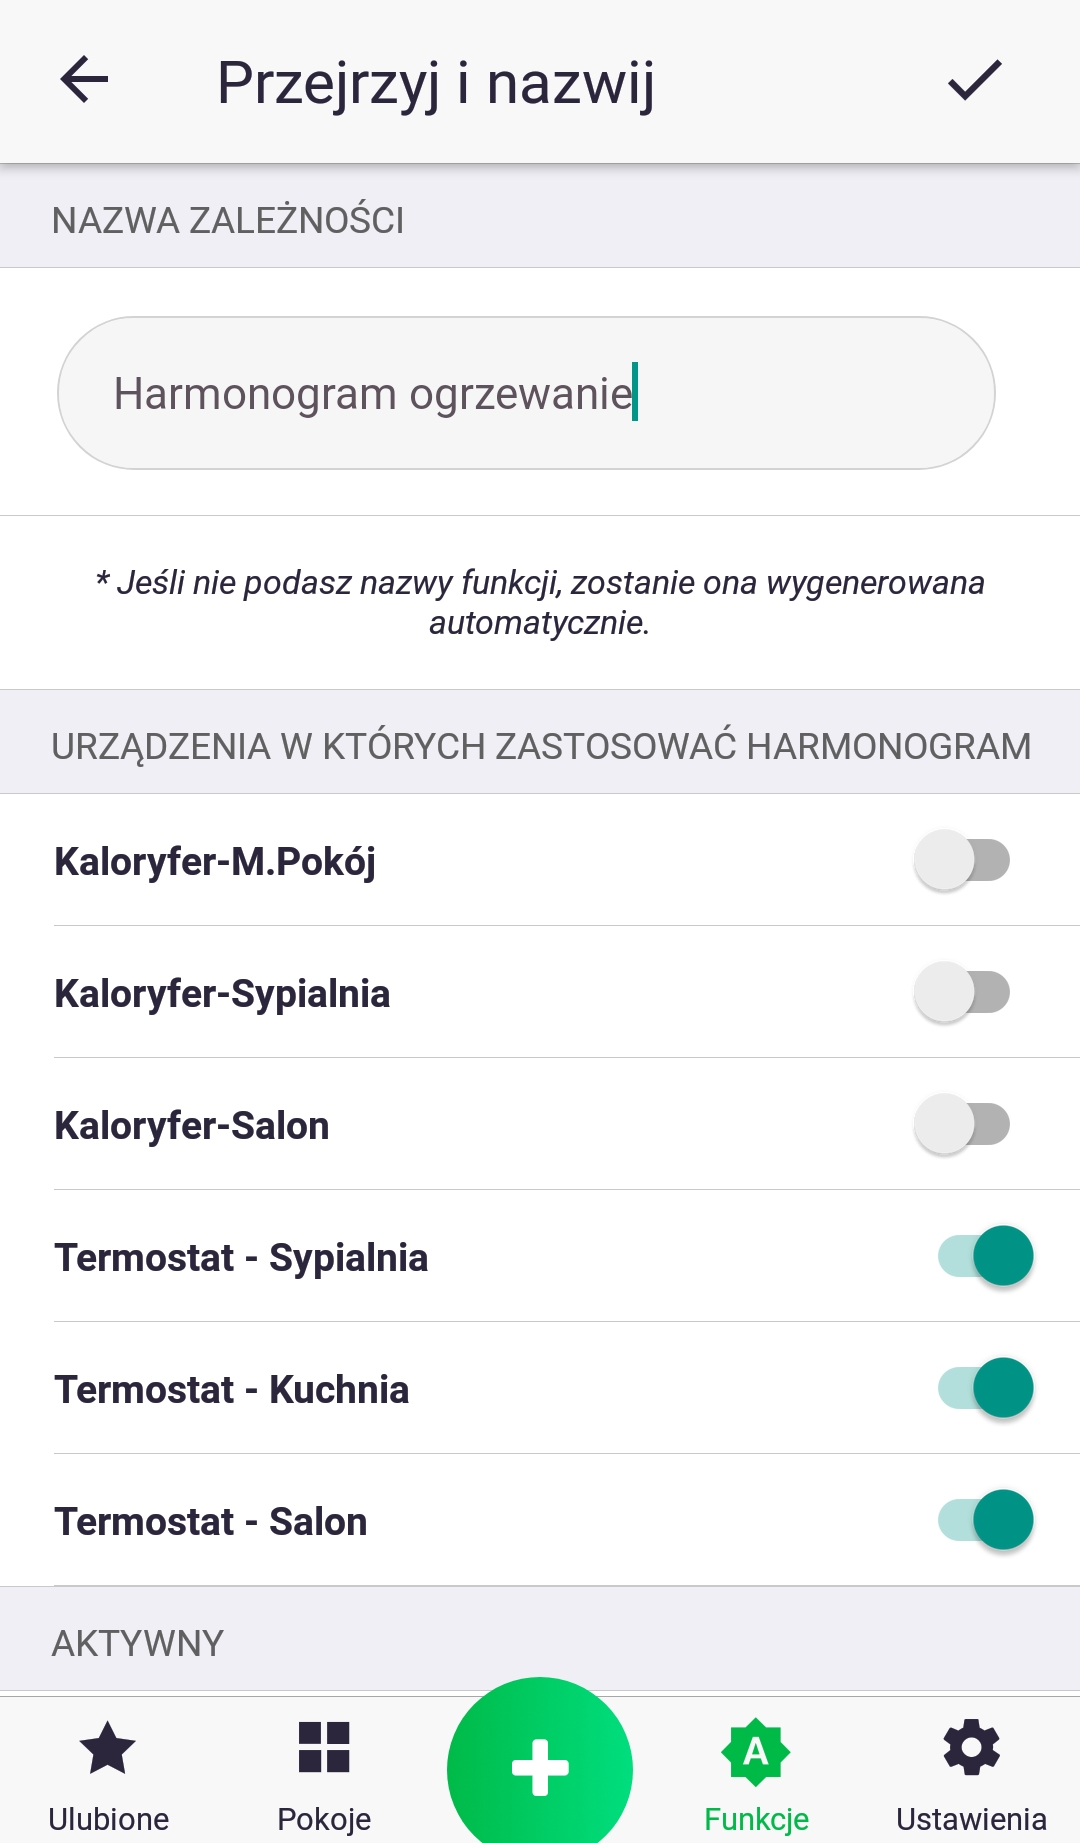
10. In the final step, we name our schedule and optionally select additional devices to apply to. Processing the set schedule may take some time; if an additional window pops up informing us, simply click "Ok" and proceed. We've just created a schedule!
If-Do Function
The "If-Execute" function is used to link any devices. For example, if I turn on the living room light, set the target temperature on the thermostat to 23°C, or if the flood sensor detects flooding, close the water valve. You can also choose how the devices in the "if" section should be linked, either through "and" or "or." If the "and" conjunction is used, then all set conditions must be true, for example, if I turn on the living room and kitchen lights, then turn on the hallway light as well. With the "and" conjunction, you can also add a time limit to the function's operation, for example, the function can only operate after dusk from Monday to Friday. With the "or" conjunction, you can't set a time limit, but you can, for example, link multiple flood sensors.
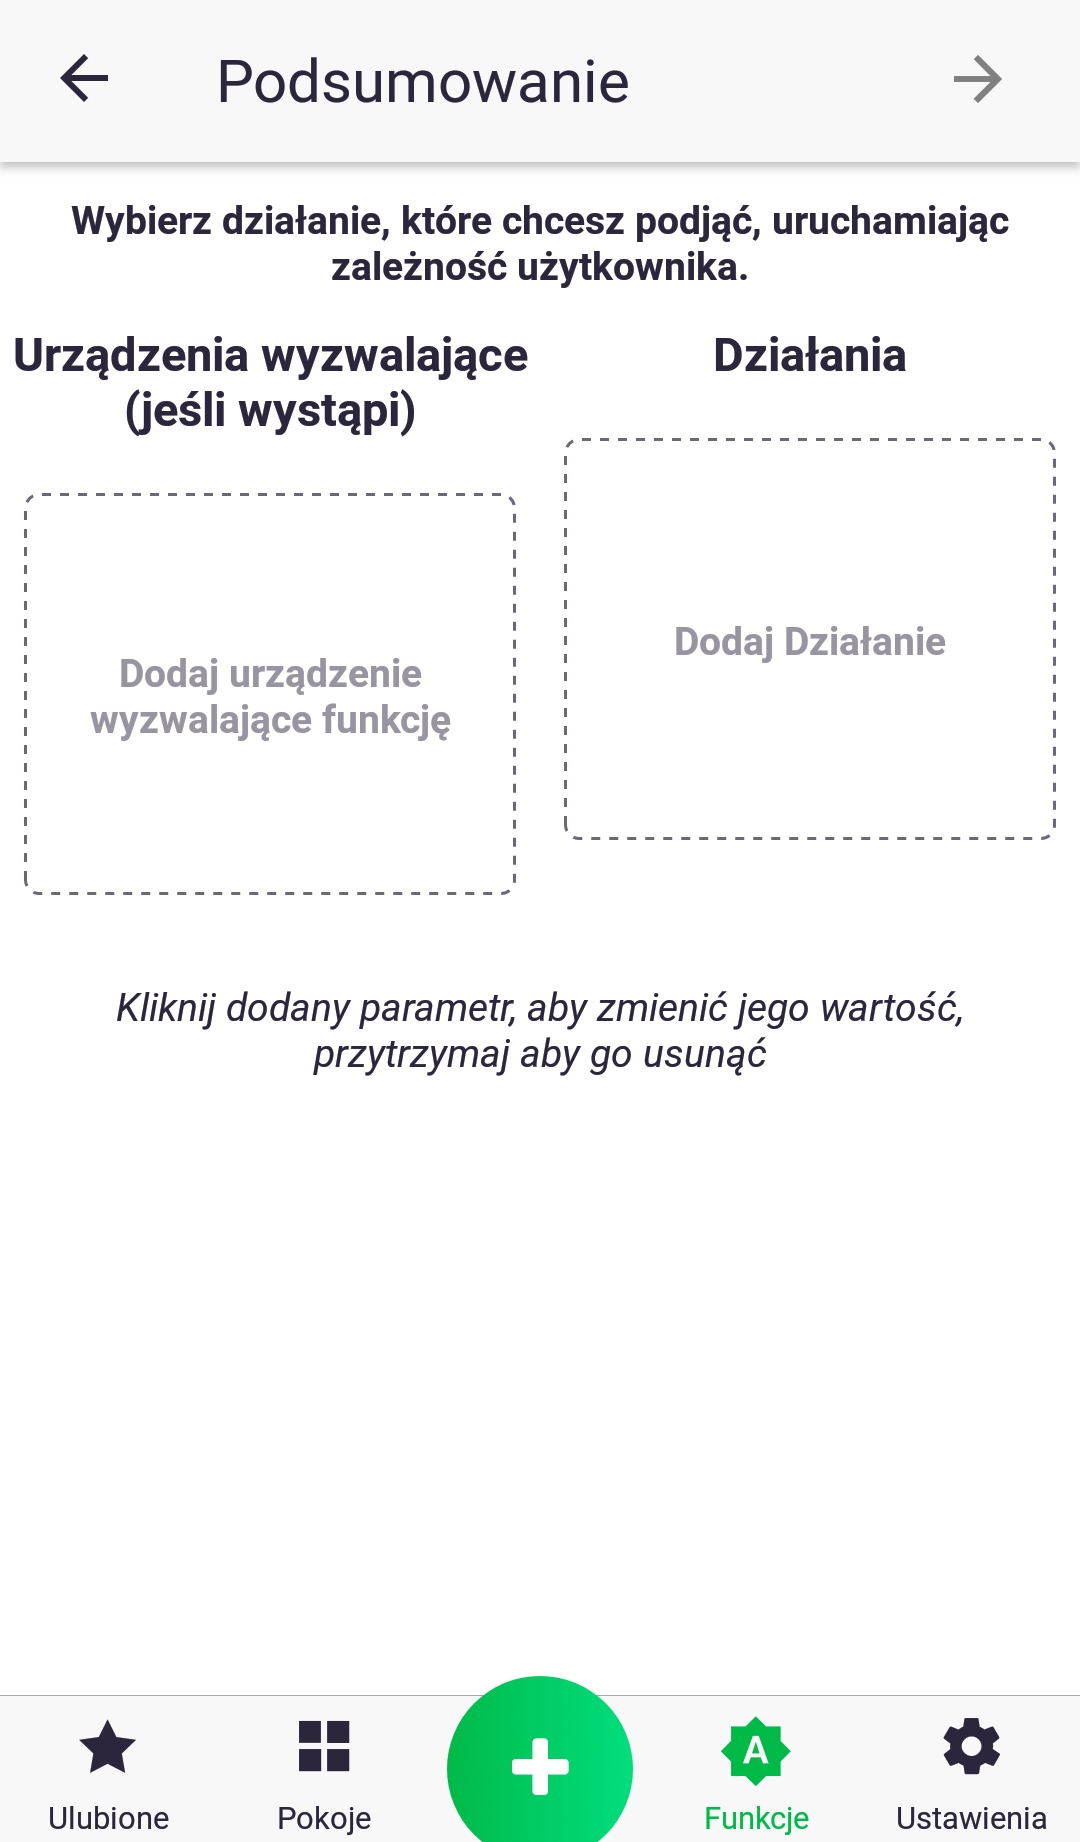
- First, click on the icon called "Add a device to trigger a function" and select the device that will initiate the selected action.
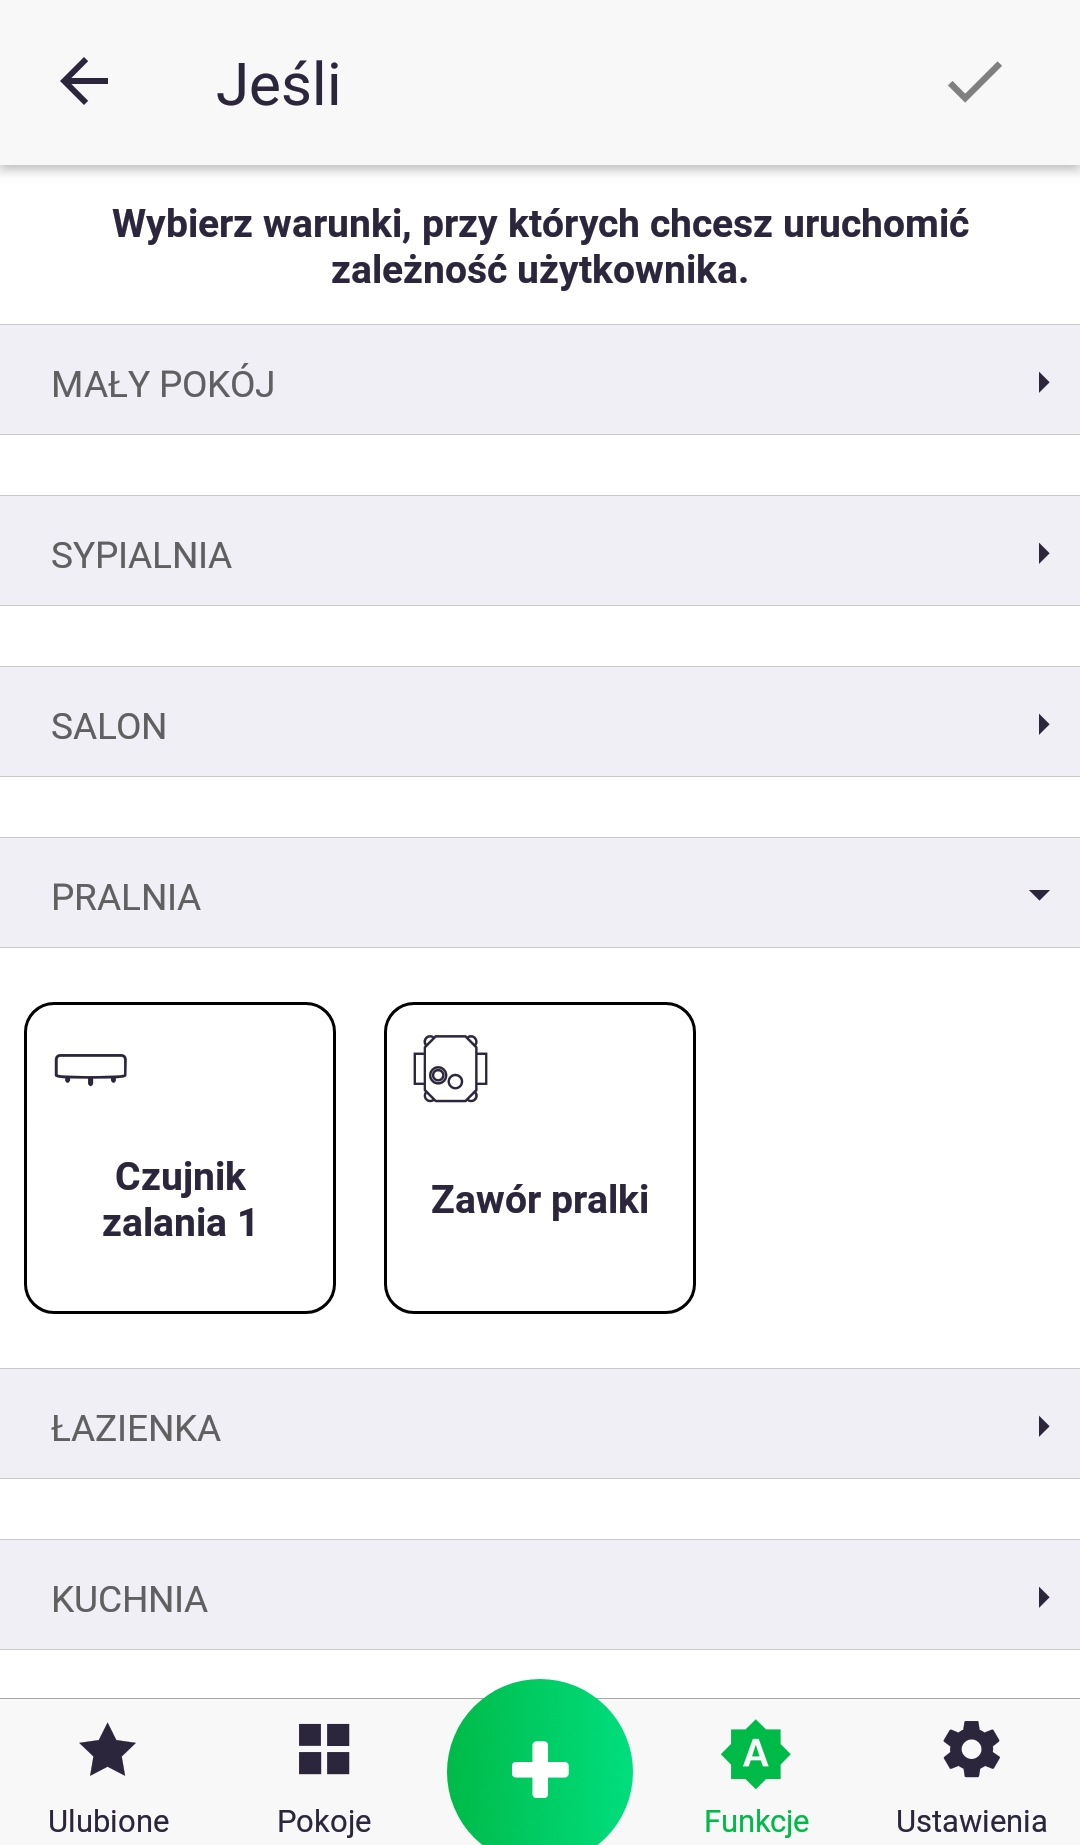
2. We select the device we are interested in by expanding the list of devices in a given room and briefly pressing the selected icon.
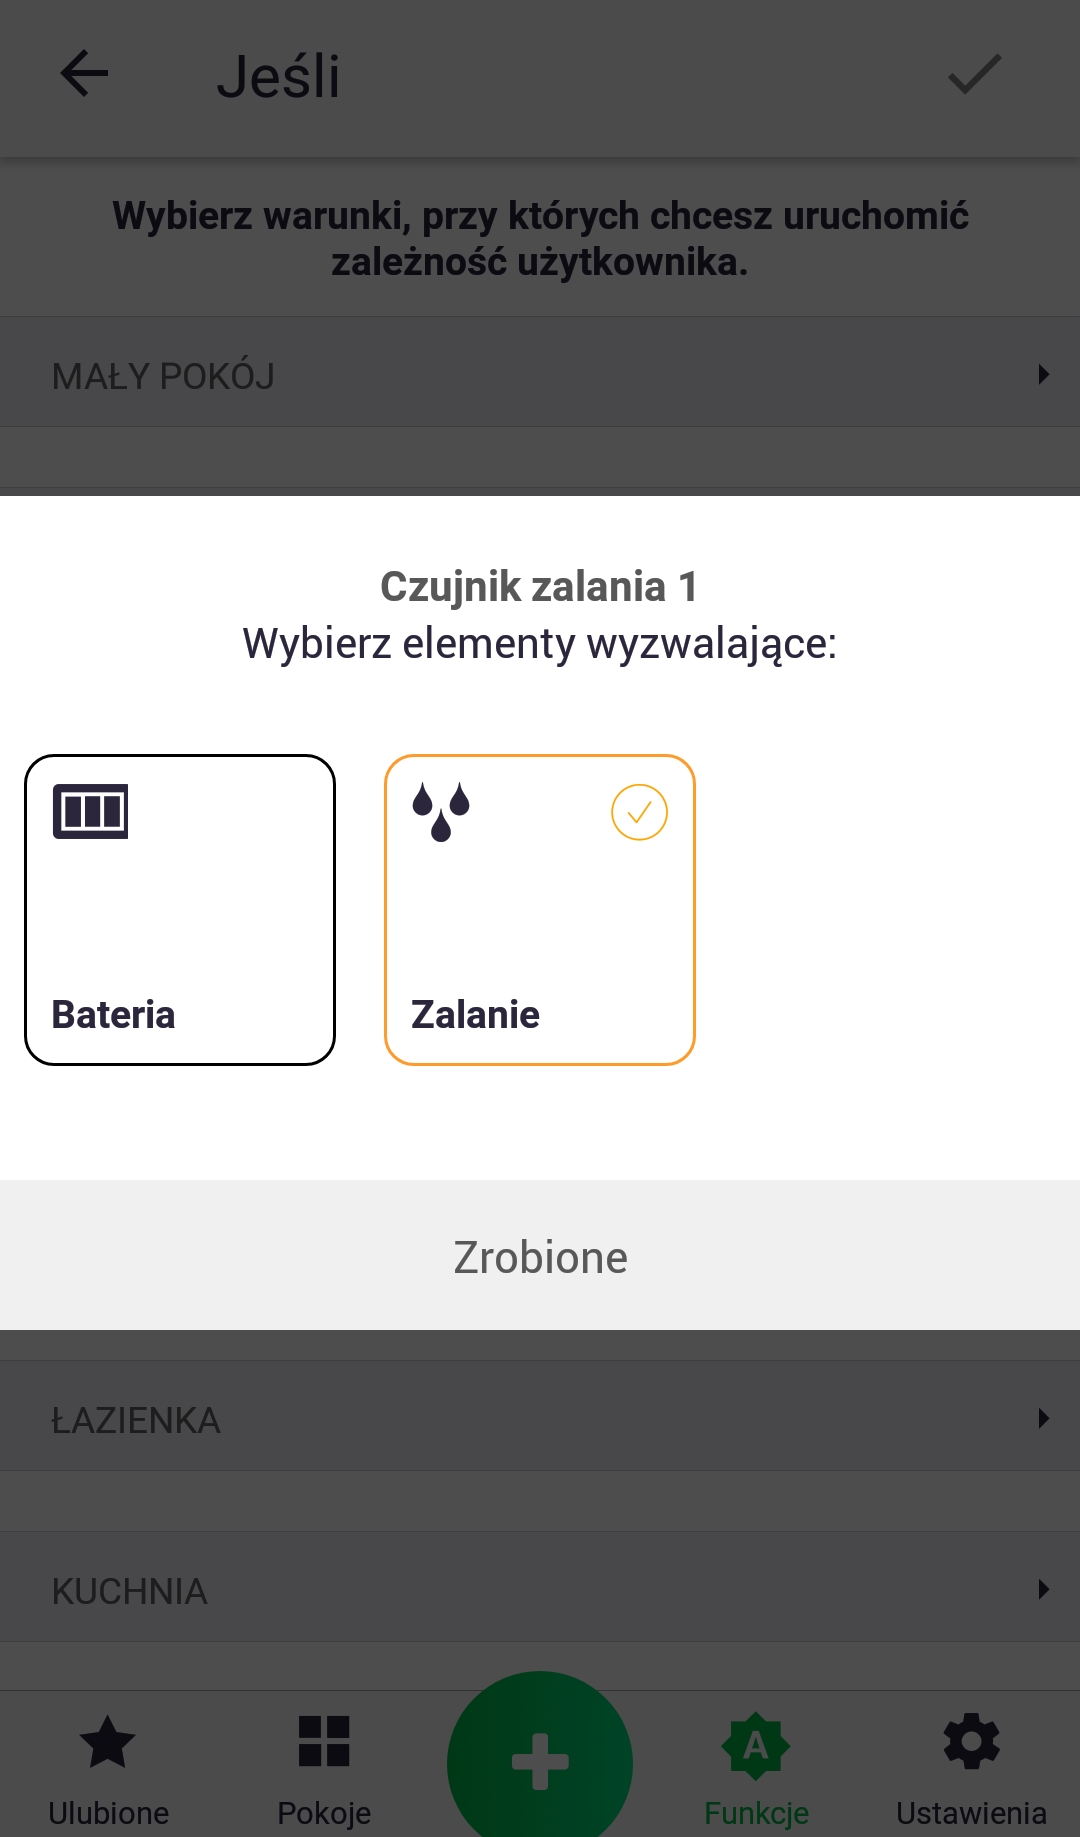
3. Select the parameter to be used in the function.
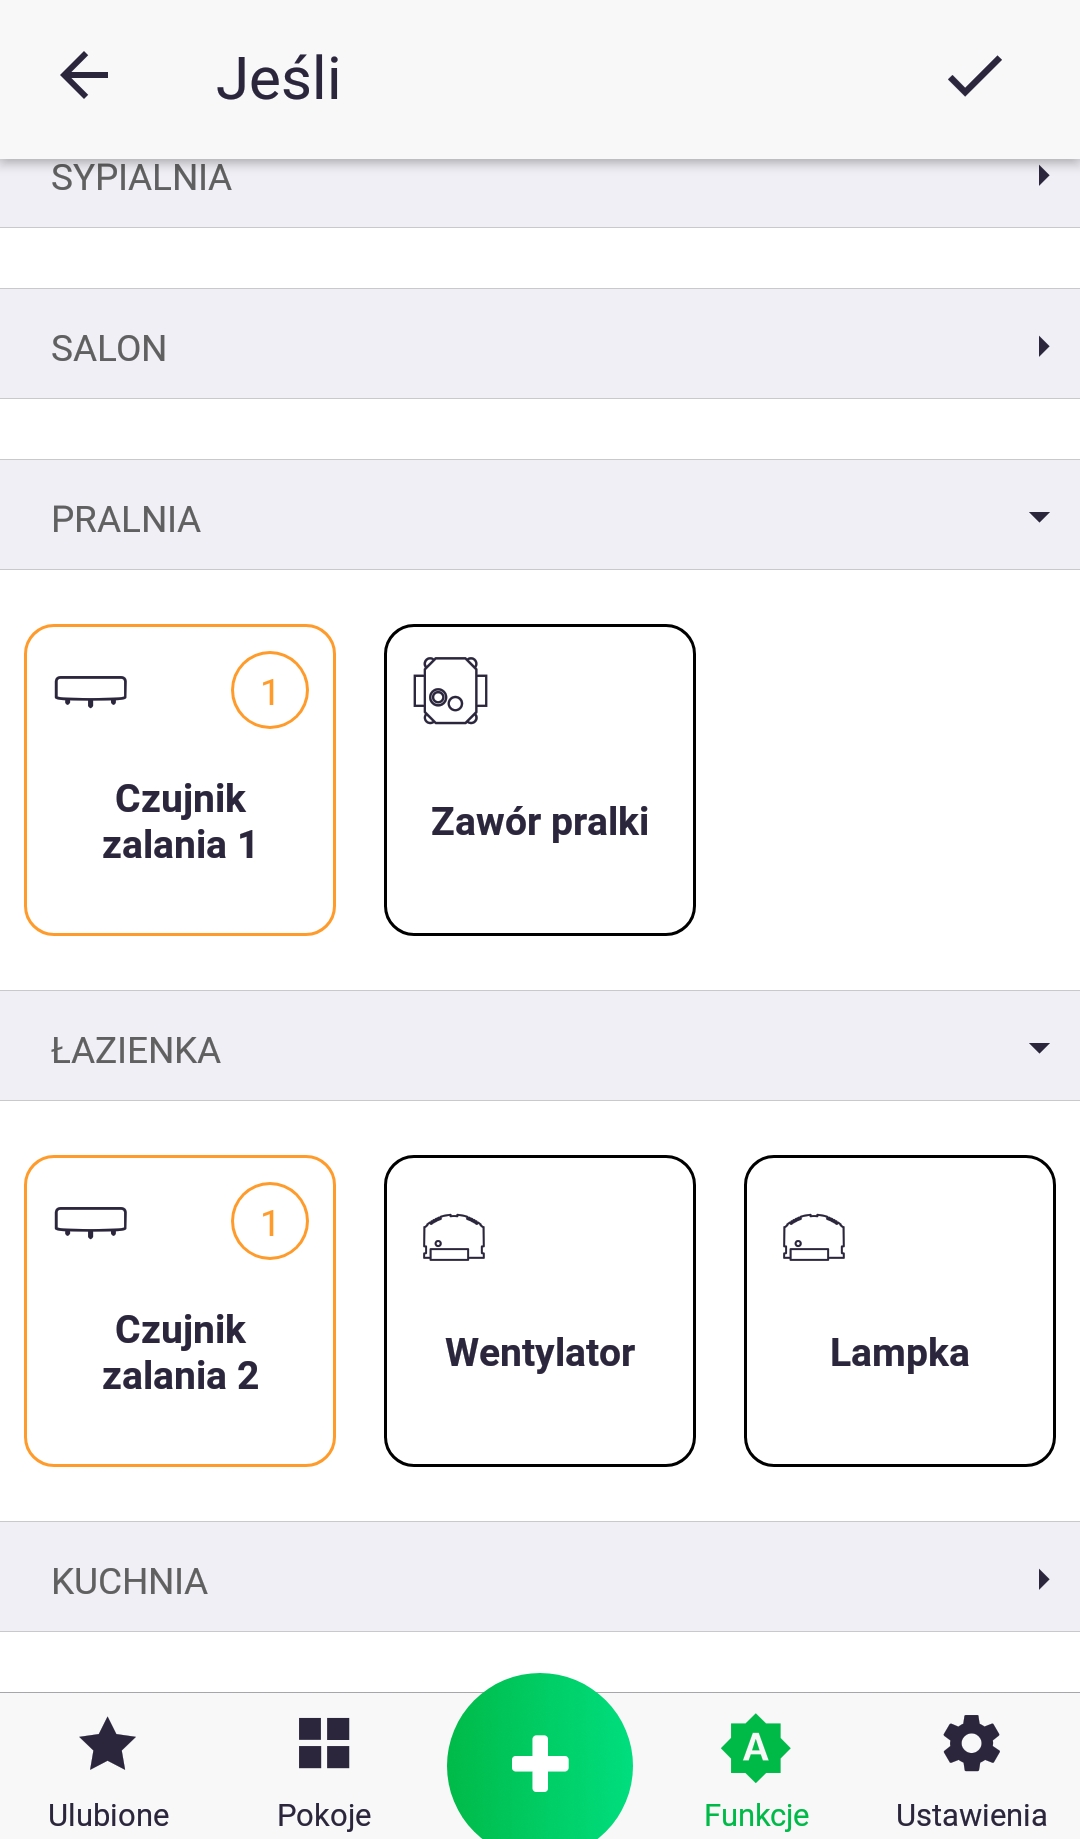
4. If we have more than one flood sensor, repeat the actions from points 2 and 3, adding another parameter.
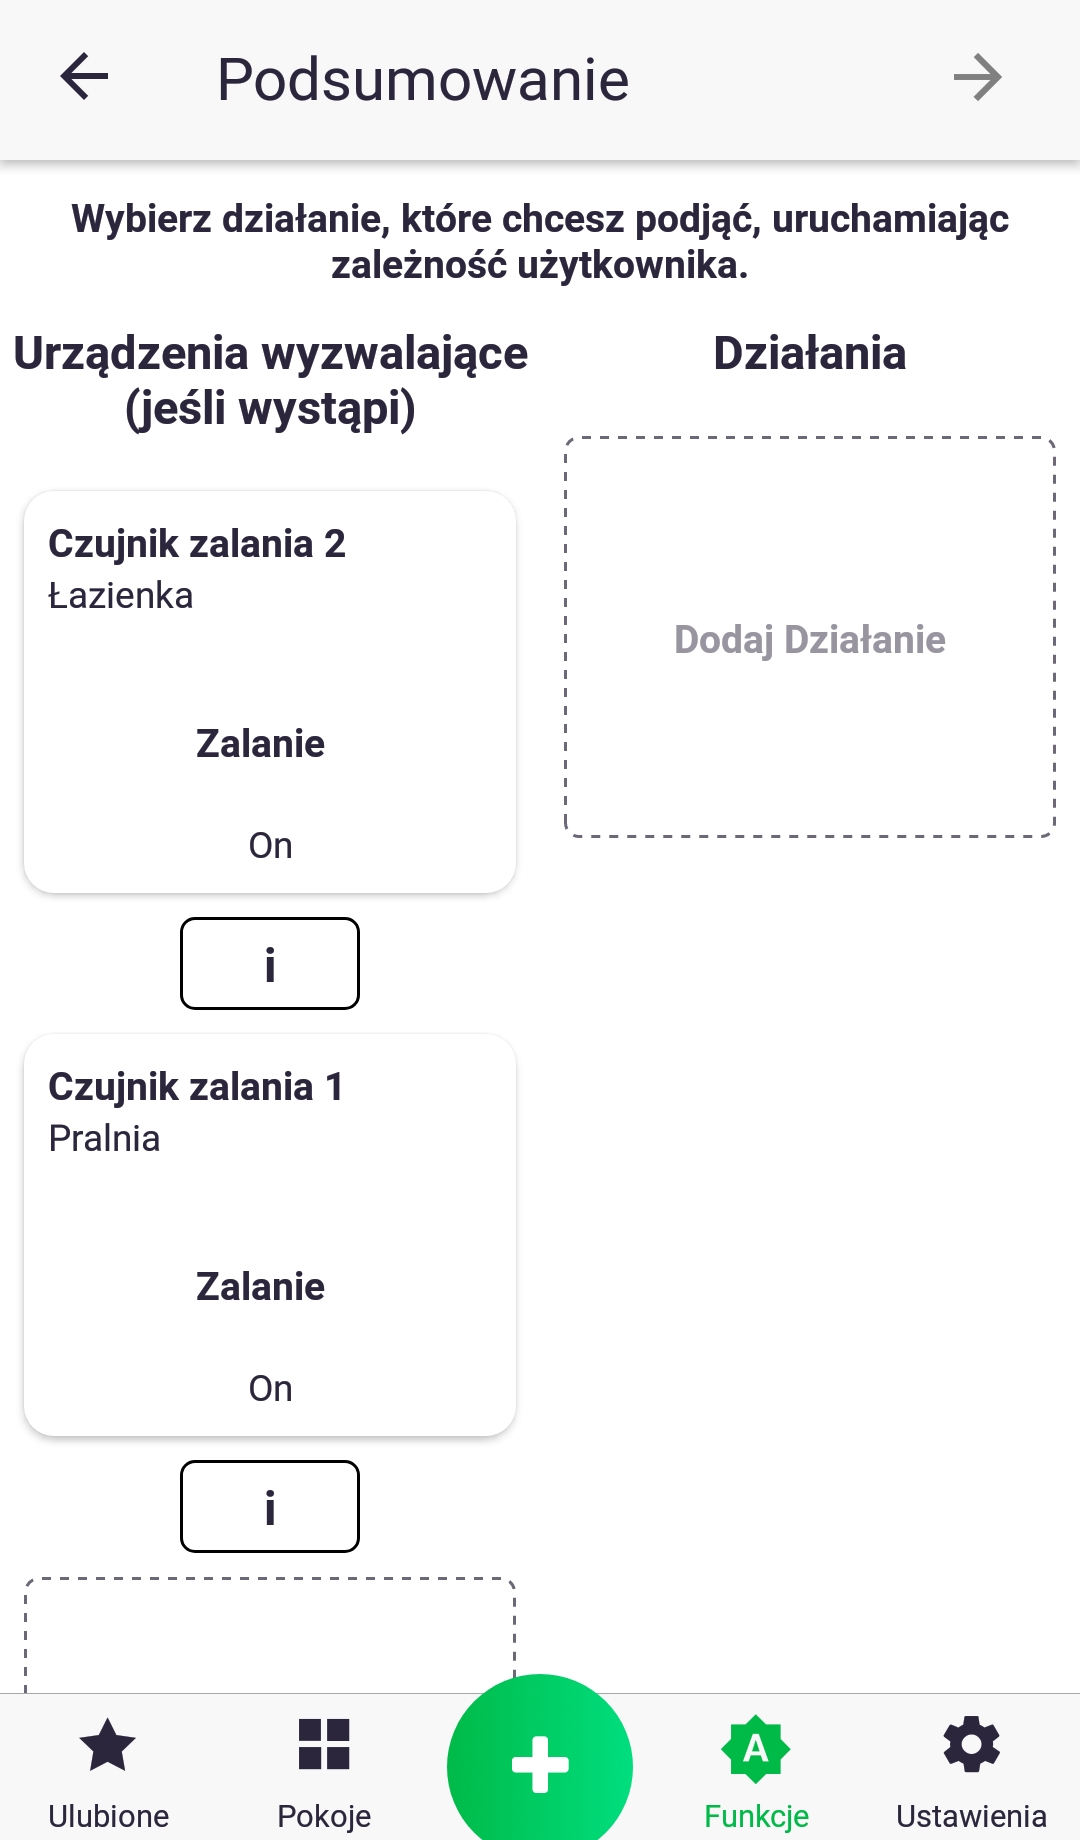
5. After selecting the parameters in the "If" section, add the action to be performed by briefly clicking on the "Add Action" icon.
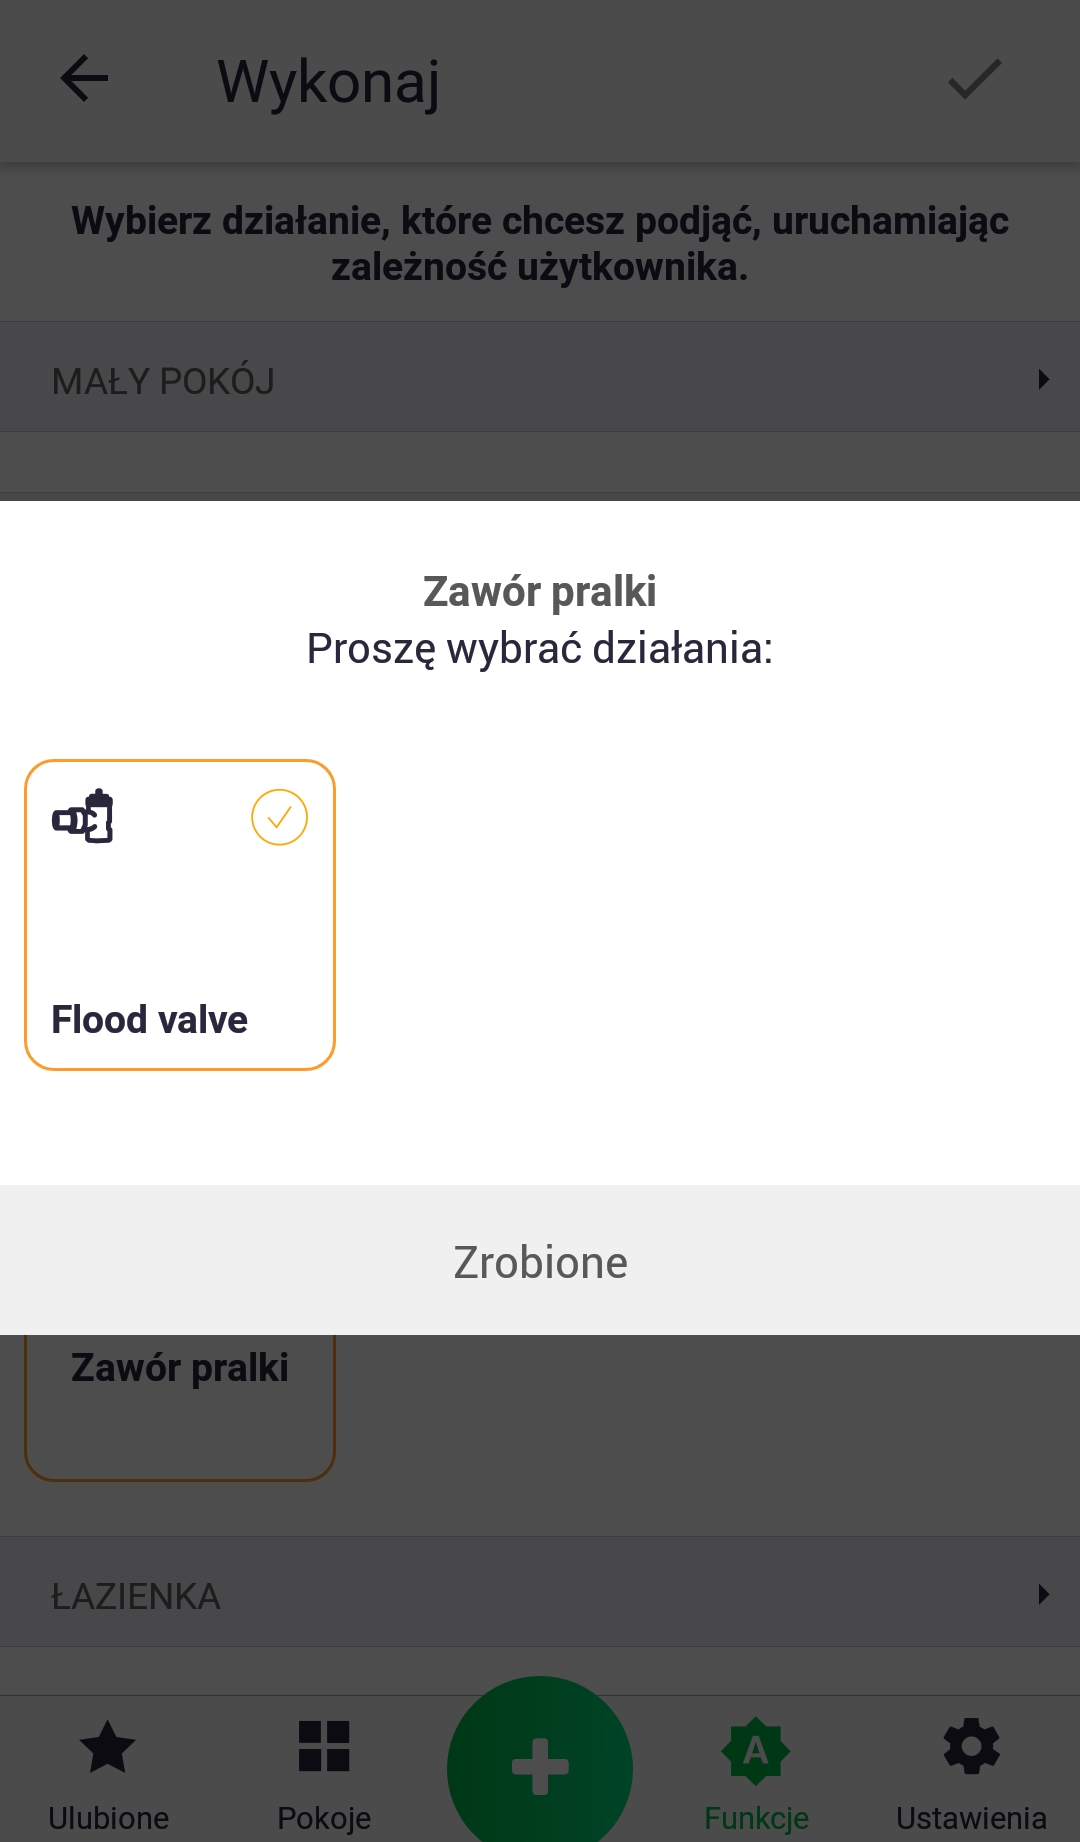
6. We proceed similarly to points 2 and 3, adding the parameter that will be set in the function.
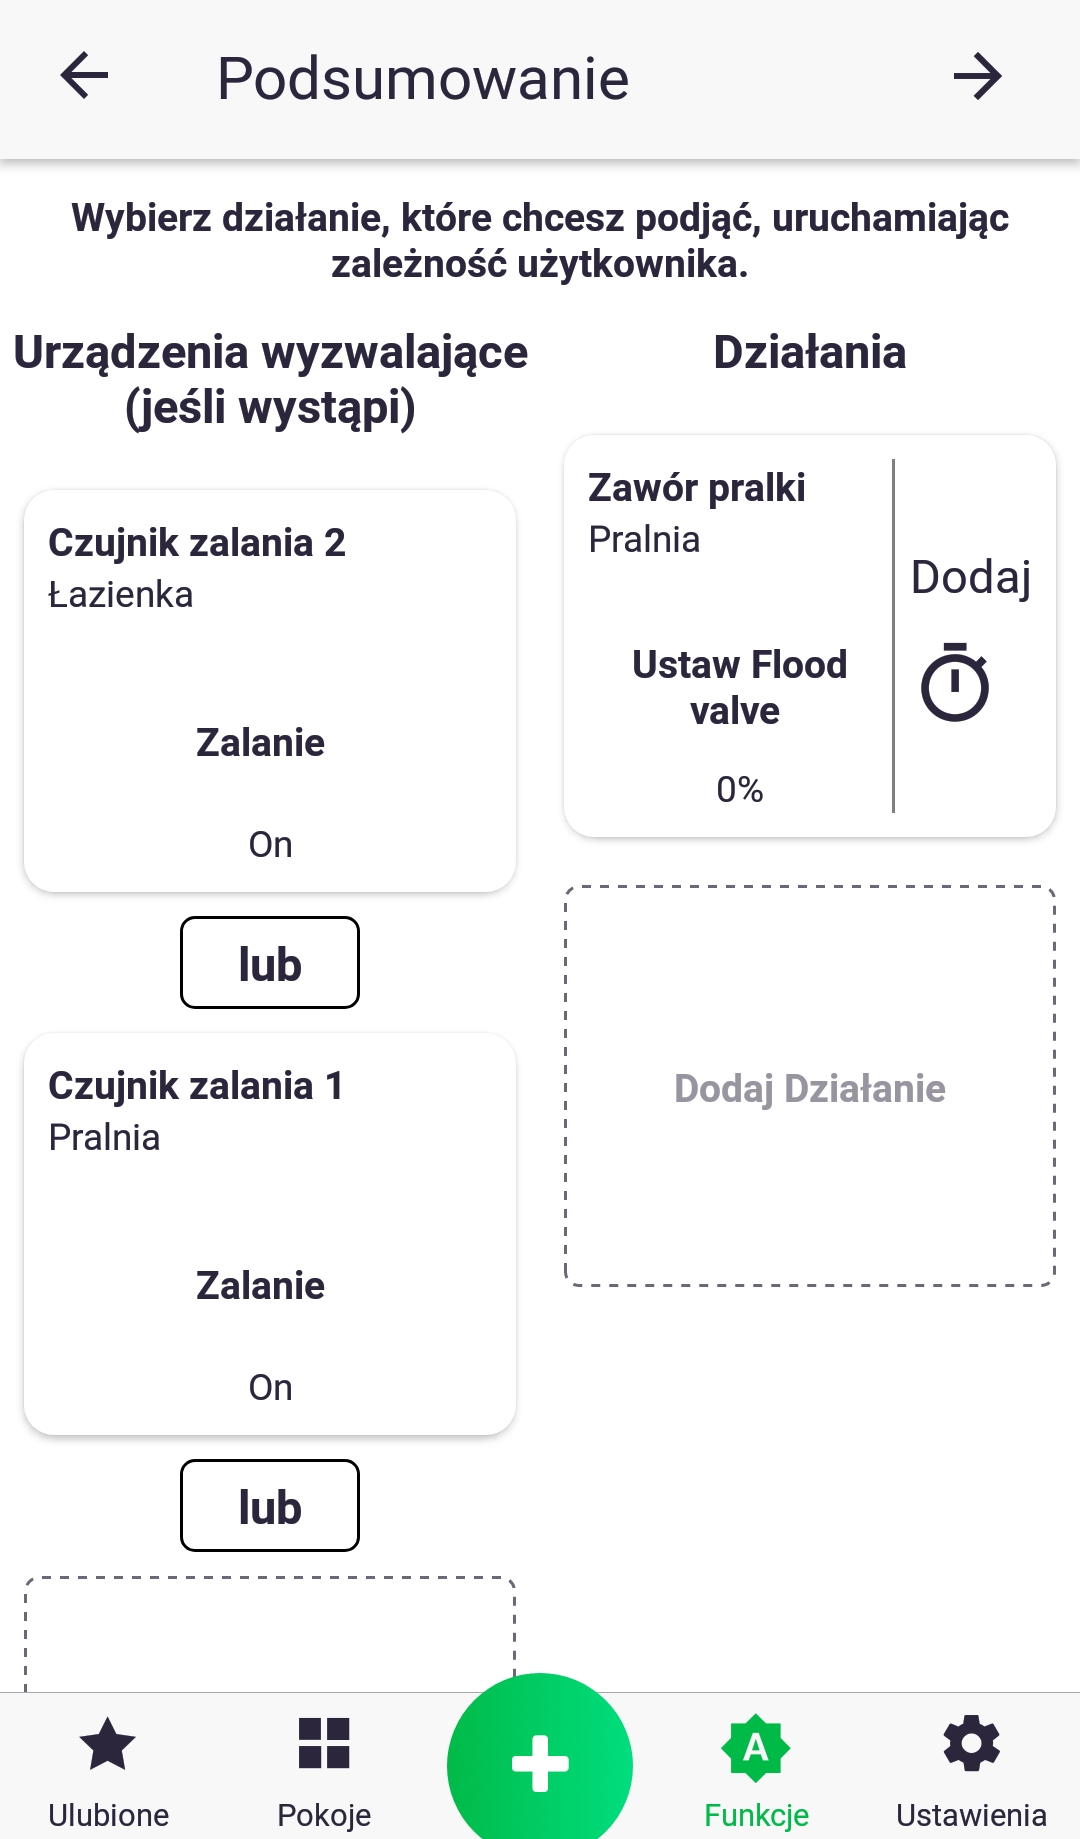
7. If there is more than one flood sensor in the "if" section, connect them with the conjunction "or" by briefly pressing the "and" icon, which will change its name. The example shown will work as follows: if flooding occurs on any sensor, close the water valve. You can change the value of each parameter in the function by briefly pressing its icon.
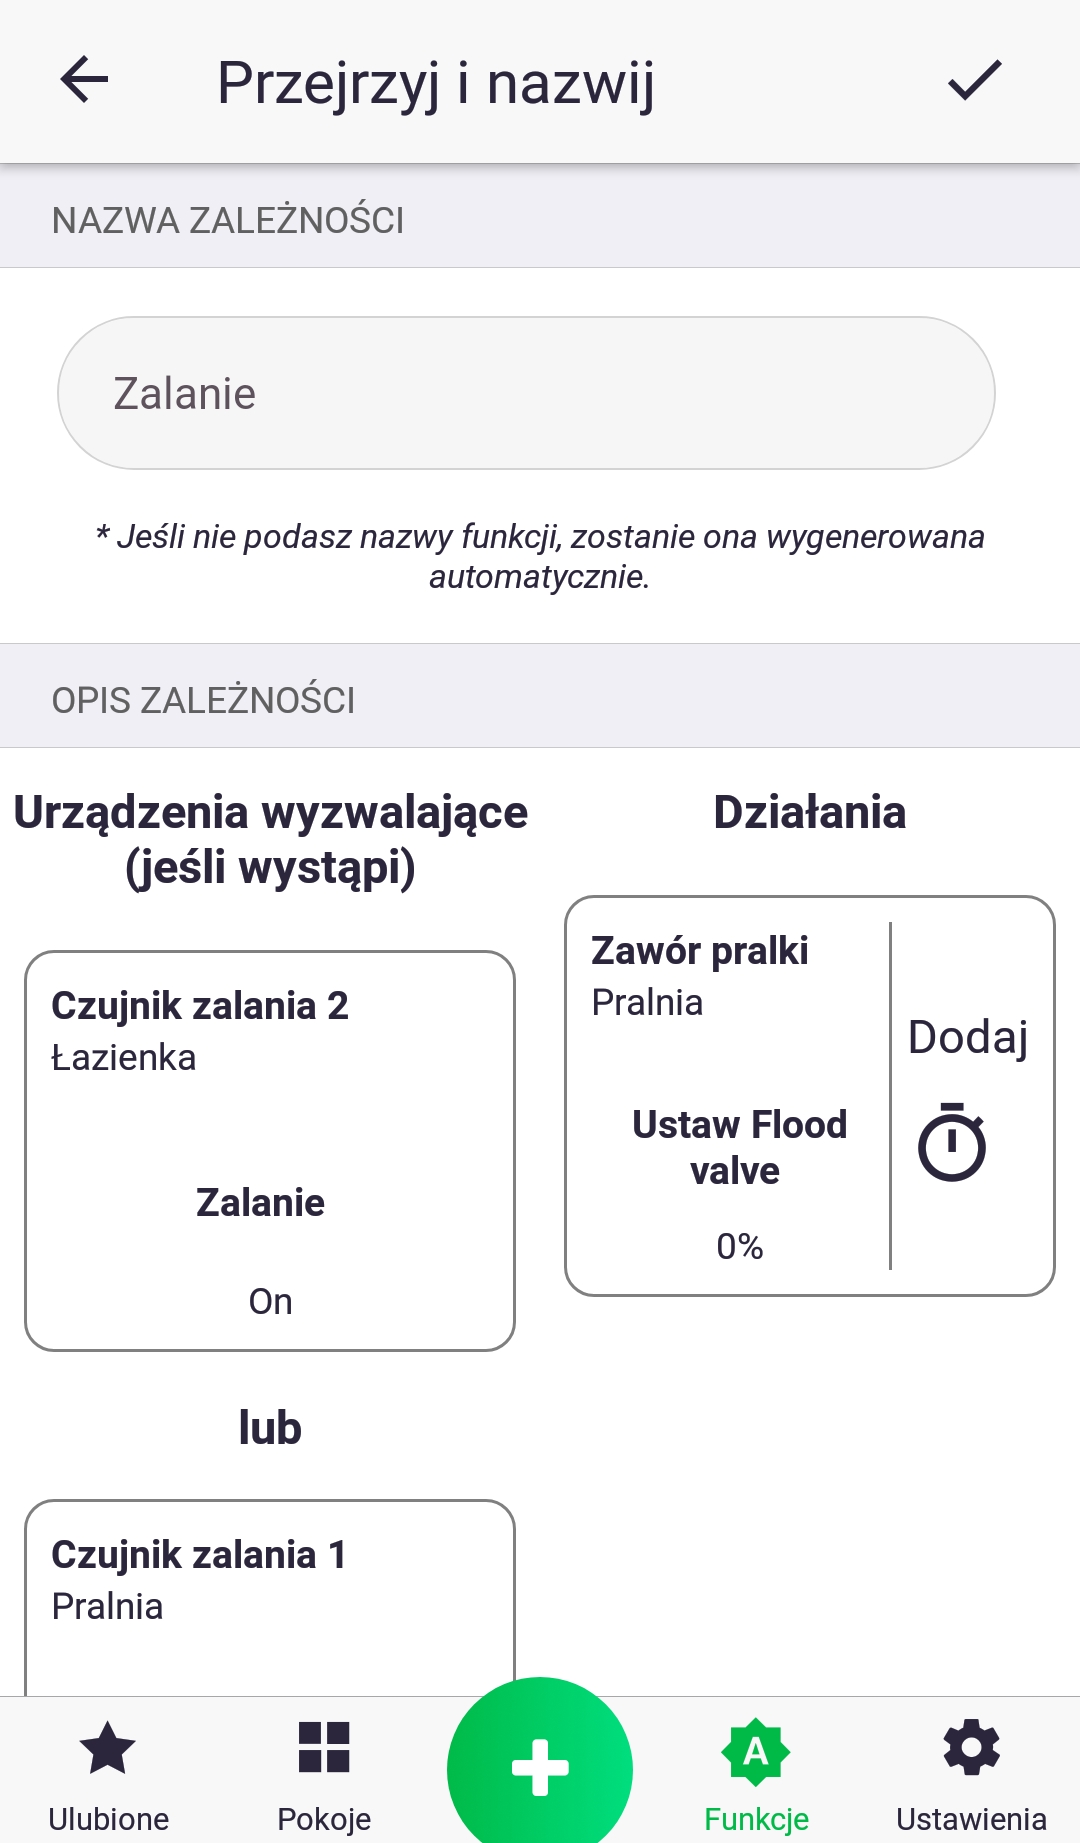
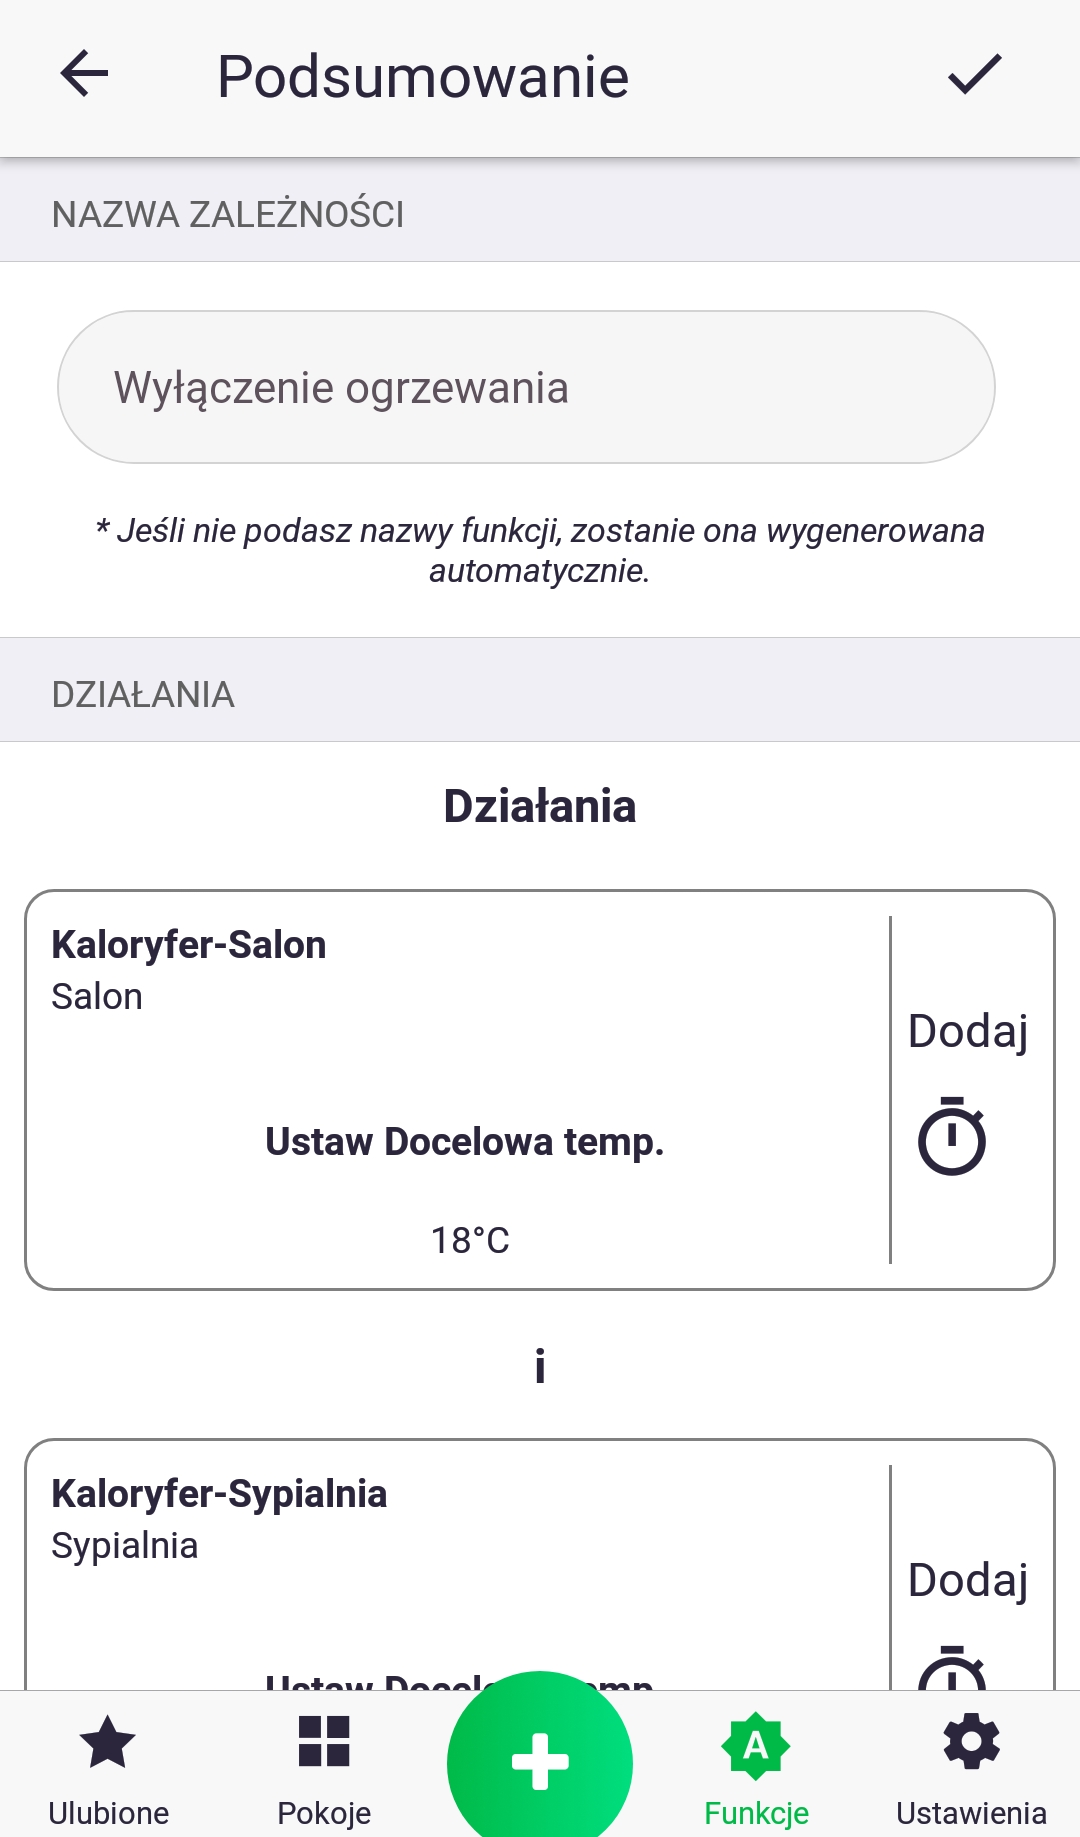
8. In the final step, we check that everything is correct and name our function. Confirm its creation with the button at the top of the screen. We've just created a new dependency!
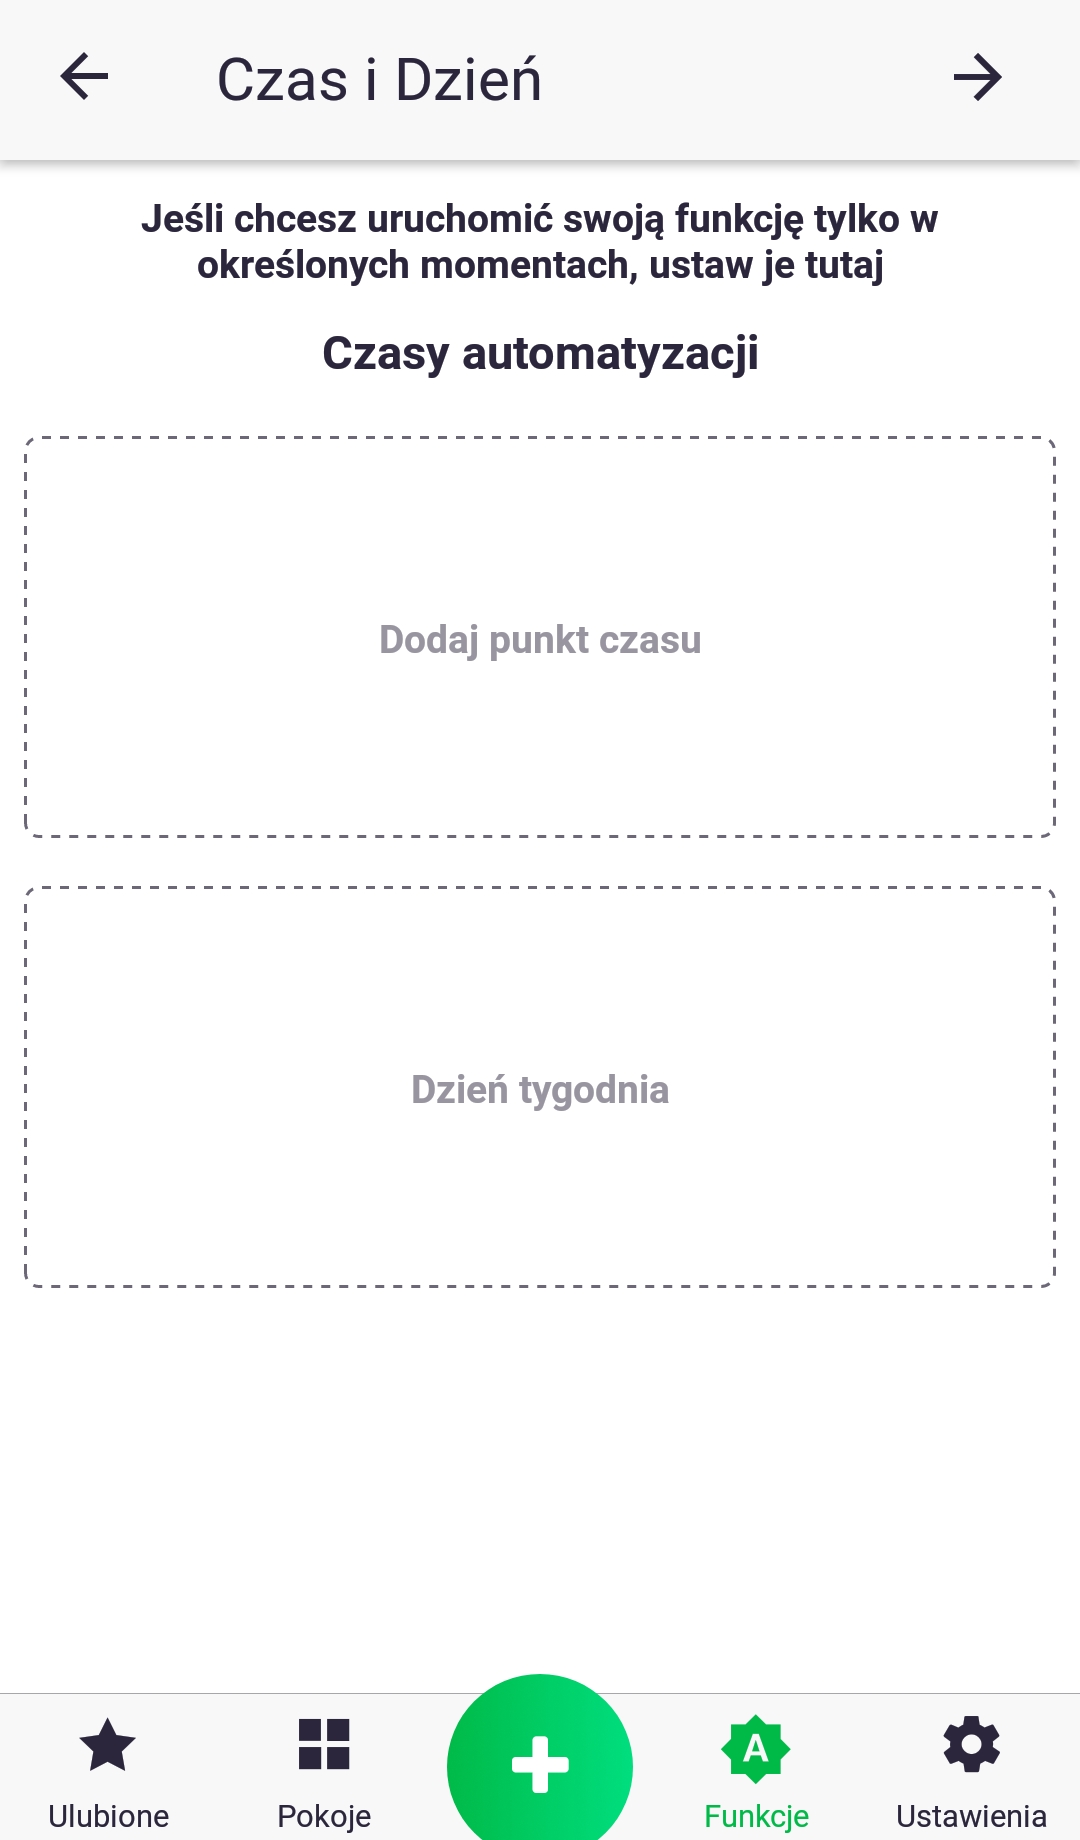
If the function conditions are connected with the conjunction "and", an additional screen will appear that will allow you to add a time constraint.
Function – Group
The "Group" function, as the name suggests, groups device parameters and synchronizes their values. After creating a group, for example, with the target temperature parameter on a thermostat and a thermostatic head, any change in the value on any of the devices will be sent to the others. Some devices have a read-only parameter; for example, a thermostat has a built-in temperature sensor, whose value is sent to the thermostats connected to it in the group.
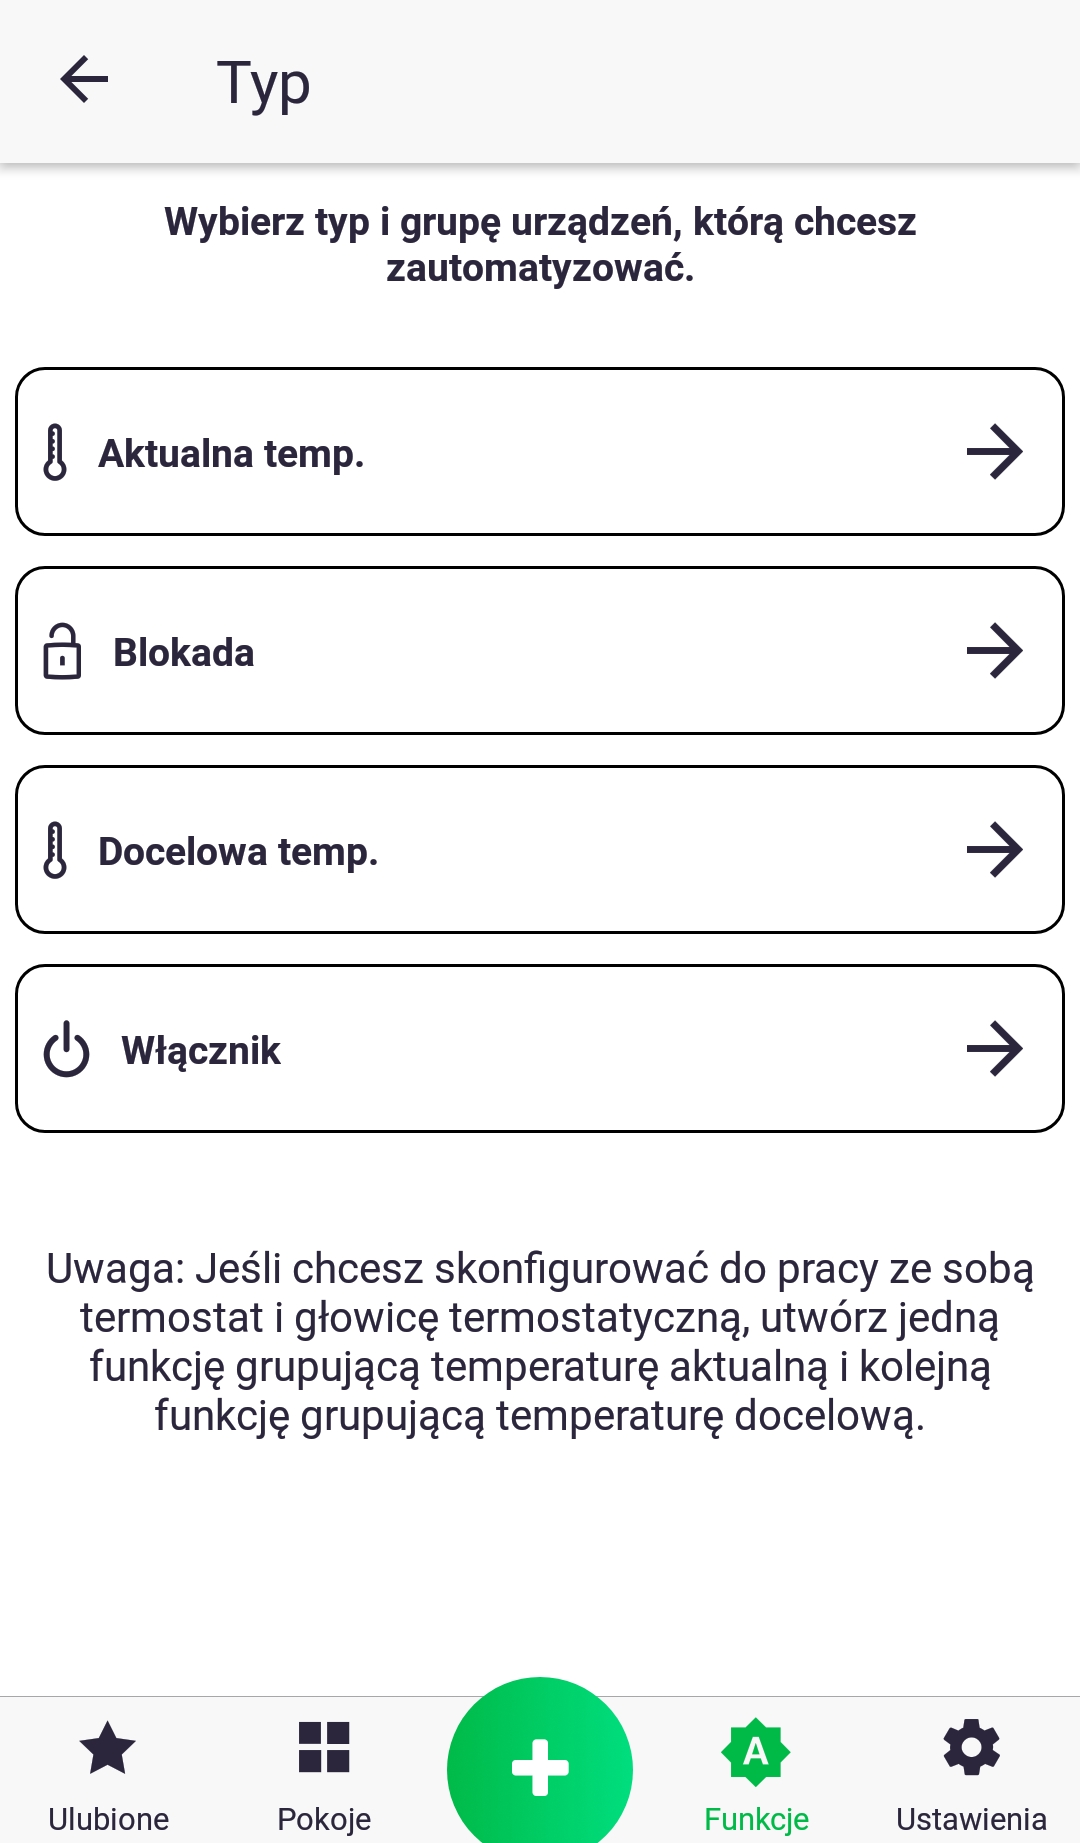
- In the first step, we select the type of parameter we want to group.
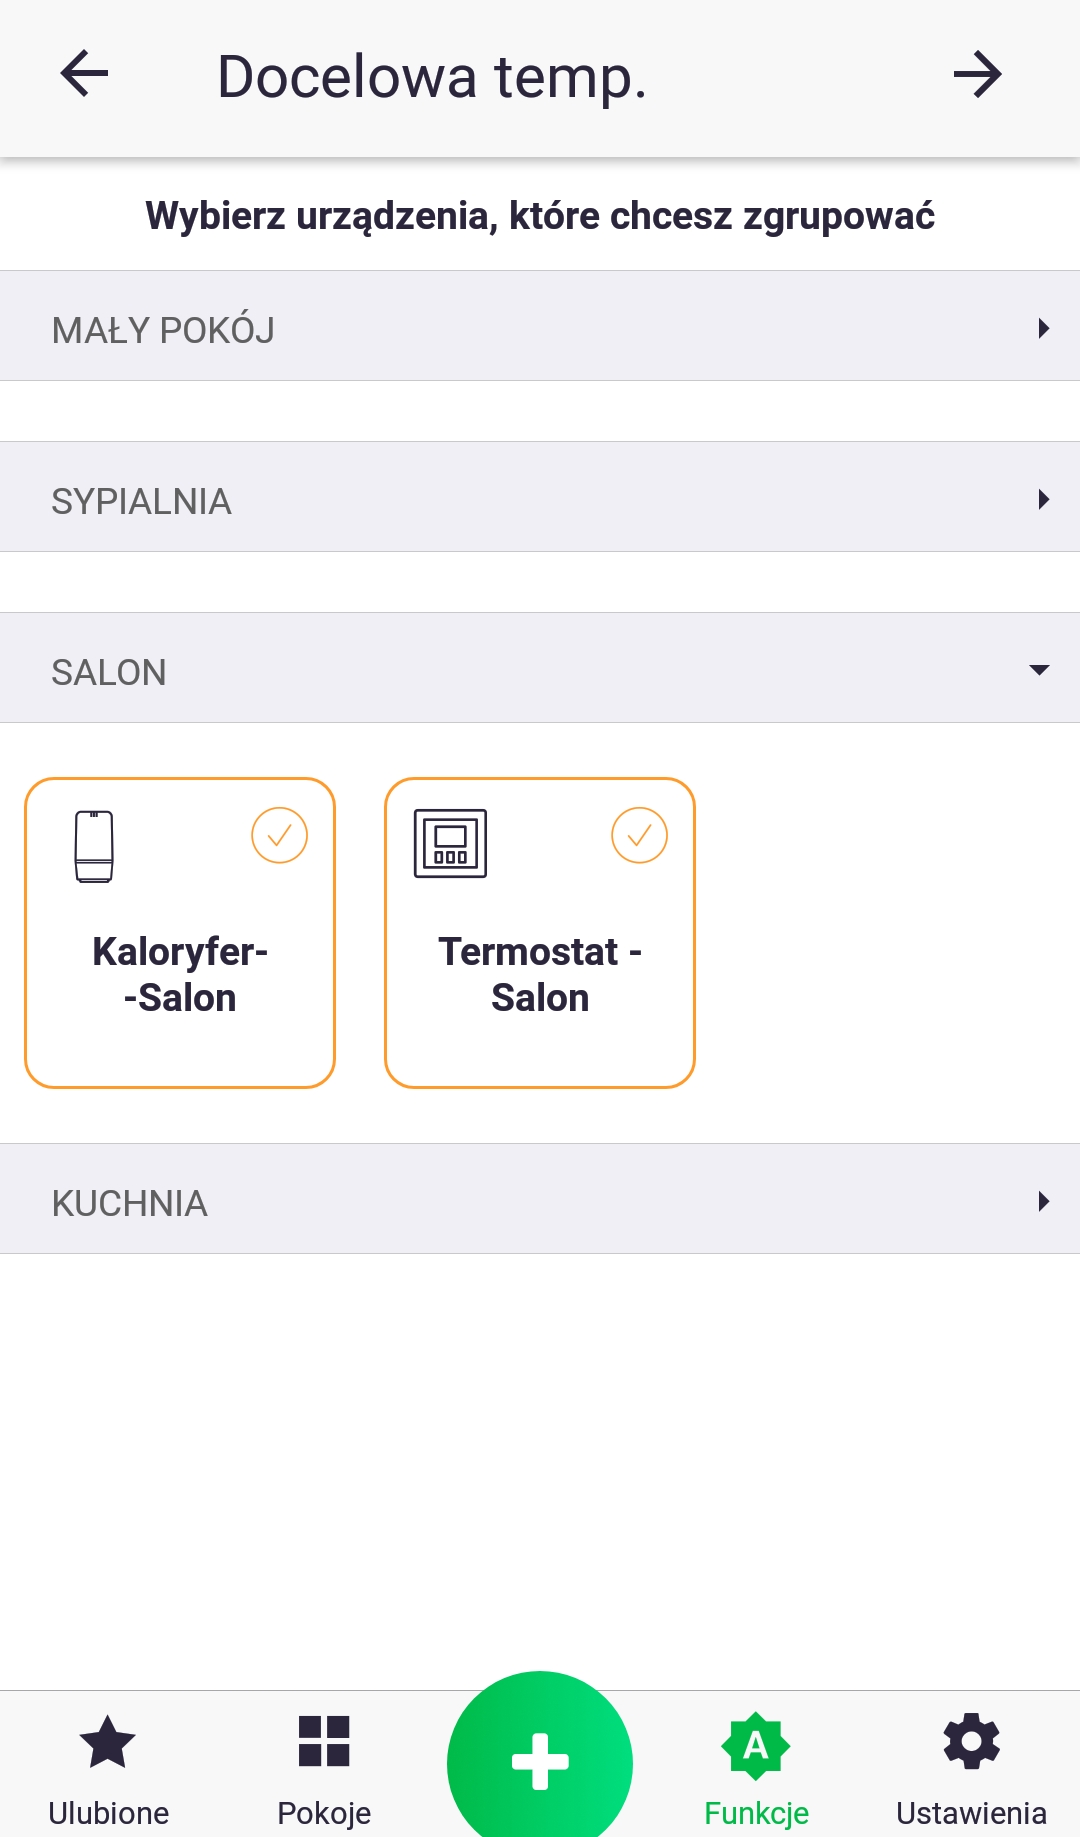
2. After selecting the parameter type, a list of devices will be displayed, divided by room. Select the accessories you're interested in.

3. Verify everything is correct and name your function. Confirm its creation with the button at the top of the screen. You've just created a new group!
Function – Heating
The "Heating" function is used to turn on the heating based on the device's internal program. We select the devices that will request heating (initiate heating) and the actuators that physically turn on the heating. Using the example of a house where each room has a thermostat and a thermostatic valve, and the furnace is switched on by a separate device, the thermostatic valves are the devices that decide whether a given room has cooled down enough to turn on the furnace. The thermostatic valves turn on the heating if the calculated percentage opening of the radiator valve is above 0. A simpler example is a situation where the house has only one thermostat and the furnace control, the thermostat decides when the heating is turned on.
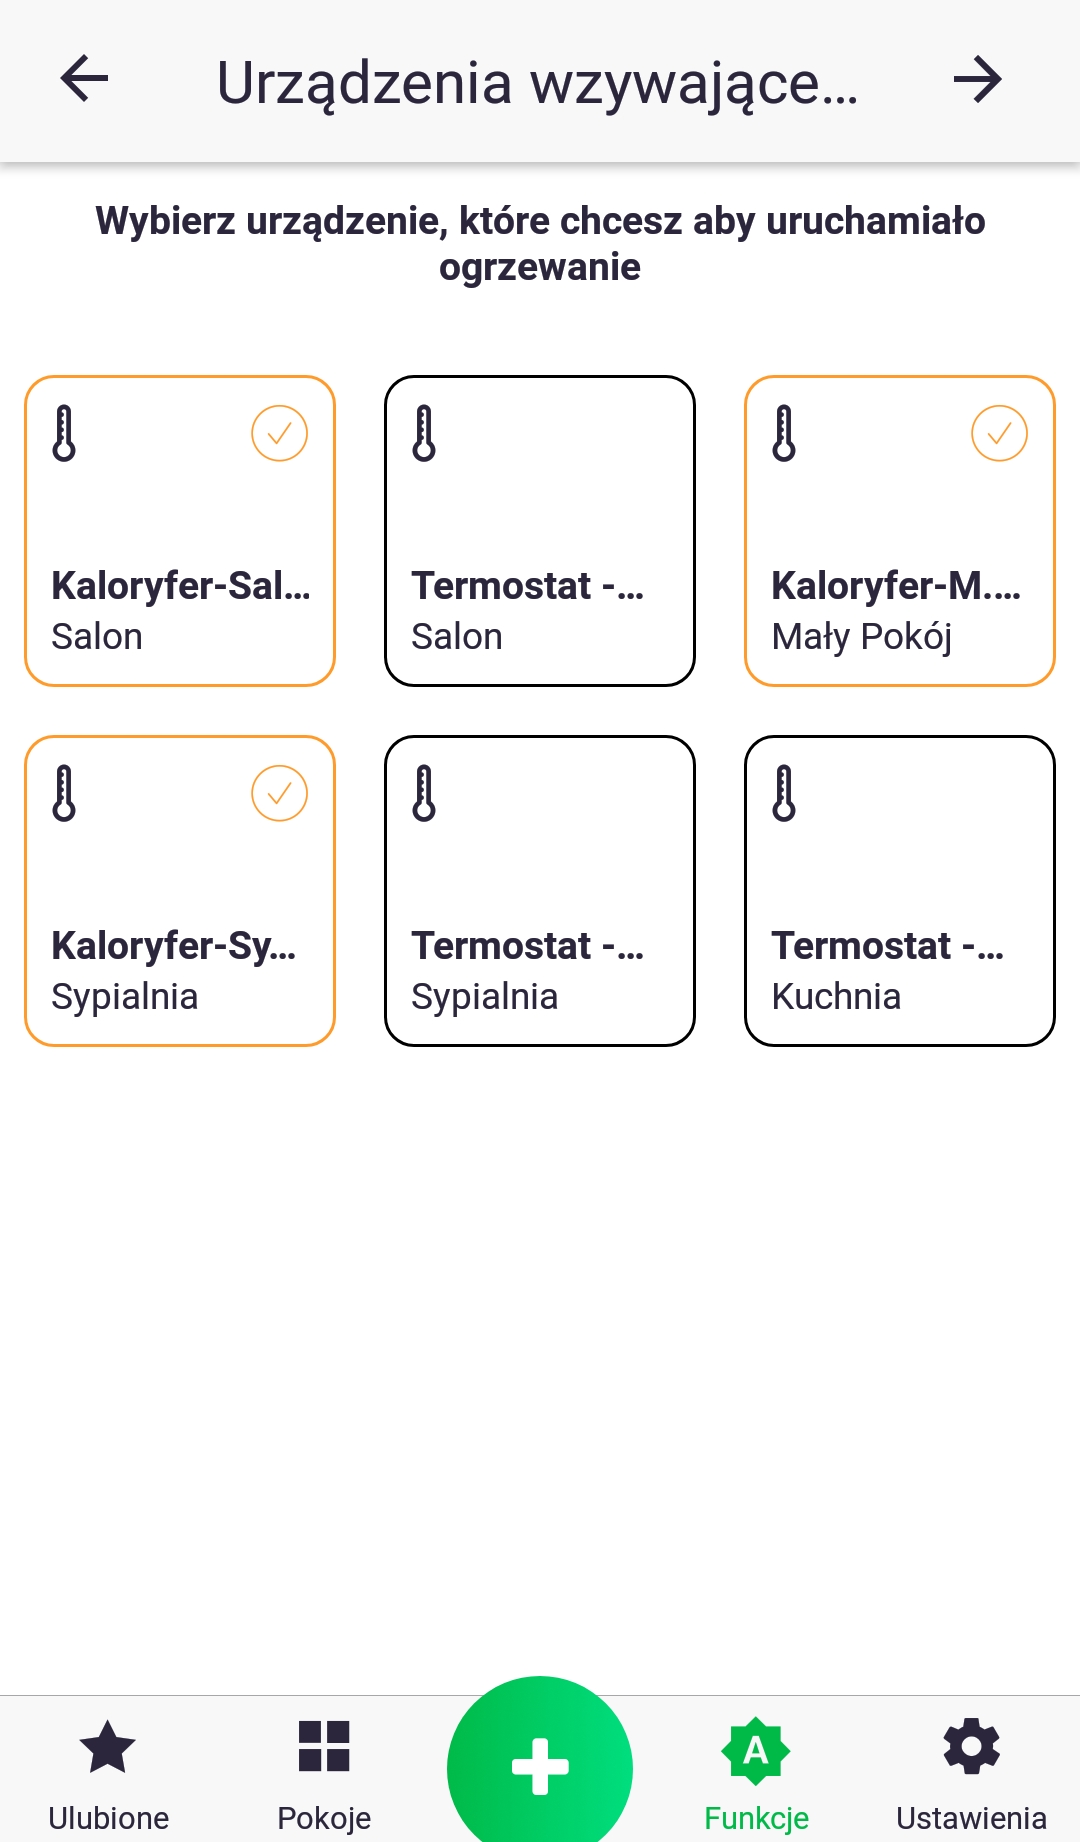
- In the first step, we select the devices that will initiate heating. In the example shown, if any radiator valve has a valve opening above 0%, it will turn on the furnace.
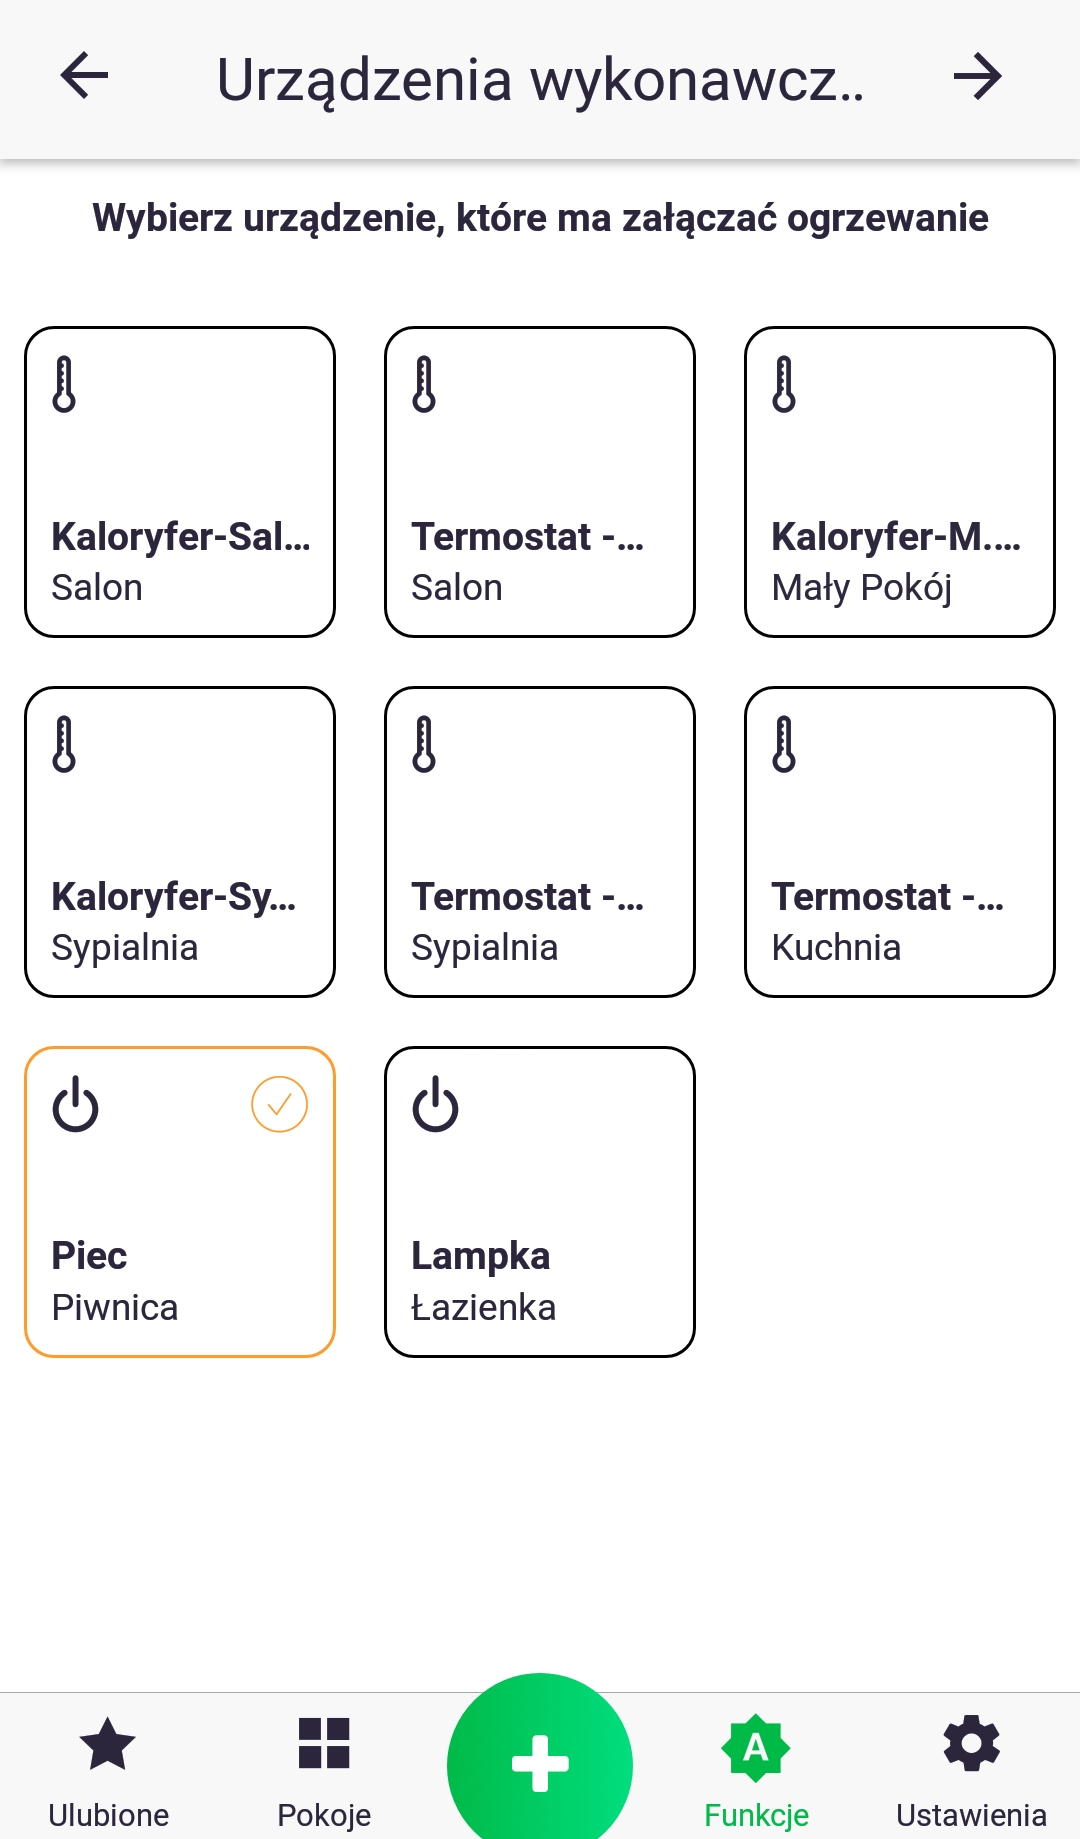
2. In the second step, we select the device that will physically turn on the furnace.
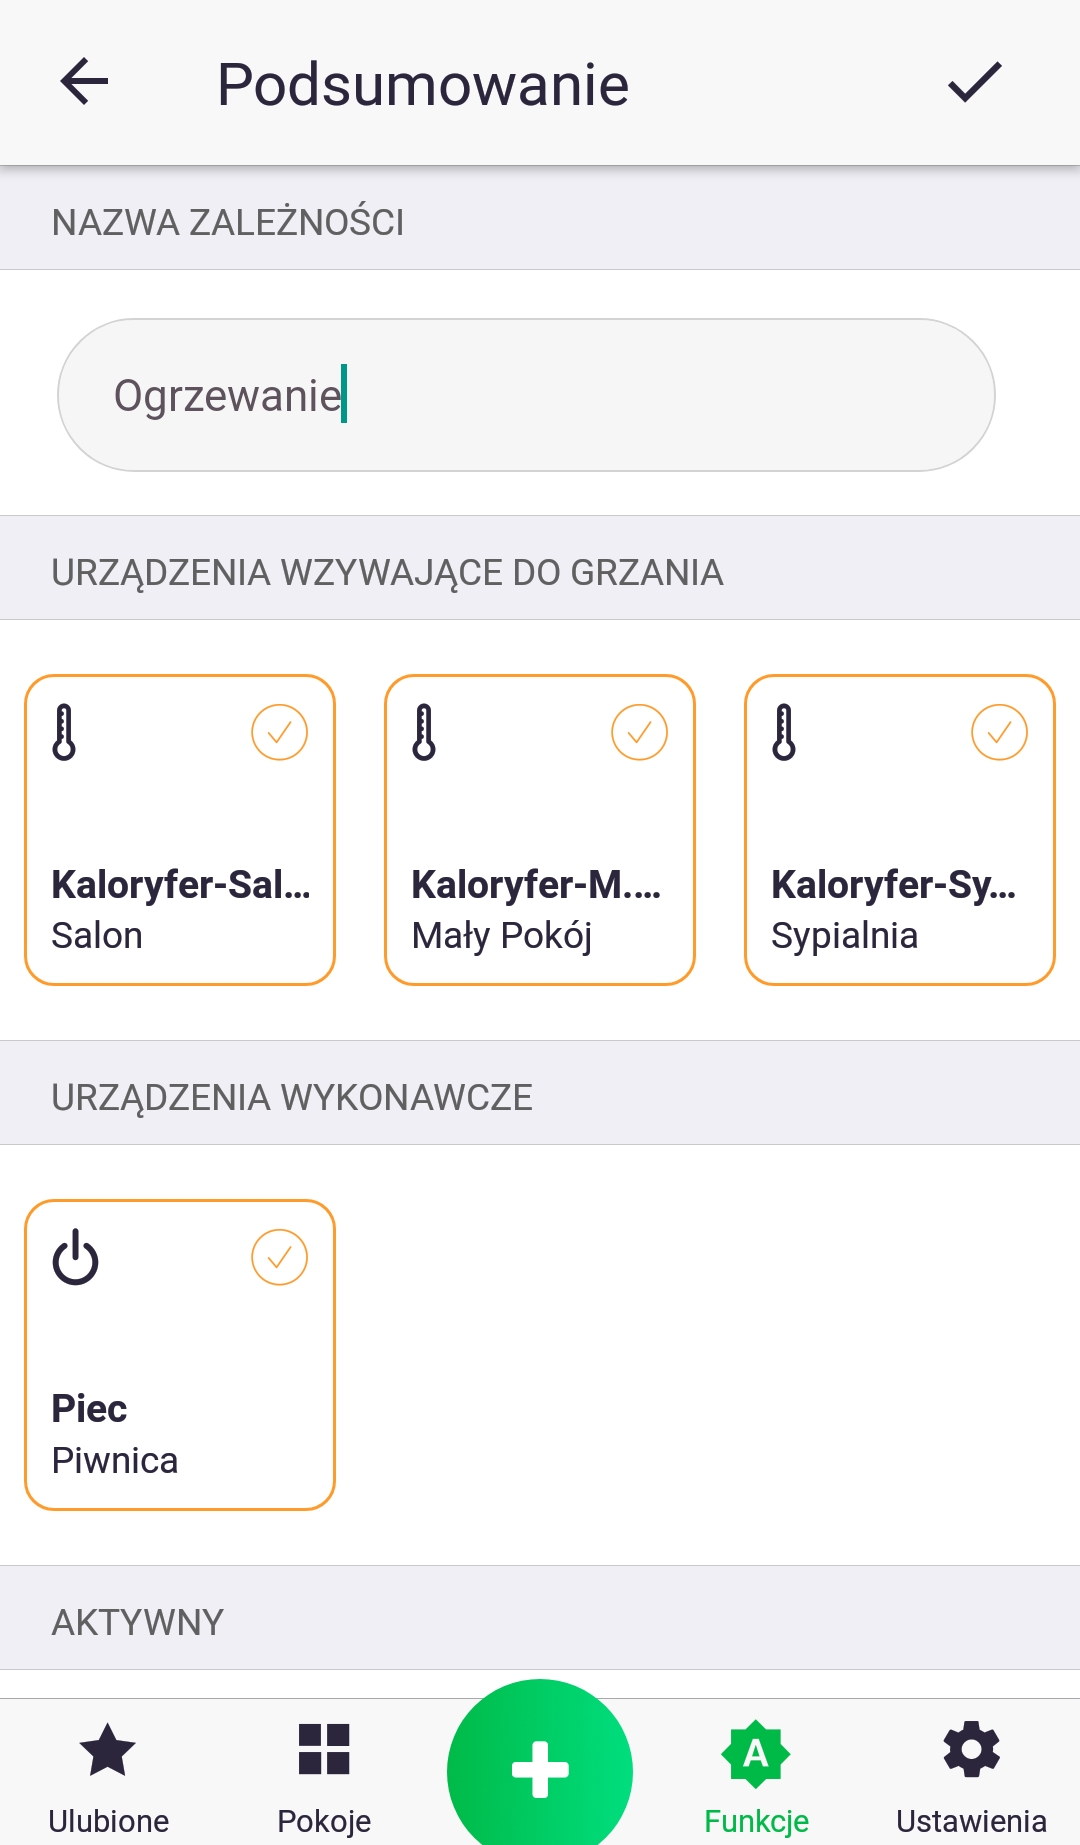
3. Verify everything is correct and name your function. Confirm its creation with the button at the top of the screen. You've just created a new heating function!
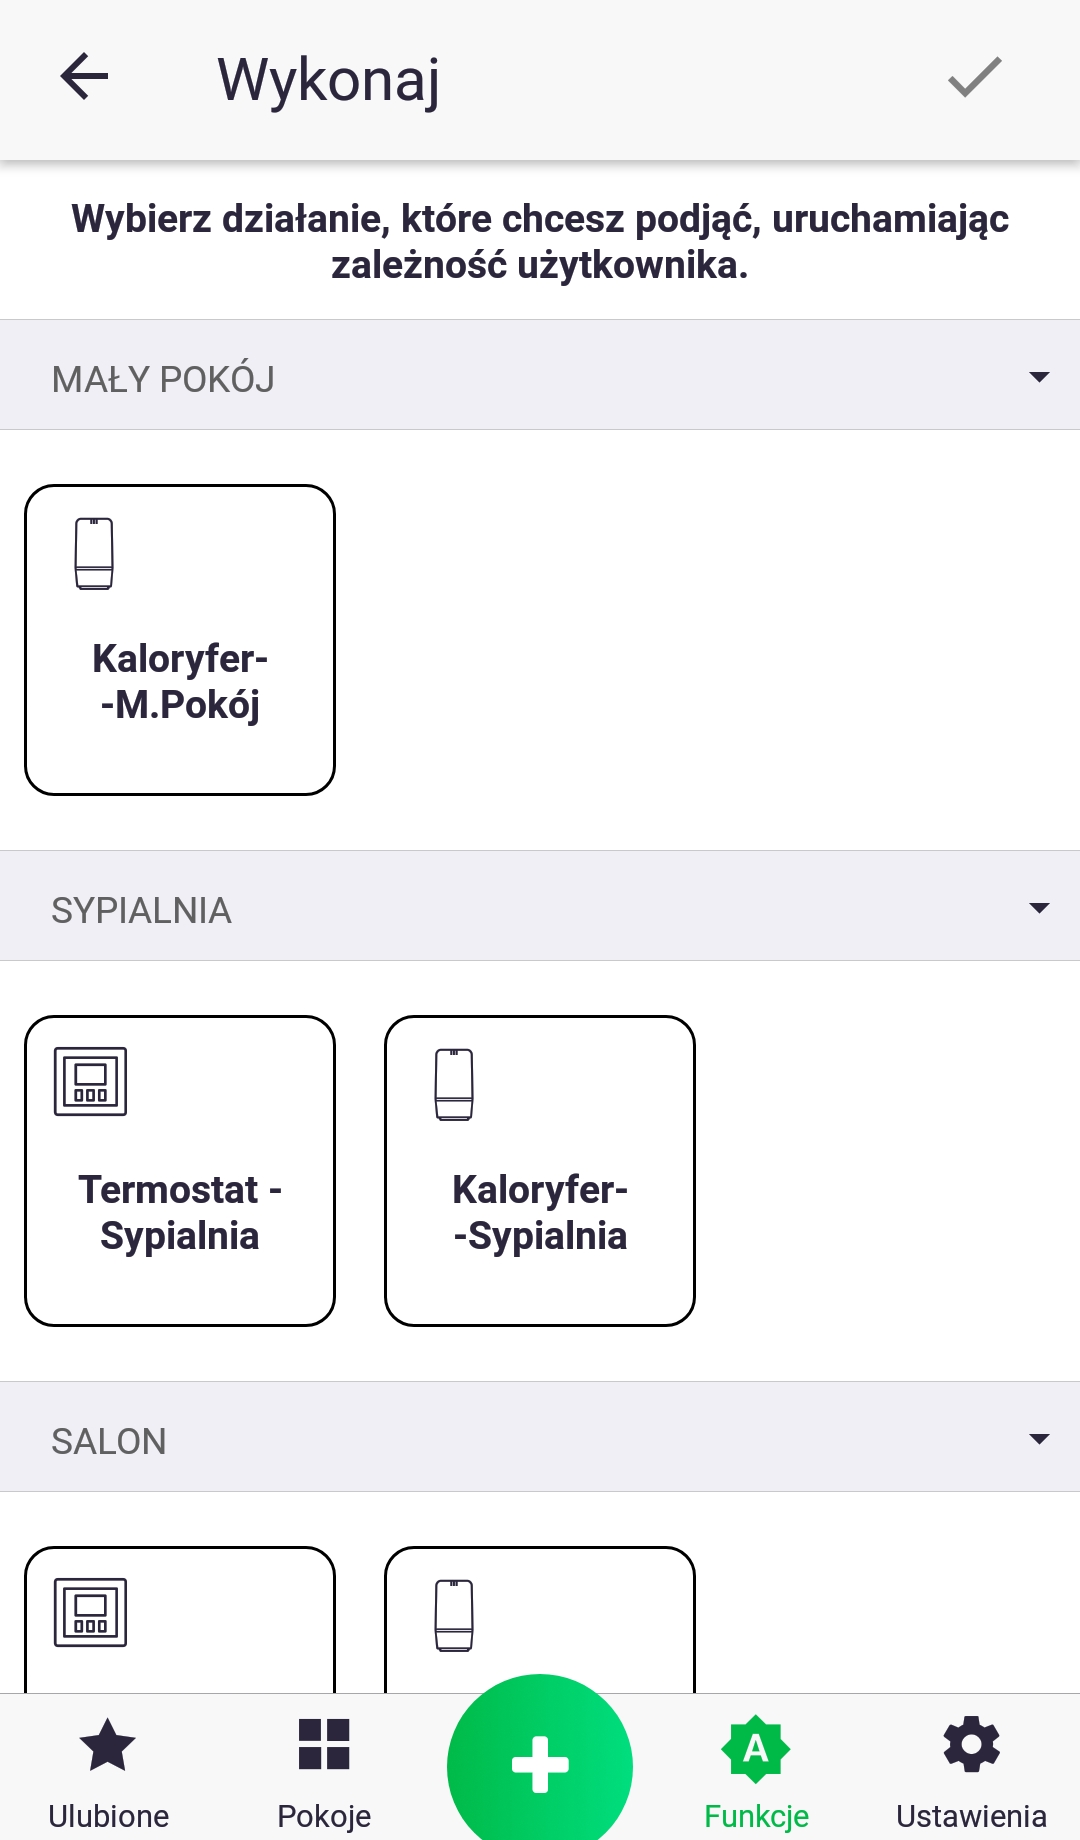
Function – Execute
The "Execute" function allows you to group several operations under one button in the app, e.g. I go out to the terrace and turn on several lighting sections at once.
- We start by clicking on the "Add action" icon
2. Select the device you are interested in from the list, and a short click on a given icon will expand the list of its parameters.
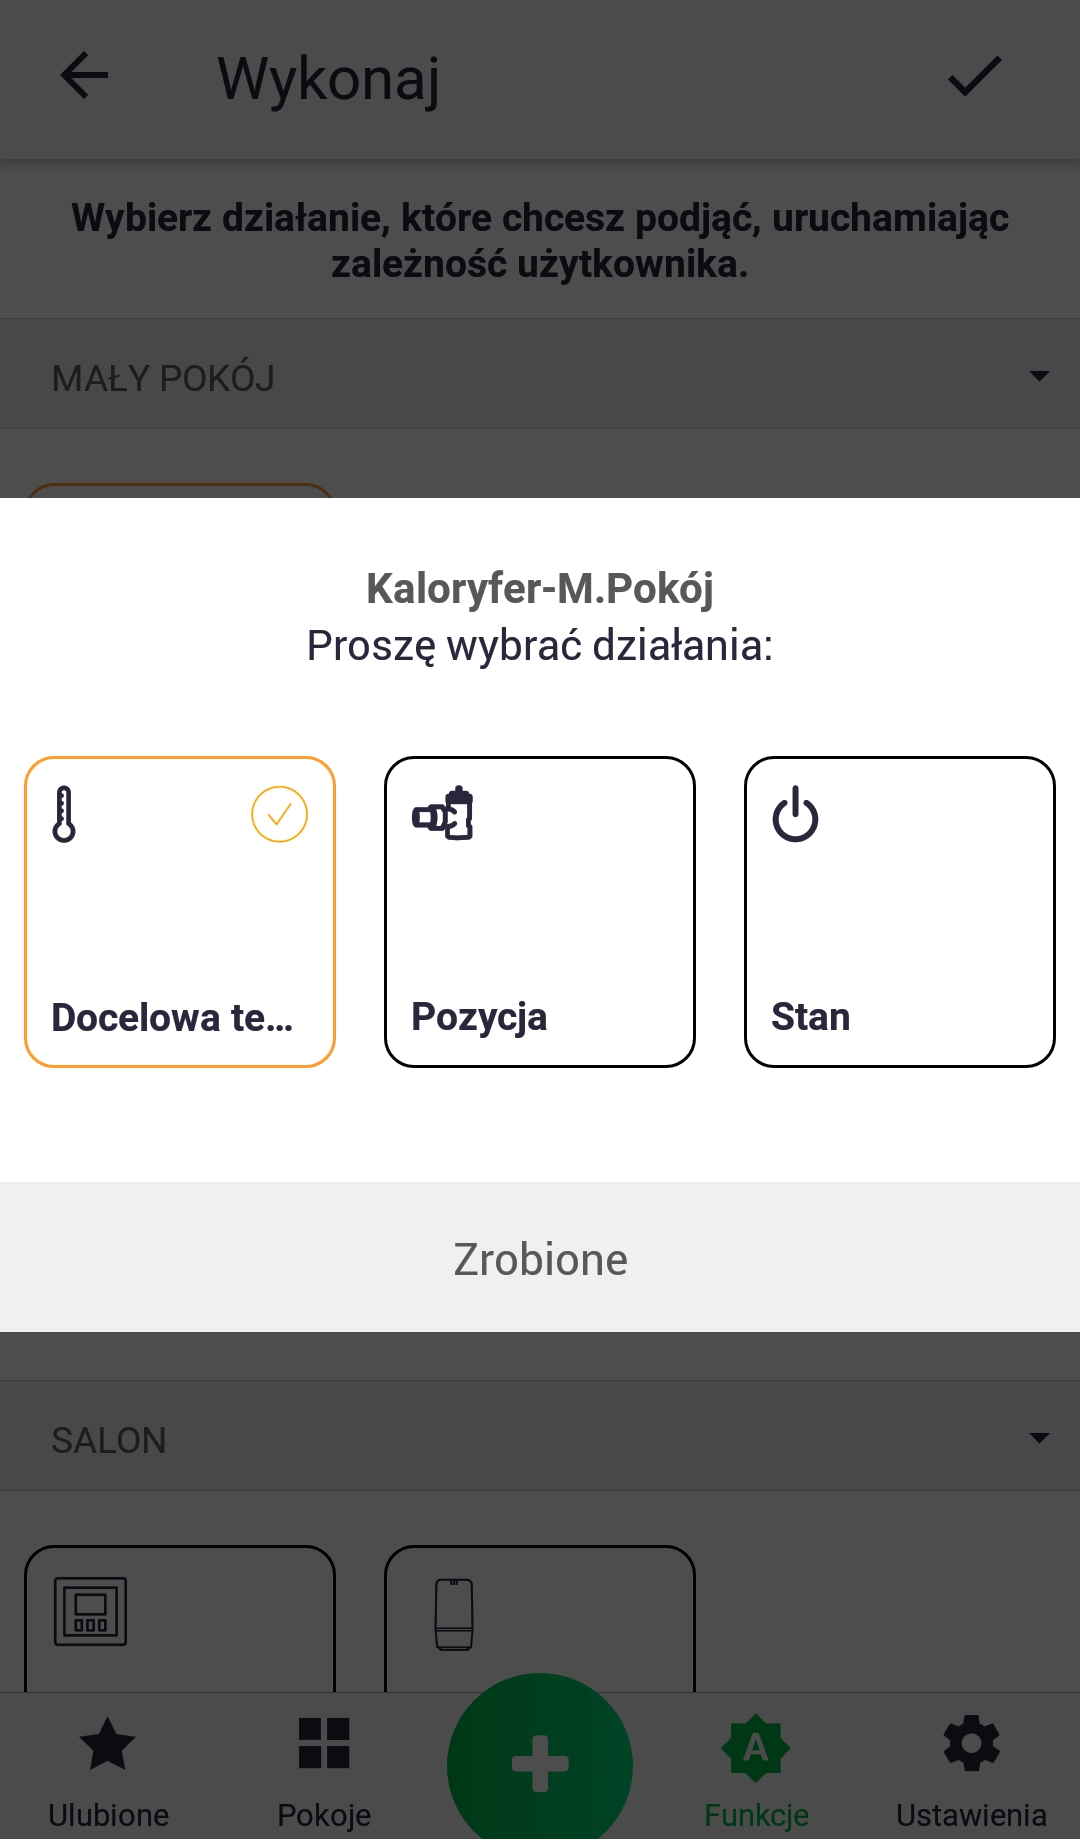
3. Select the parameter whose value we will change and click the "Done" button.
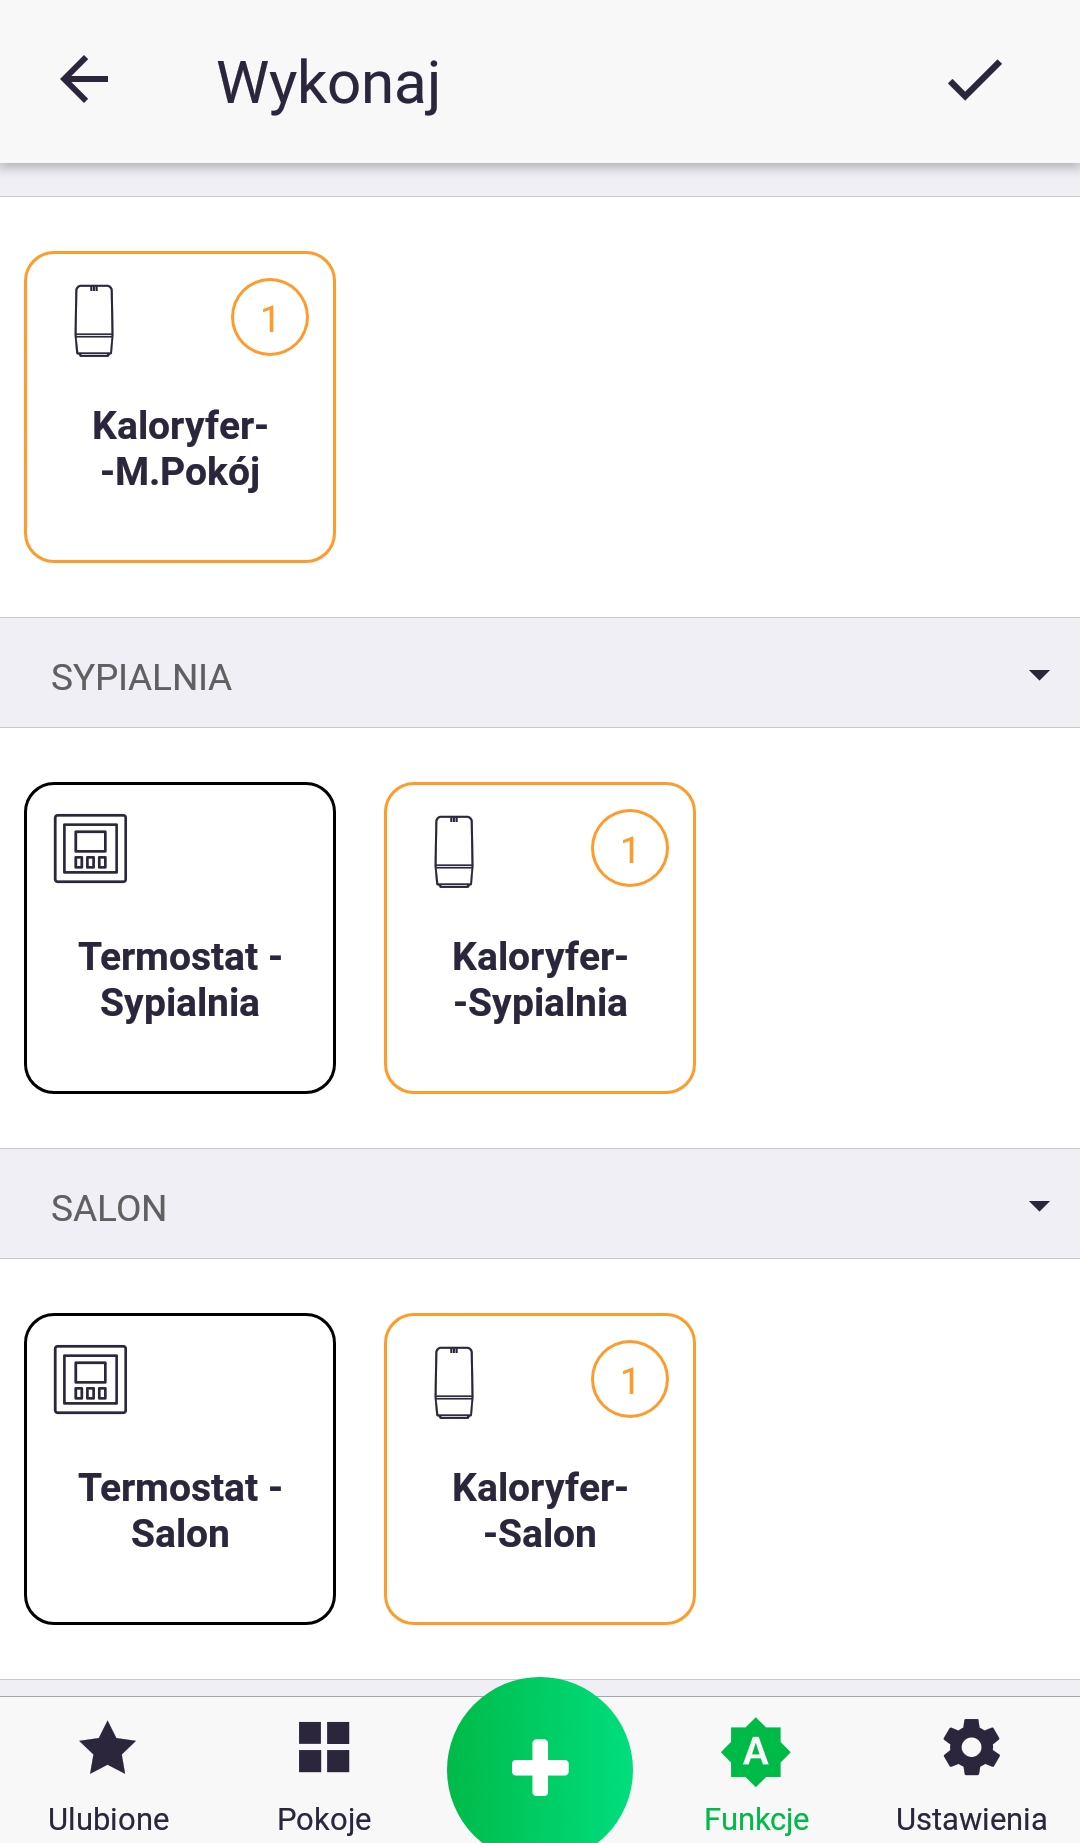
4. Repeat steps 2 and 3 if you want to add more devices.
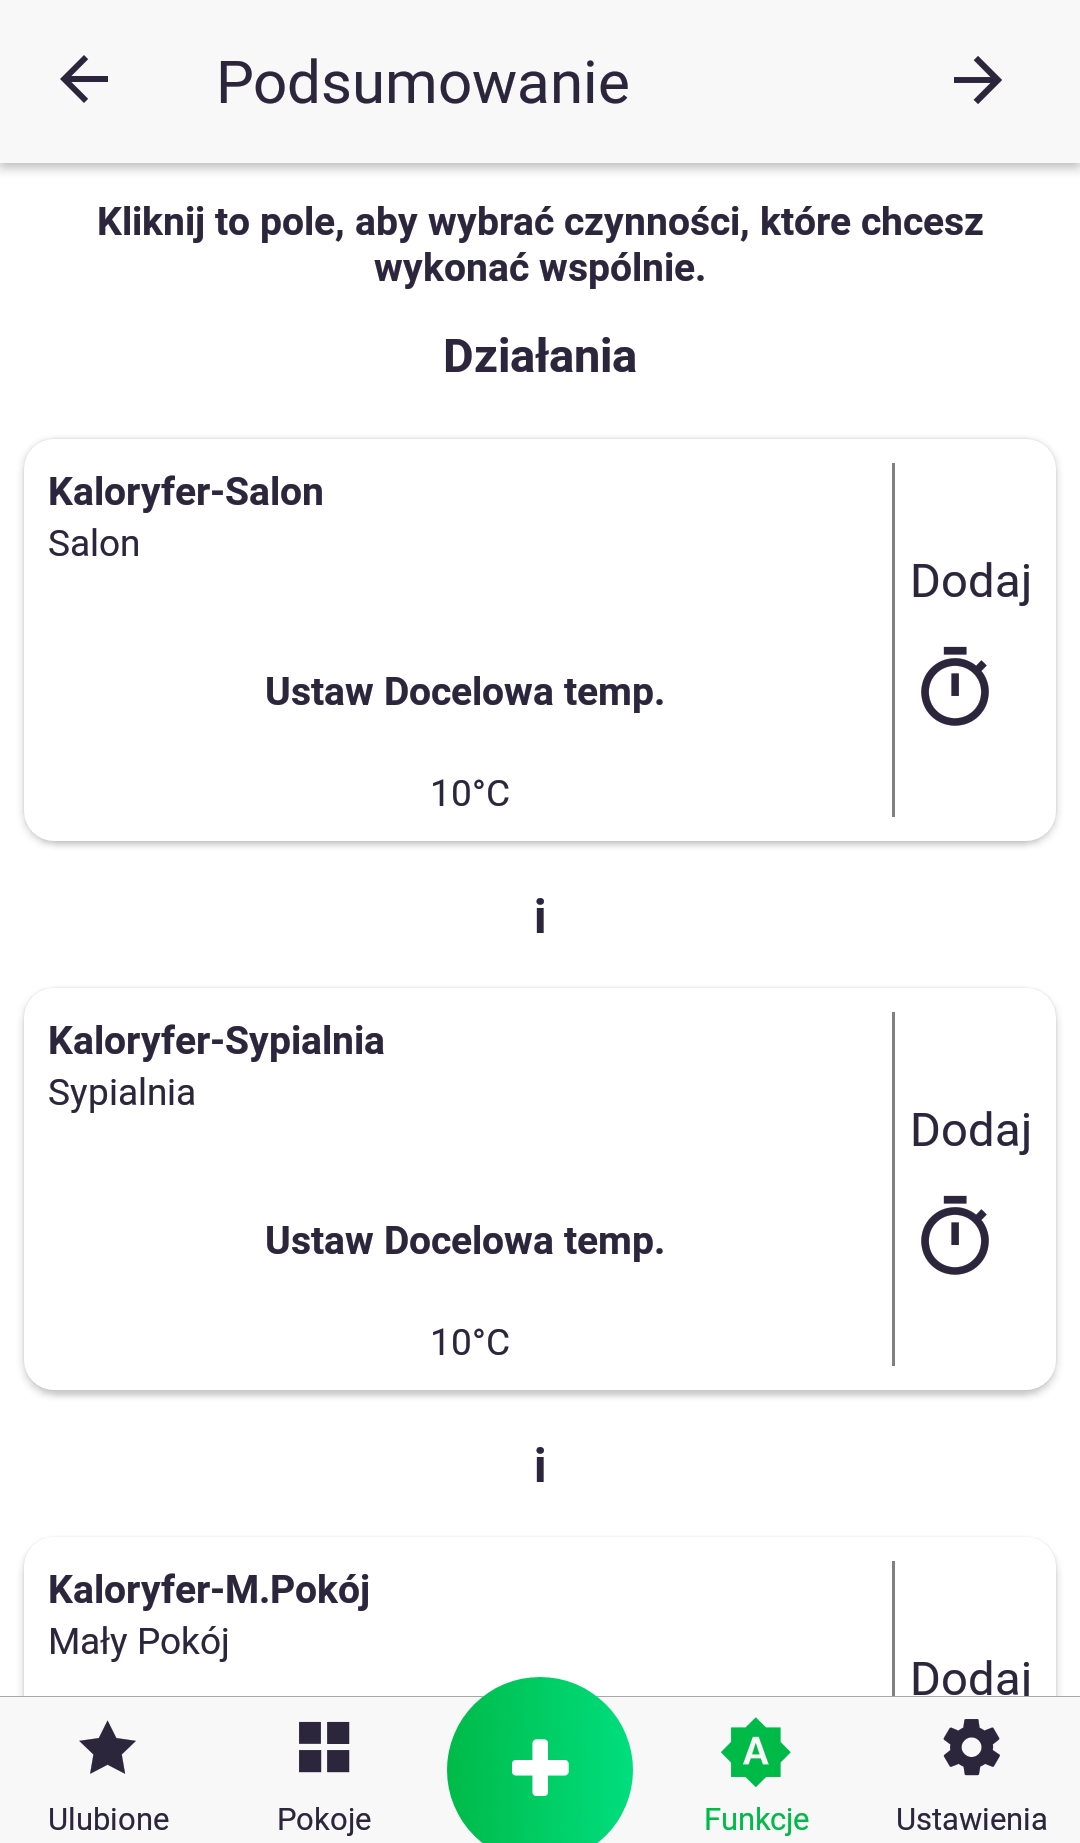
5. By briefly clicking on the icon of a given parameter from the list, you can proceed to setting its value.
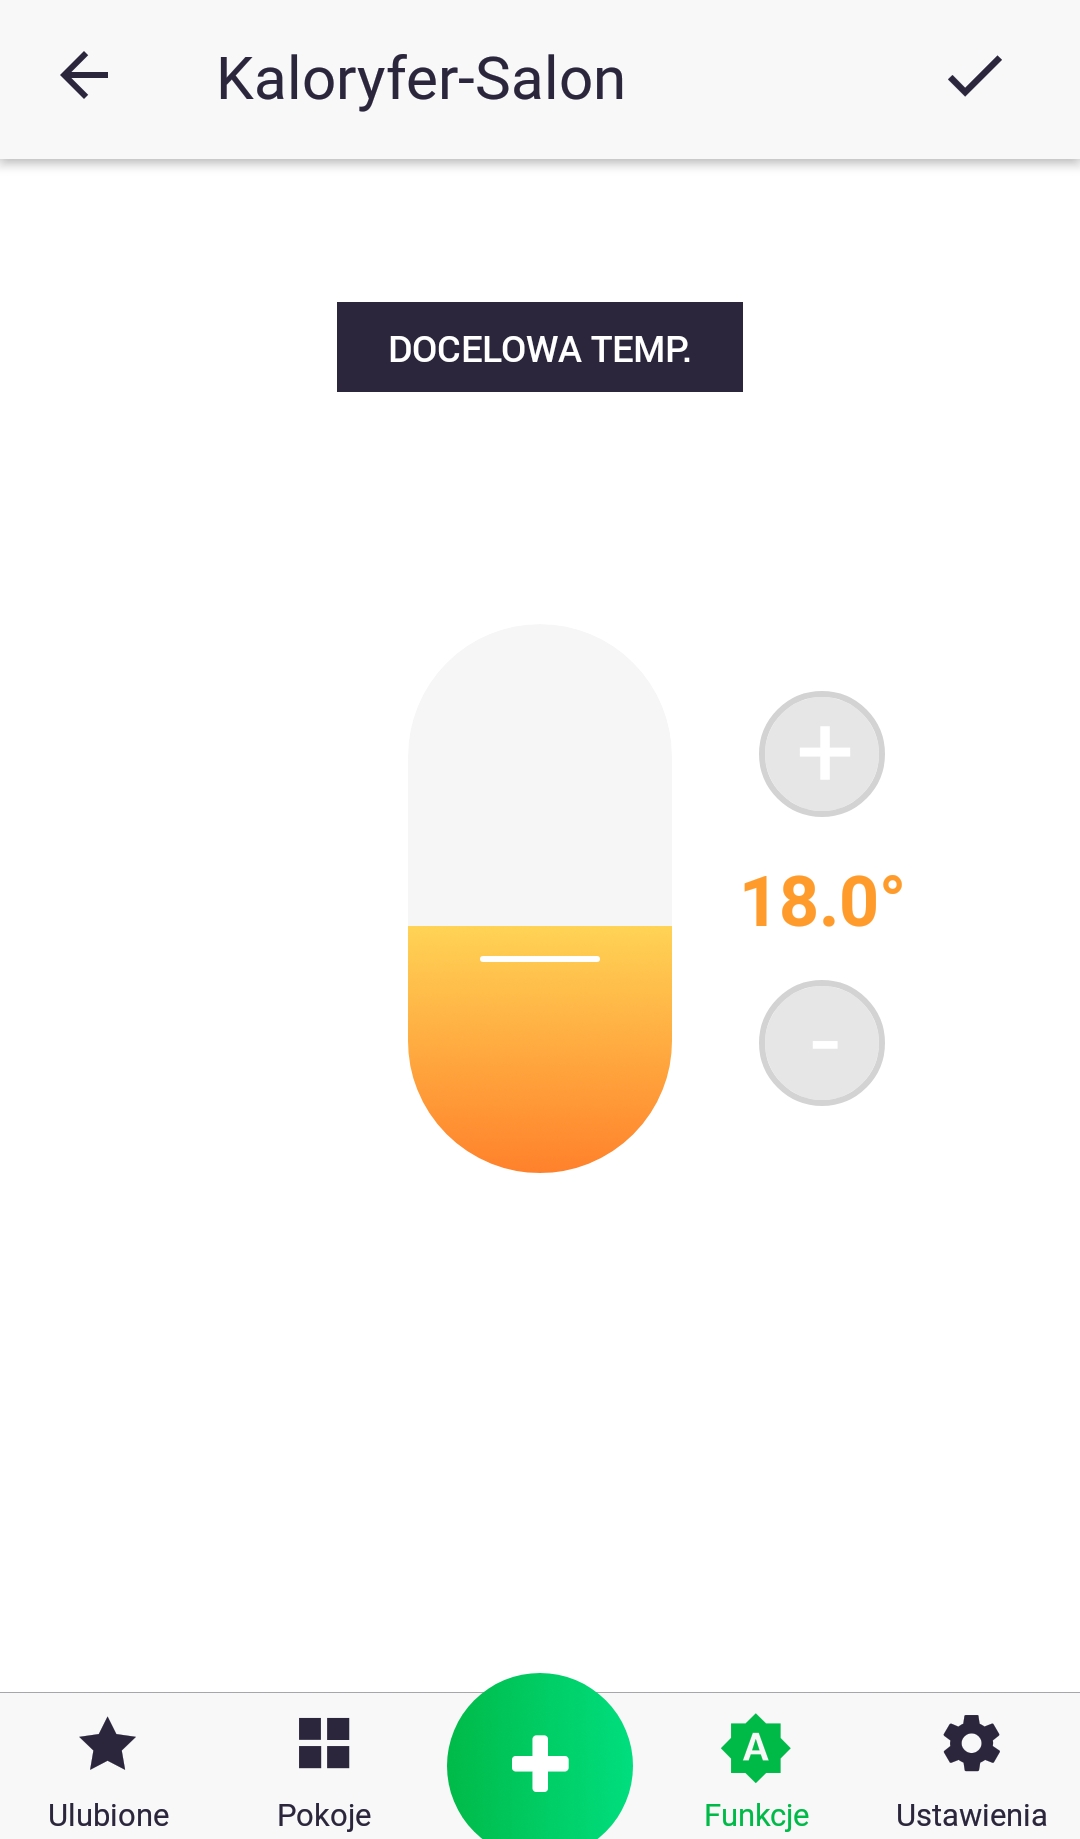
6. In this case, we set the target temperature value by changing the slider position or using the plus and minus signs.
7. Verify everything is correct and name your function. Confirm its creation with the button at the top of the screen. You've just created a new runtime function!

We can run the function by briefly clicking on its icon in the "Functions" tab or in the "Favorites" tab (if we added it to favorites and checked "Group favorite functions" in the settings).
Push notifications
Push notifications notify us of specific actions even when we don't have the app open on our phone, such as a flooded apartment. Notifications appear in the phone's status bar. Notifications can be set for specific functions and devices.

Notifications for a feature are set by editing it and selecting "Push Notifications." You can also set your own notification content by clicking "Notification Content."

- To set notifications for a specific device, go to its control screen, then to settings, and then click the bar called "Notifications".
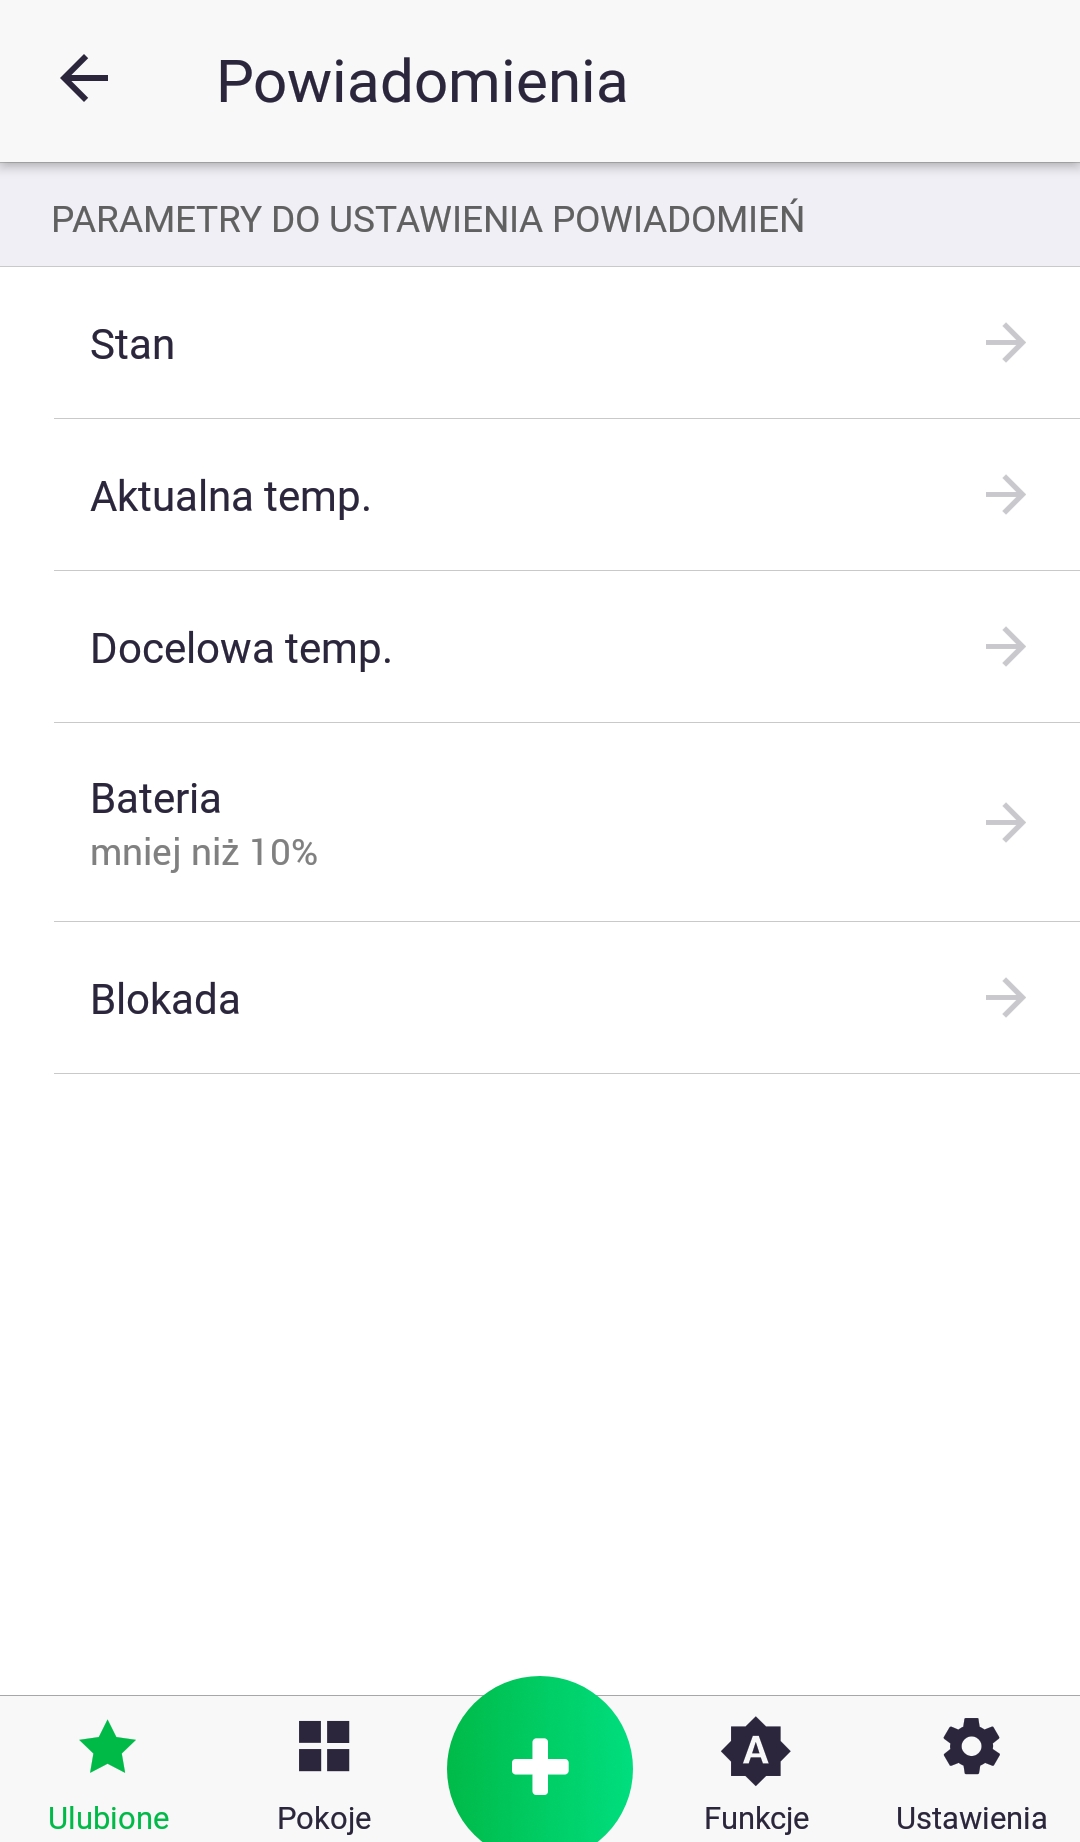
2. From the list of parameters, select the parameter you want to set by briefly pressing its name.
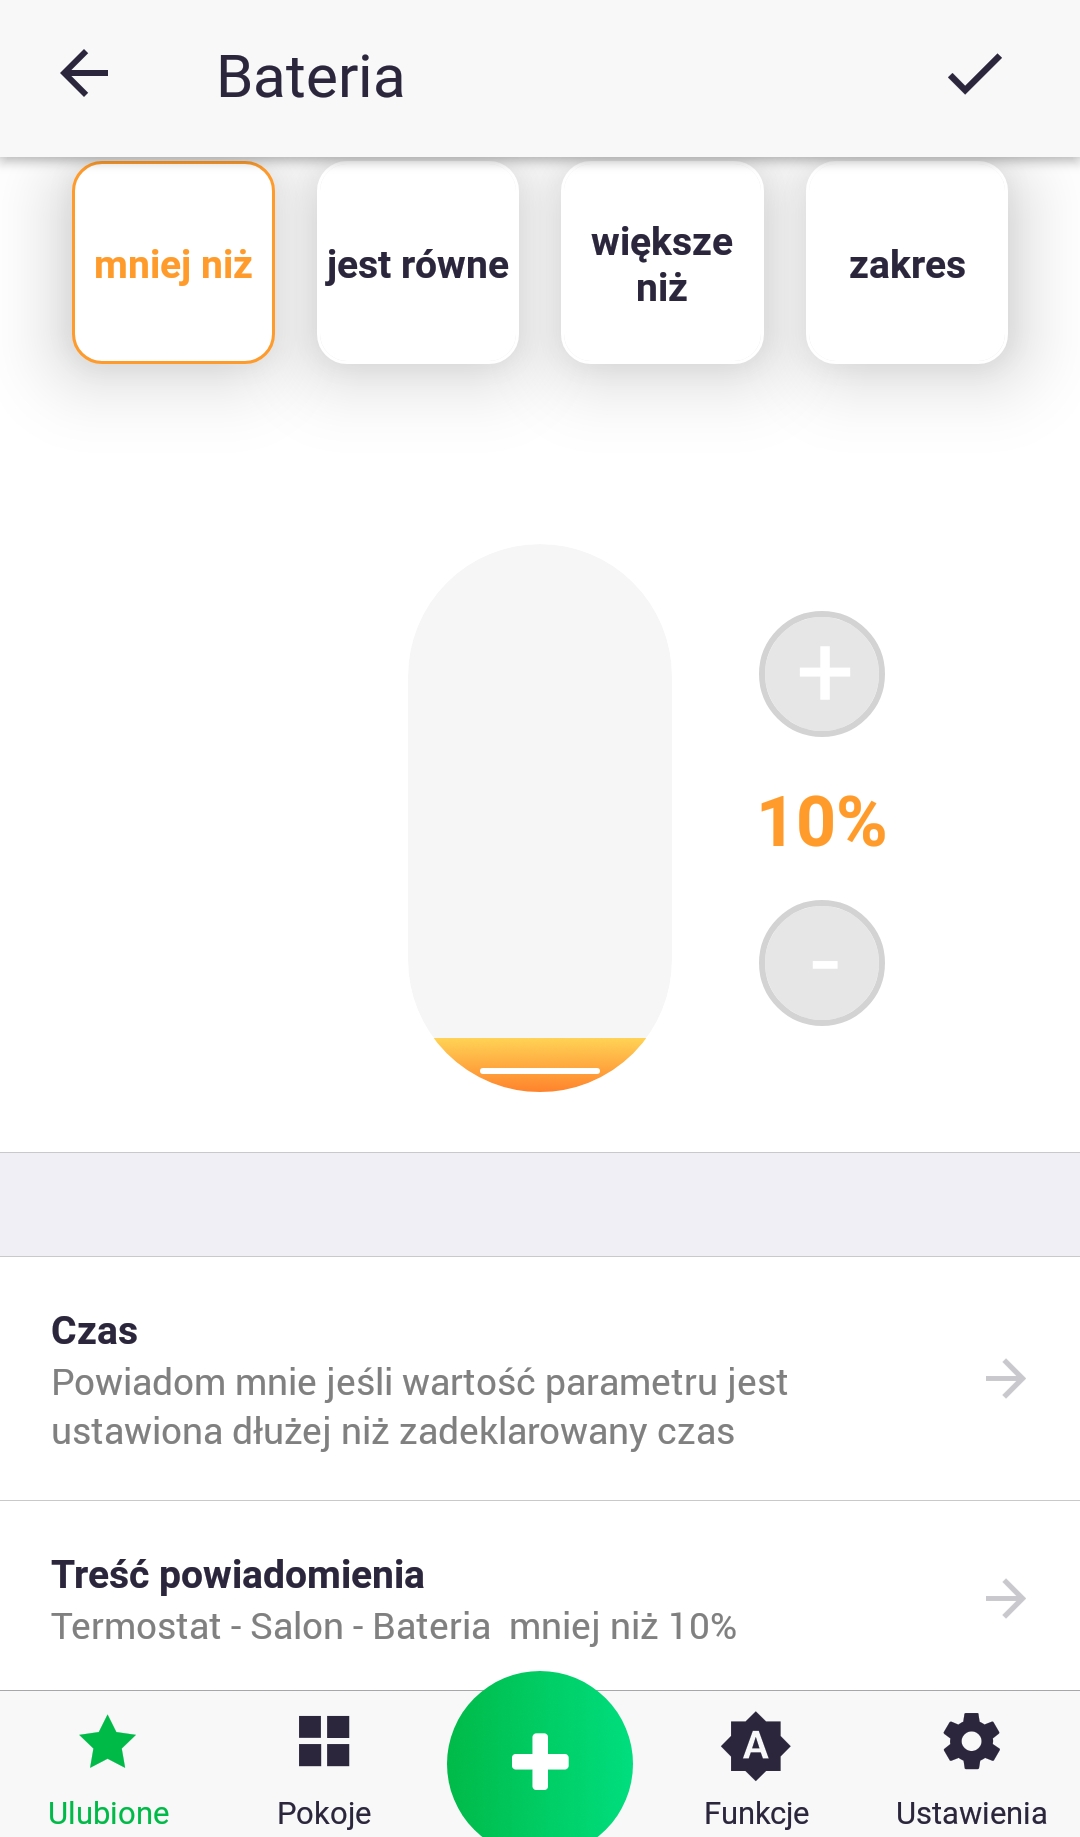
3. When setting a notification for a given parameter, we can choose from several conditions (visible at the top of the screen) and the time after which the message will appear in the status bar, e.g. if the battery parameter value is less than 10% for 2 hours, notify me by displaying a message with the specified content.
Settings

In the settings, you can make changes to your user account (name, surname, password change), general settings regarding the application, and privacy (e.g. sending marketing materials).
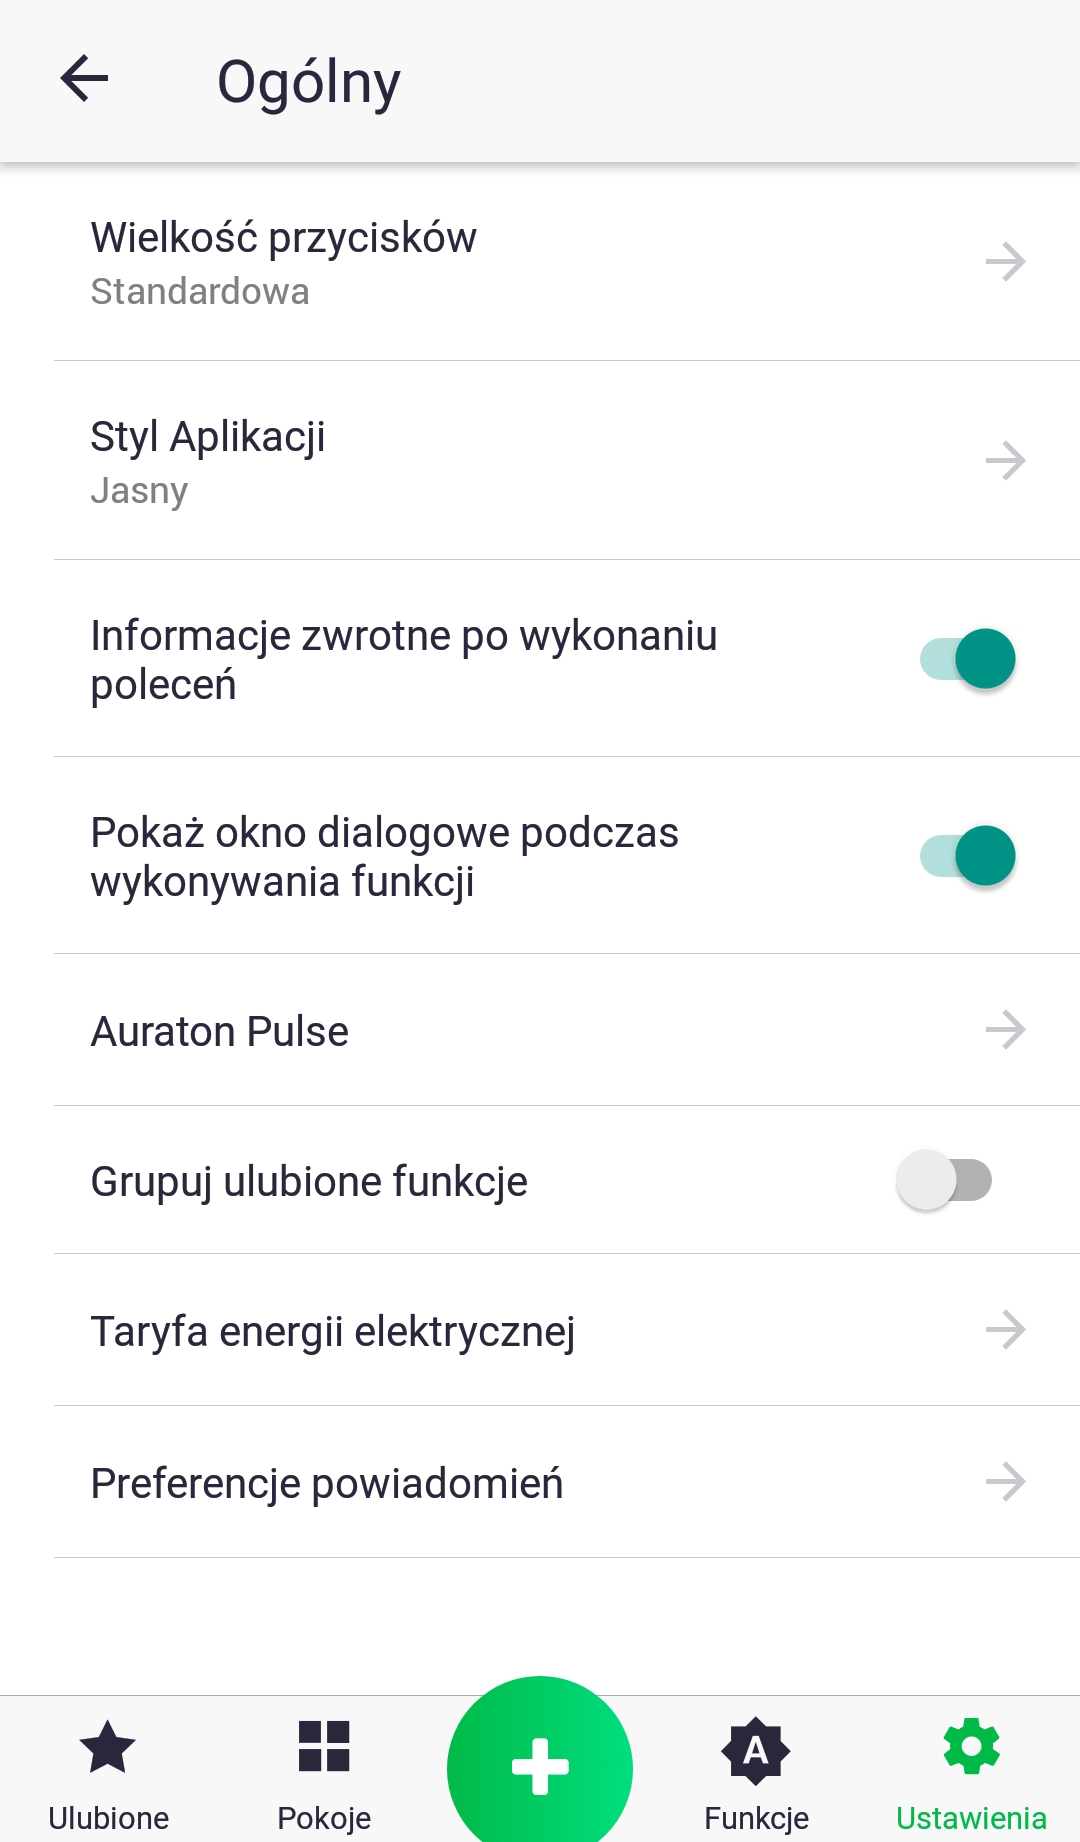
In the case of general settings it is possible to:
- changing the size of buttons
- changing the application color to dark or light
- changing the settings of the Auraton Pulse control panel (location, notification LED color)
- enabling the option of grouping favorite functions in the "Favorites" tab
- setting the electricity tariff if we have connected devices that measure the energy consumption of given actuators
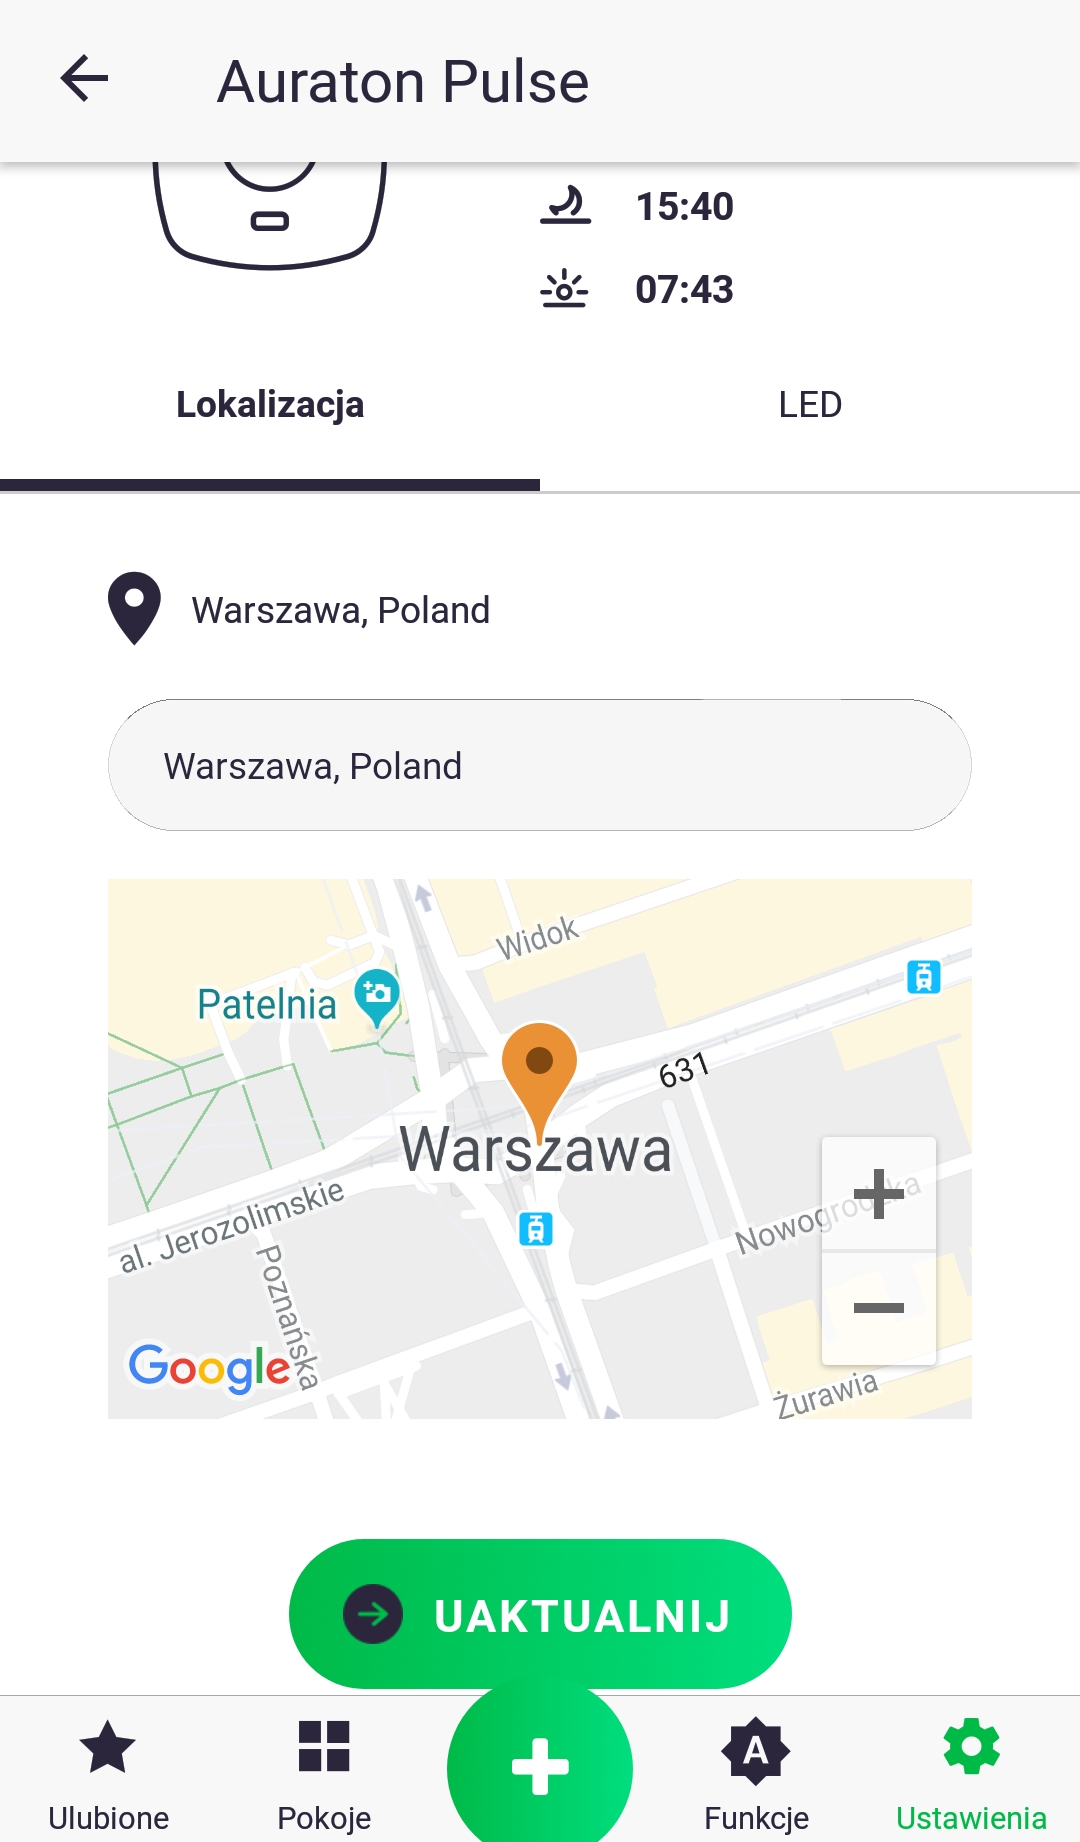
The location of the Auraton Pulse control unit can be set by entering the address or searching for the current location of the phone/tablet and then confirming with the "Update" button.
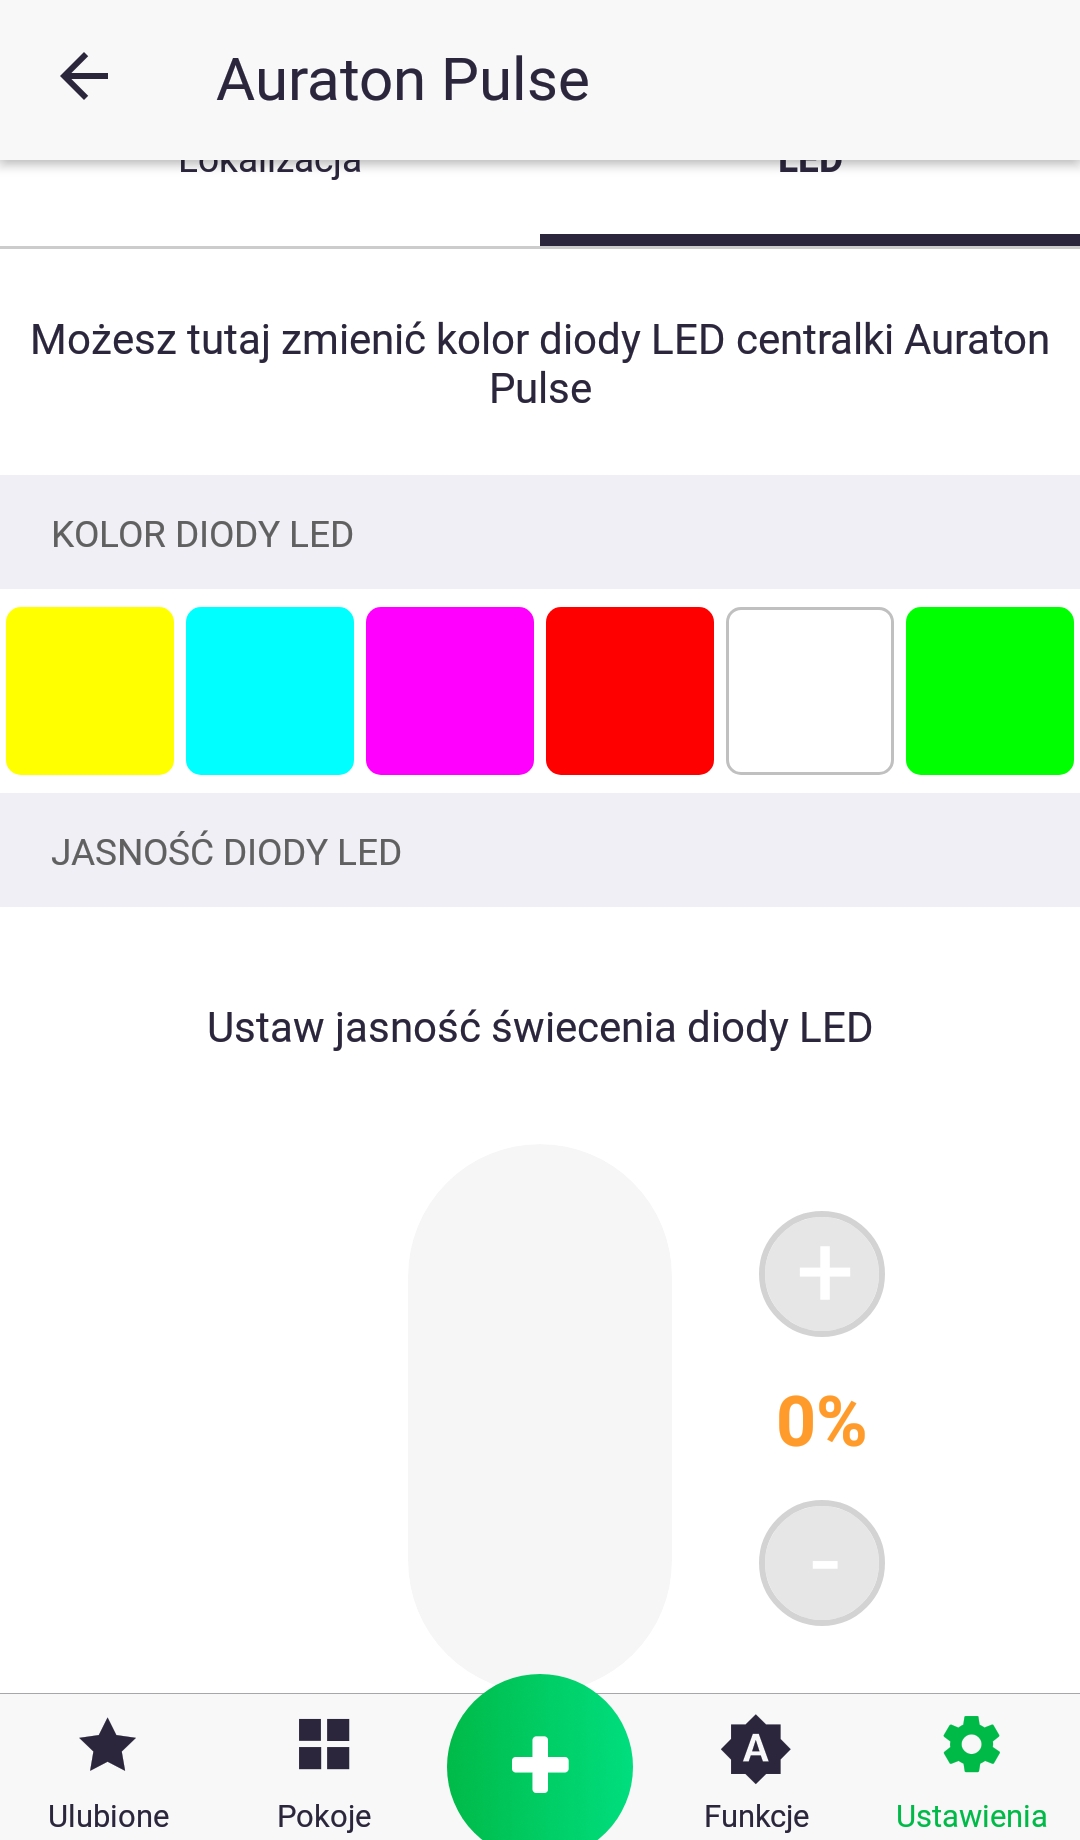
In the "LED" tab in the Auraton Pulse settings, we can choose the color of the notification LED on the device and set its brightness using the slider.
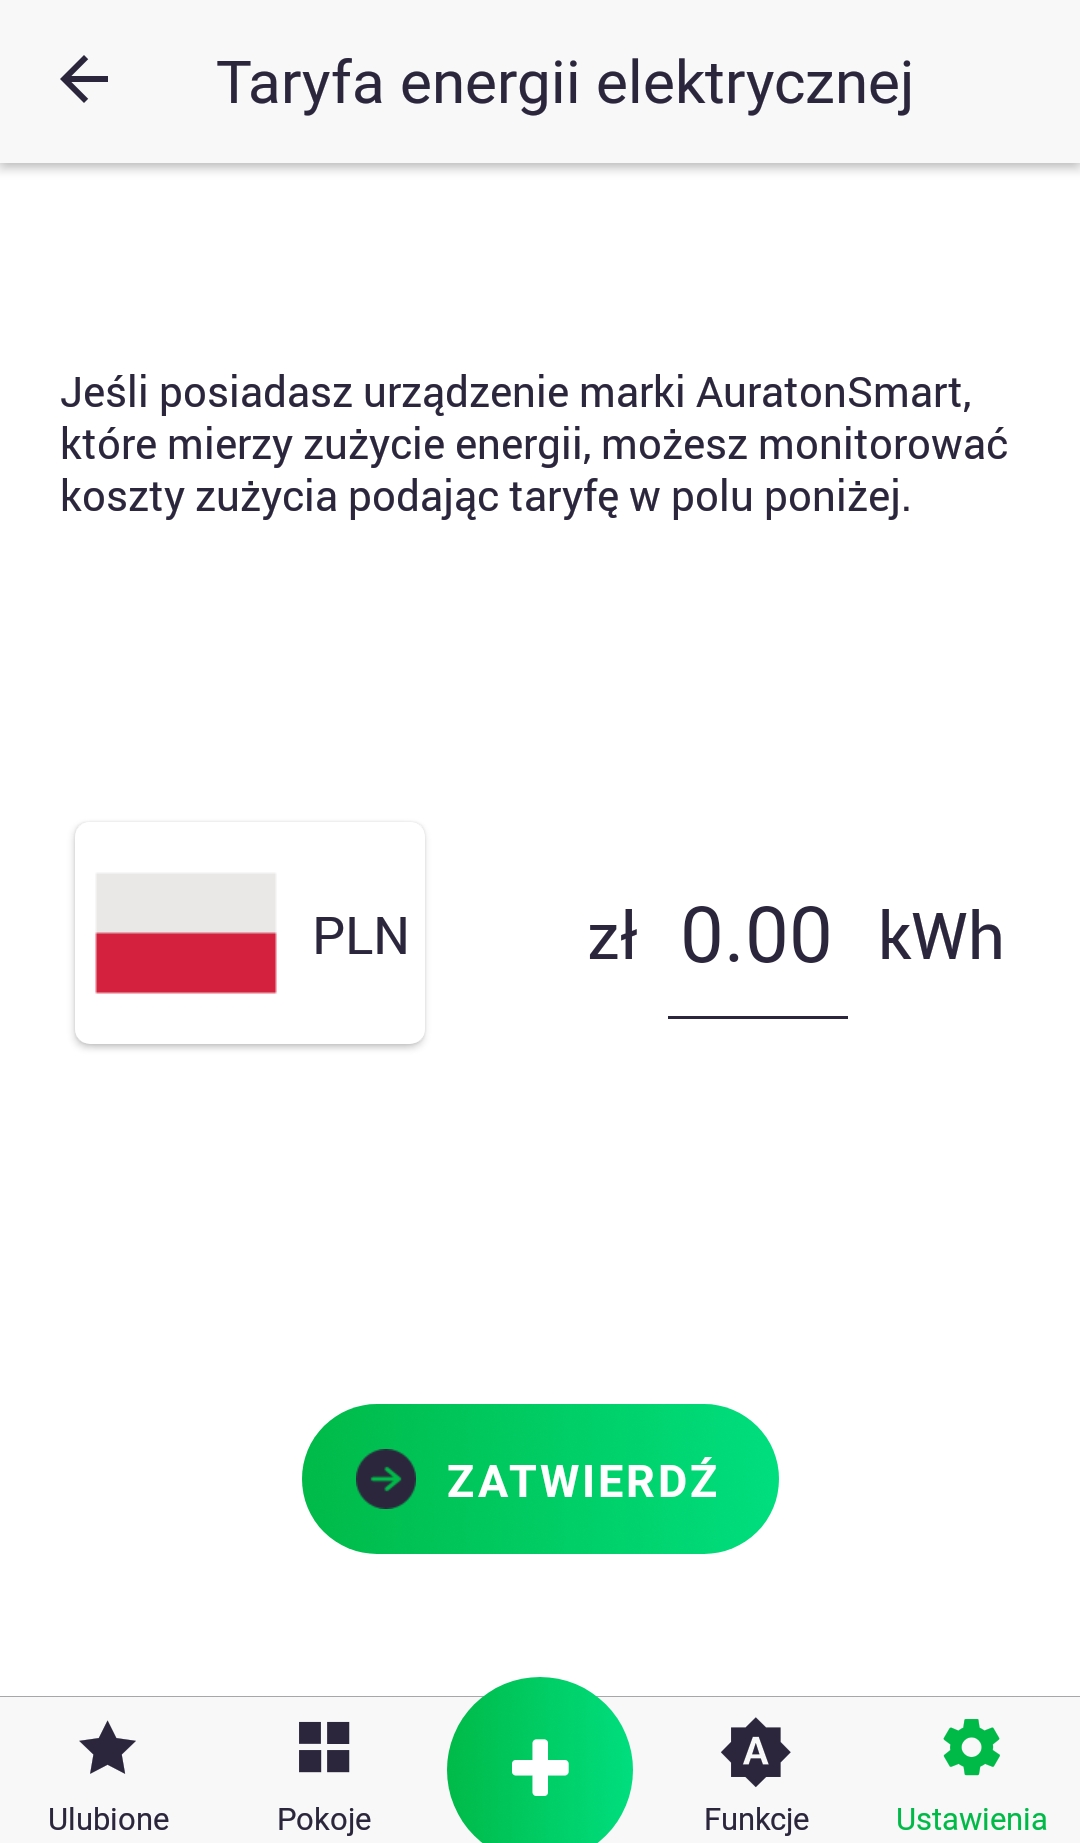
When setting your electricity tariff, first select the currency by clicking the flag icon and then enter the kWh rate. Changes are confirmed by clicking the button.
Peripheral software update
The Auraton Smart system allows for remote software updates for peripheral devices, such as the Heat Monitor (HM) thermostat or the Radiator Controller (RC) thermostatic head. Updates are performed over the air (OTA), which is always followed by a device restart. If, after installing the new software, the device is enriched with features that are not desired, it is possible to manually restore the previous version according to the device's instructions.
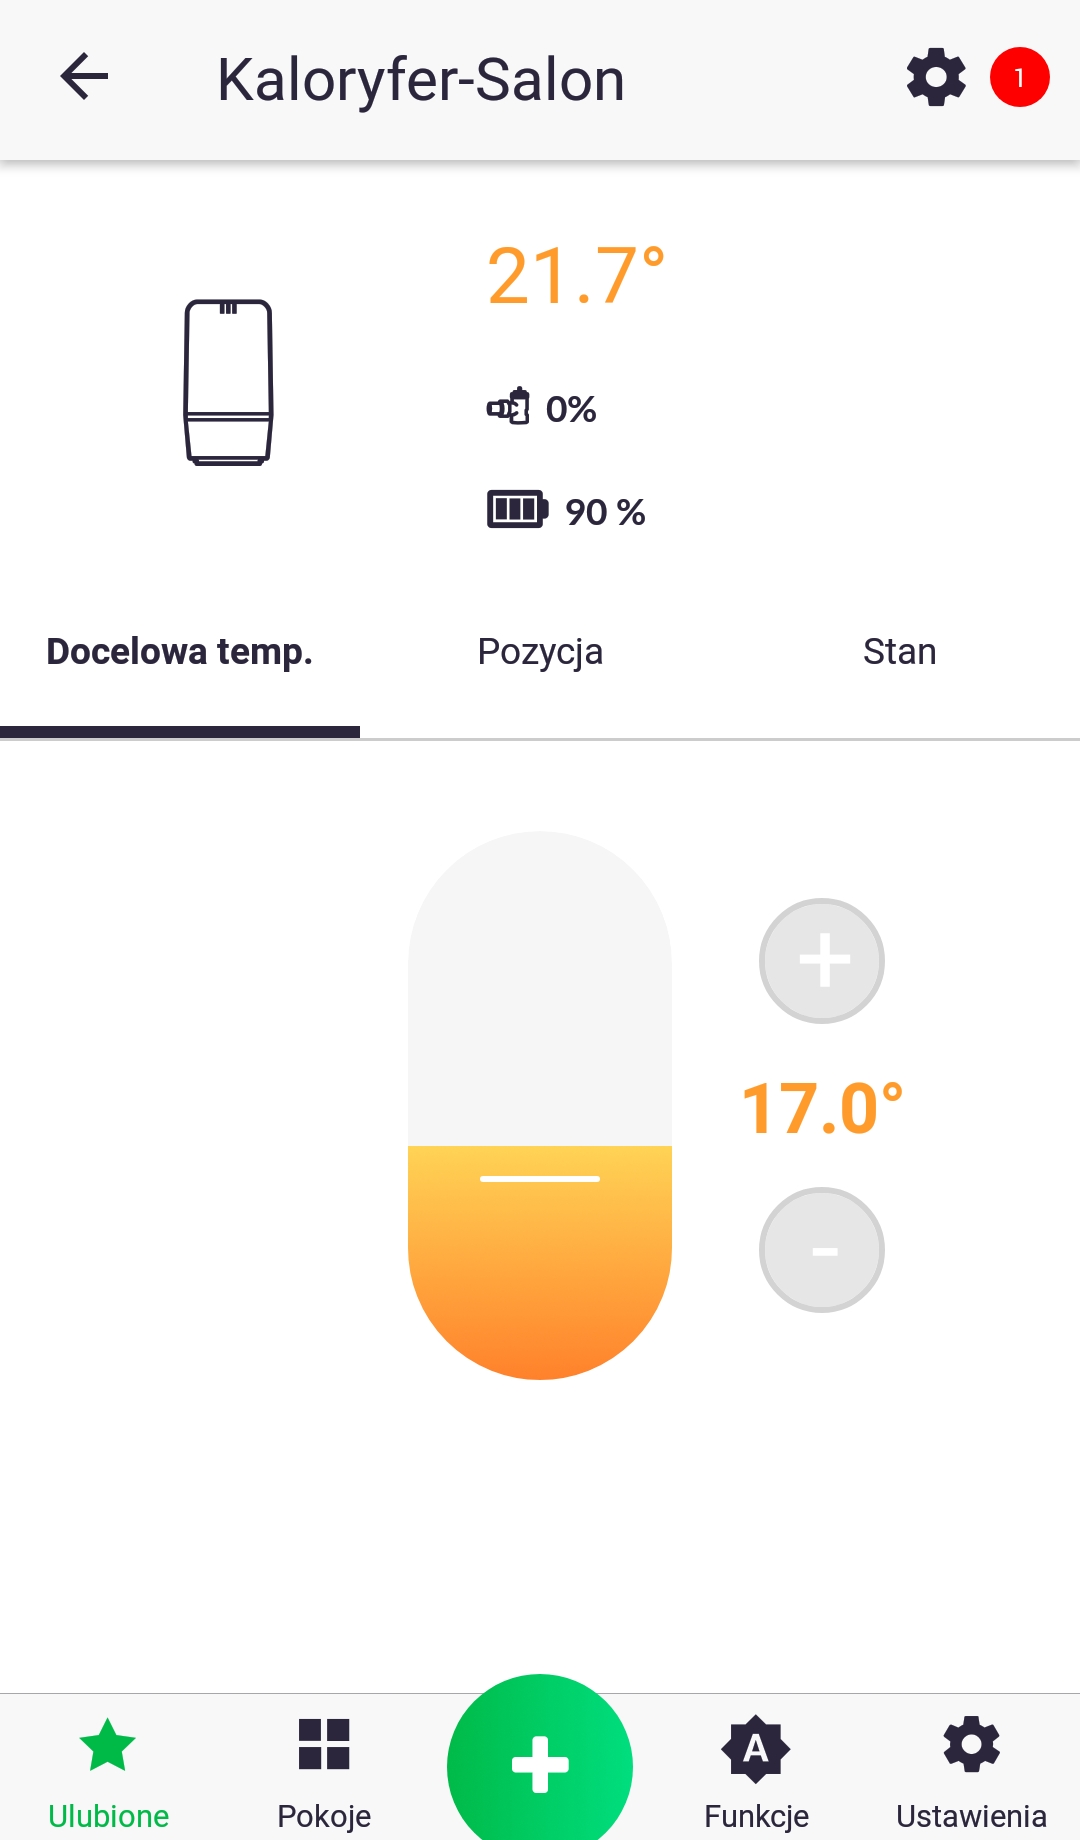
- A red marker indicates that an update is pending for a given device. To perform an update, go to the control screen for a thermostatic head, for example, by long-pressing its icon.
2. Follow the marker and click the device settings icon. On the next screen, press "Software Update."
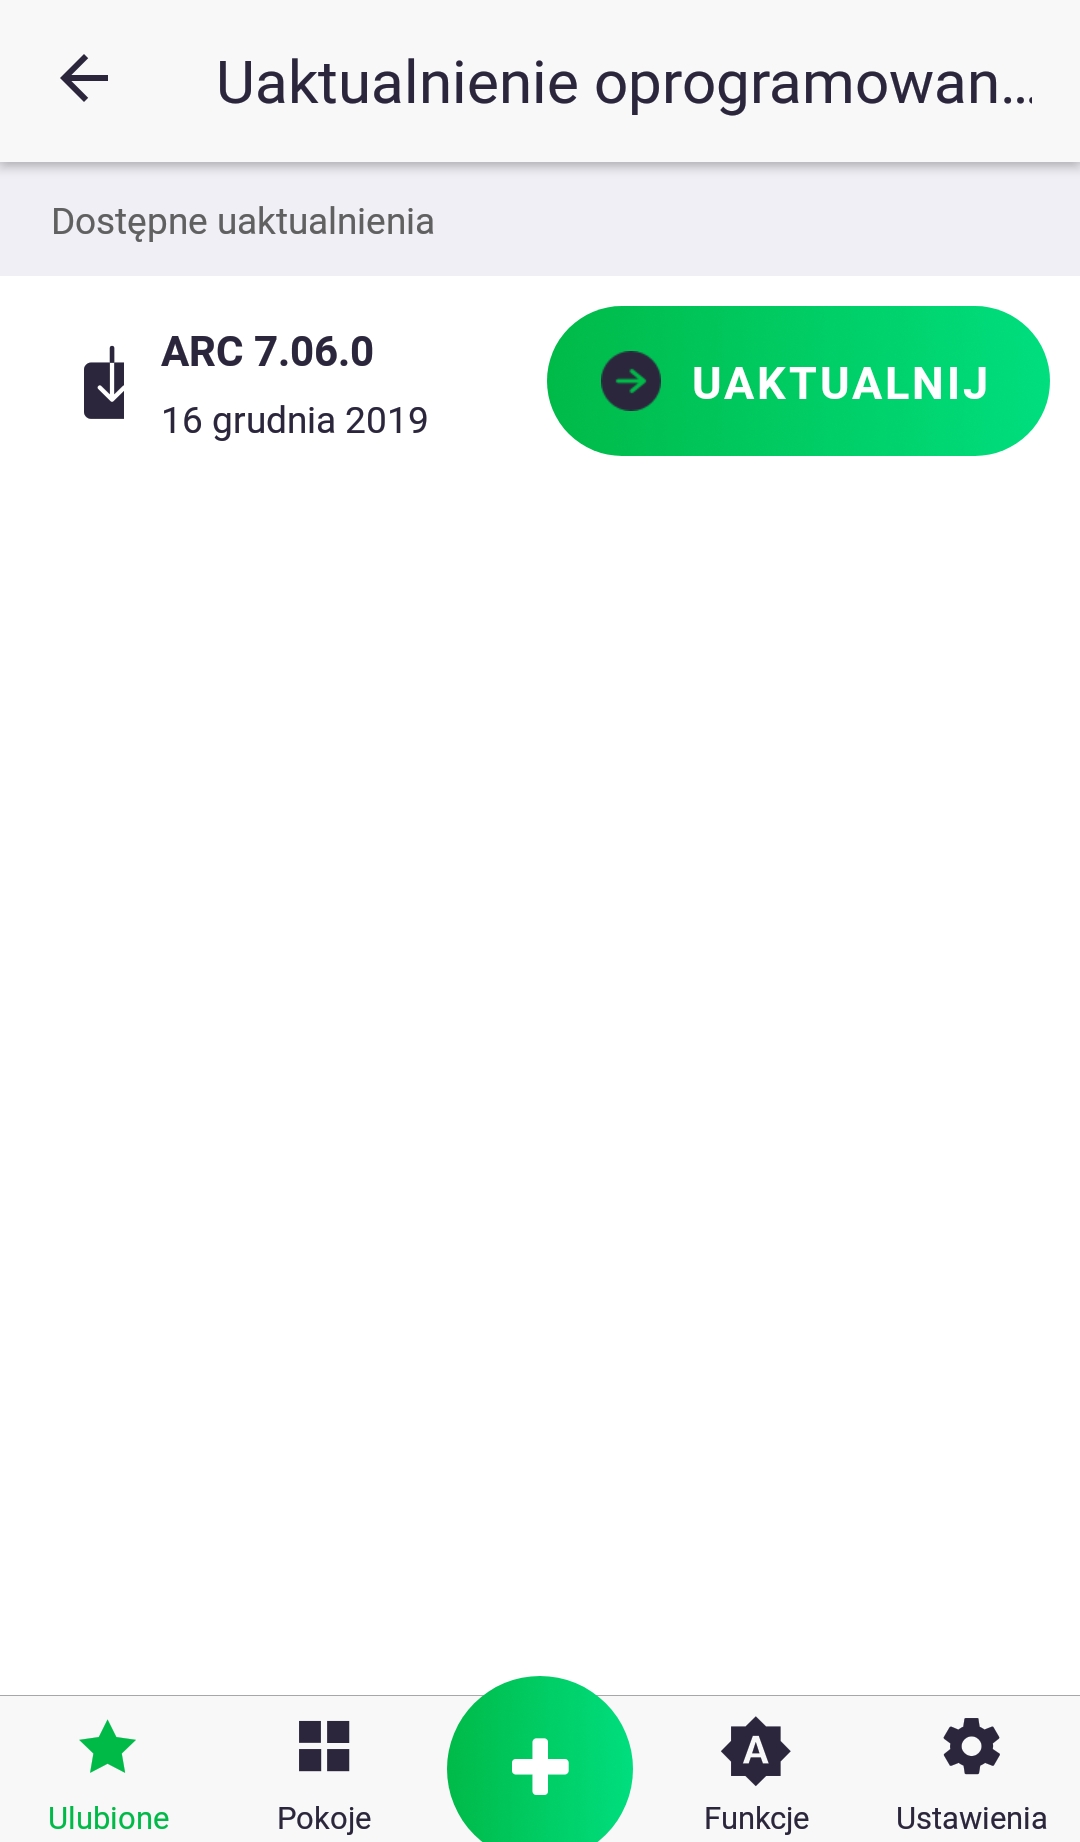
3. Click "Update." The update may take several minutes, during which time the Auraton Pulse control panel will not respond to commands issued from the app. After the update, the red check mark should disappear; if this doesn't happen, repeat the steps.