User manual ver. 20201122
This document collects information on the safety, installation and use of the AURATON Tucana P device.
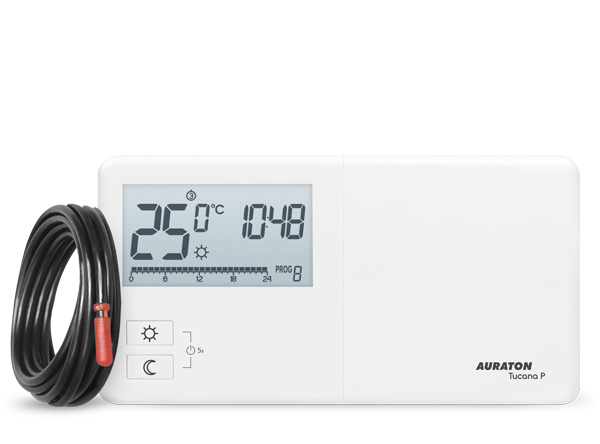
Weekly wired temperature controller (single sensor)
The AURATON Tucana P is a weekly, wired temperature controller with an additional external temperature sensor on the cable, designed to work with a gas or electric heating device. Designed to control underfloor heating.
| ST UV |
4 independently adjustable temperatures: Day, night, anti-freeze, holiday. |
| & | 9 independent temperature programs , including 6 user-modifiable. |
| LCD | Backlit LCD display Thanks to the backlit display, we can monitor the operation of the device even in a dimly lit room (3 backlight colors to choose from). |
Description of AURATON Tucana P
weekly, wired temperature controller
On the front right of the AURATON Tucana P, you'll find a sliding cover. Opening it reveals buttons. The cover can be removed for battery replacement.
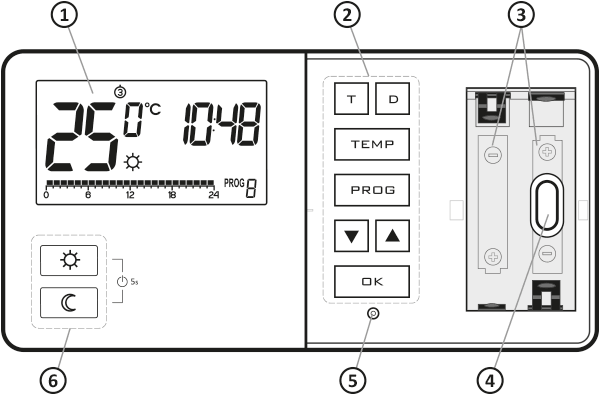
- LCD display
- Programming buttons
- Space for 2 batteries (AA LR6 1.5 V)
- Mounting hole
- RESET button
- Mode selection buttons:
S – day mode
T – night mode
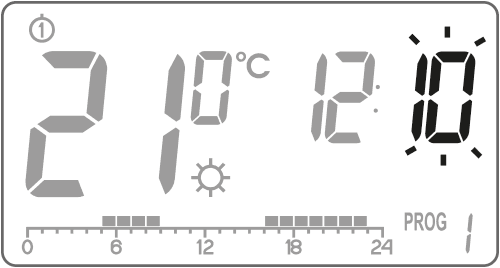
Display
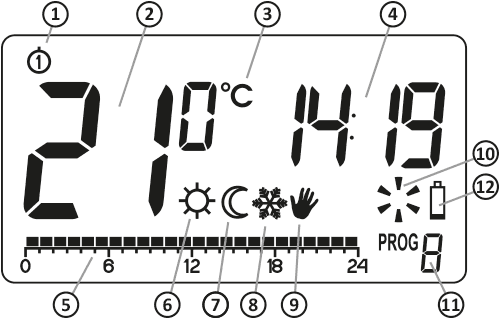
- Day of the week (8 ) – Indicates what day of the week it is. Each day is assigned a number.
- Temperature – In normal operation mode, AURATON Tucana P displays the temperature of the room in which it is installed.
- Temperature Unit – Indicates whether the temperature is displayed in degrees Celsius (°C).
- Clock
The time is displayed in 24-hour format. - Timeline:
A program progress indicator. This line is divided into 24 segments. Each segment represents one hour. This line shows how the program will progress (see the "Timeline" section). - Day mode indicator (S )
Indicates that the AURATON Tucana P is operating in day mode. (see chapter: "Temperature programming") - Night mode indicator (T )
Indicates that the AURATON Tucana P is operating in night mode. (see chapter: "Temperature programming") - Anti-freeze mode indicator (U )
Indicates that the AURATON Tucana P is operating in anti-freeze mode. (see section: "Anti-freeze mode") - Manual control indicator (V )
Indicates that the AURATON Tucana P is operating in manual mode (see chapters: "Manual control" and "Holiday mode") - AURATON Tucana P power on indicator (Y )
Segment informing about the device's operating status. Visible when the controlled device is turned on. - Program number
Indicates the number of the program currently running. (See chapters: "Factory programs" and "Weekly programming") - Battery drain (X)
This indicator appears when the battery voltage exceeds the minimum allowable level. The batteries should be replaced as soon as possible.
NOTE:
To maintain the programmed parameters, the battery replacement operation time should not exceed 30 seconds.
Choosing the right location for the AURATON Tucana P
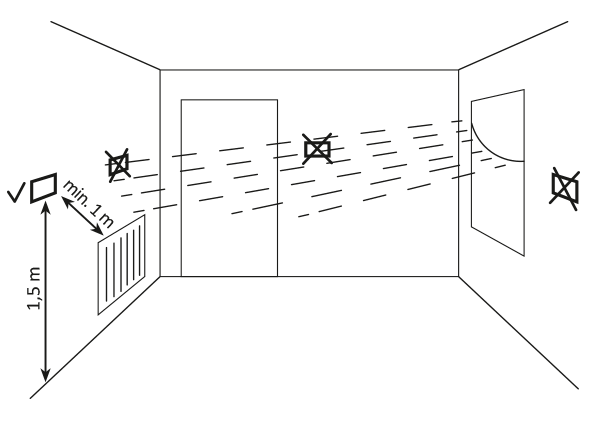
The proper operation of the AURATON Tucana P is significantly affected by its location. Siting it in a location lacking air circulation or exposed to direct sunlight may result in improper temperature control. The AURATON Tucana P should be installed on an interior wall (partition wall), in an environment with free air circulation. Avoid proximity to heat-emitting devices (TV, radiator, refrigerator) or locations exposed to direct sunlight. Proper operation may be impaired by proximity to doors, which may expose the AURATON Tucana P to potential vibration.
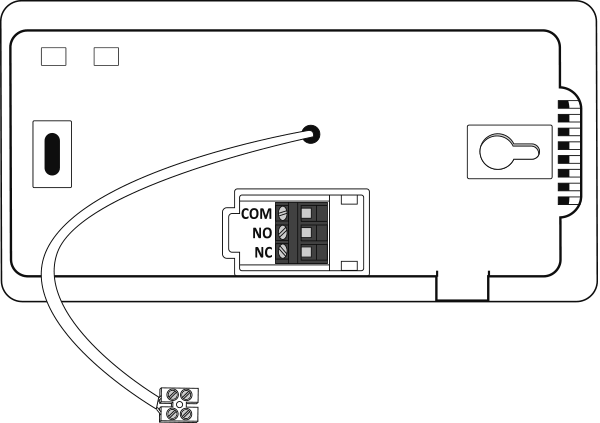
Connecting the cables to the AURATON Tucana P
The wiring terminals are located on the rear panel of the AURATON Tucana P. This is a typical single-pole, two-state relay. In most cases, the NC terminal is not used.
External temperature sensor
For correct operation of AURATON Tucana P, an external temperature sensor must be connected to a 2.5 m cable (included in the set).
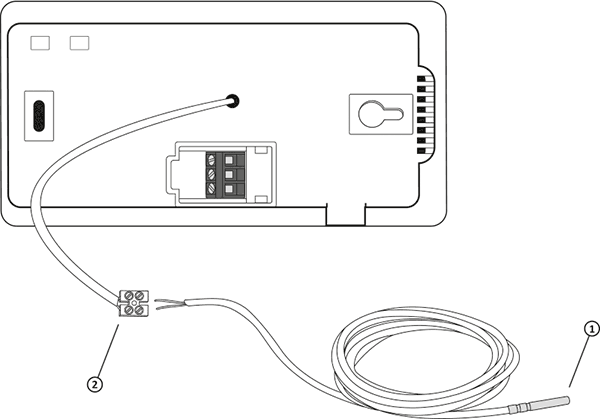
- External temperature sensor
- Connection cube
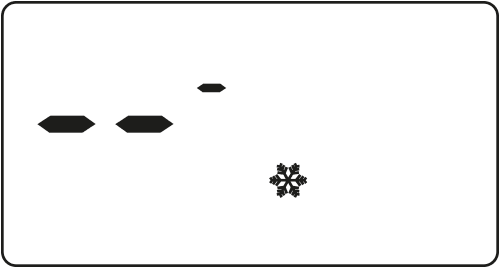
If the external temperature sensor is not connected or is damaged, the display will only show dashes at the temperature measurement point.
Battery replacement
X
If the low battery symbol ( ) appears on the display,X it means the battery voltage has dropped to the minimum allowable level. The batteries should be replaced as soon as possible.
To maintain the programmed parameters, the battery replacement operation time should not exceed 30 seconds.
We recommend alkaline batteries for powering AURATON controllers. Rechargeable batteries should not be used due to their low rated voltage.
Mounting the AURATON Tucana P – weekly, wired temperature controller
To attach AURATON Tucana P to the wall:
- Two 6 mm diameter holes should be drilled in the wall (mark the hole spacing using the template included in the instructions).
- Insert the expansion bolts (included).
- Tighten the left screw with 3 mm of clearance.
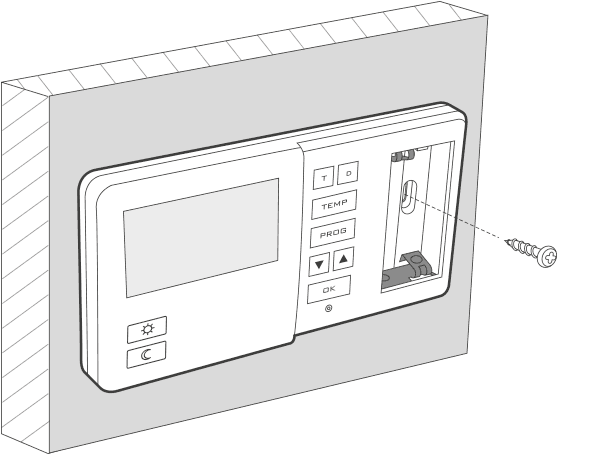
- Place the AURATON Tucana P over the screw head and slide it to the right (note the keyhole-like opening on the rear cover of the AURATON Tucana P.
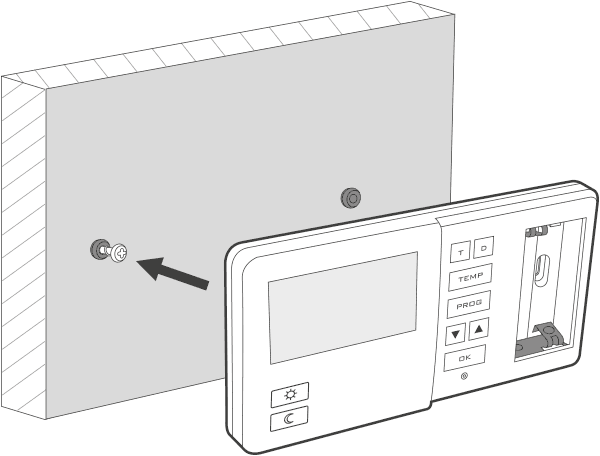
- Screw in the right screw so that it holds the installed AURATON Tucana P securely.
If the wall is wooden, there is no need to use wall plugs. Drill 2.7mm holes instead of 6mm and drive the screws directly into the wood.
First launch of AURATON Tucana P
Once the batteries are properly inserted into the slots, the LCD will display all segments for one second (display test) followed by the software version number.

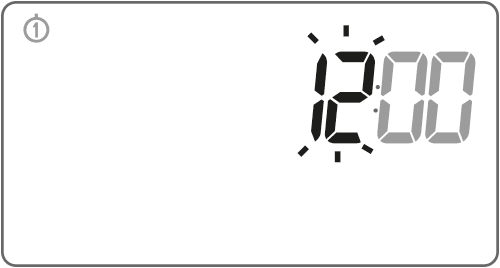
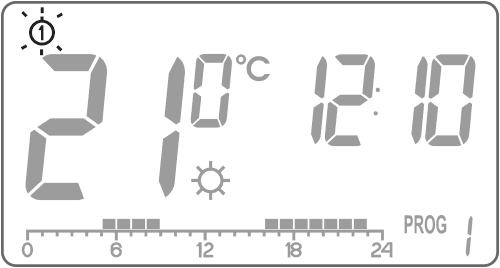
After a moment, the AURATON Tucana P will automatically enter the time setting mode. A flashing icon on the screen indicates it is currently in edit mode. Use the buttonsbc to set the desired time and confirm with the buttoni .
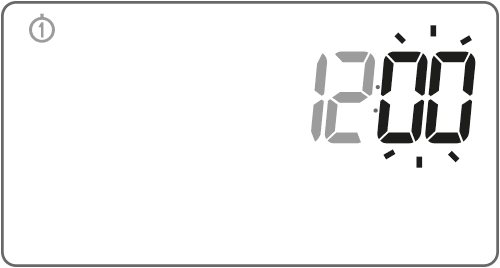
The AURATON Tucana P will proceed to the minute setting. Repeat the setting using the bc and confirm by pressing the buttoni .
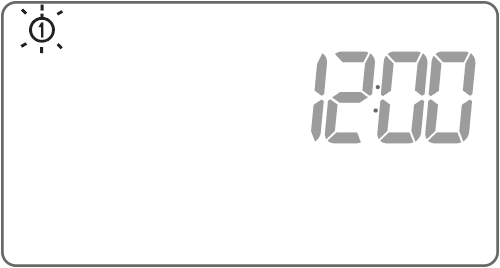
A flashing day of the week symbol appears in the upper left corner. Use the buttonsbc to set the desired day and confirm your selection with the buttoni . The AURATON Tucana P will enter normal operating mode.
When setting the hours for the first time, if no button is pressed for 60 seconds, AURATON Tucana P will automatically switch to normal operating mode.
When programming any other functions, not pressing any button for 10 seconds is equivalent to using the buttoni .
Setting the clock
To set the clock you need to:
- Press the k . The hour segment will flash on the display.
- the buttonsbc to set the correct time.
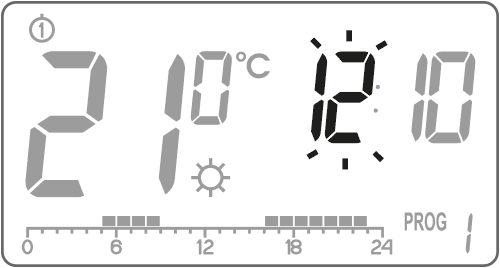
- k button again . The minute segment will start flashing.
- the buttonsbc to set the minutes.
- We confirm everything with the buttoni .
Selecting the day of the week
8
To set the day of the week:
- Press the l . One of the digits representing the current day of the week will flash on the display.
- the buttonsbc to select the appropriate day of the week.
- We confirm everything with the buttoni .
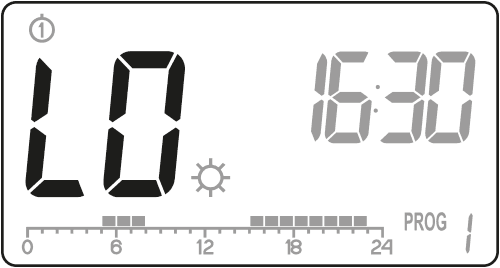
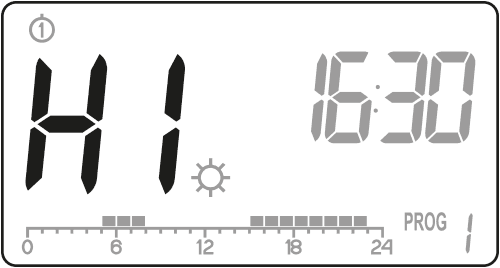
Temperature LO HI
If the ambient temperature is lower than 5 °C "LO" will appear on the display .
If the ambient temperature is higher than 35 °C
"HI" will appear on the display .
Default program settings
- Monday - Friday:
the heating device operates at the day temperature ( S ) from 05:00 to 08:00 and from 15:00 to 23:00 - Saturday - Sunday:
the heating device operates at the day temperature ( S ) from 06:00 to 23:00 - default temperature settings:
S day temperature – 21.0 °C
T night temperature – 19.0 °C
U anti-freeze temperature – 7.0 °C
Programming day, night and anti-freeze temperatures
AURATON Tucana P allows you to programmatically set 3 types of temperature:
- Daytime temperature ( S ) – from 5 to 30 °C
- Night temperature ( T ) – from 5 to 30 °C
- Anti-freeze temperature ( U ) – from 0°C to 10°C
To set one of the above temperatures:
- Press the button ?.
-
The display will show the currently set temperature with the symbol:
S – day temperature,
T – night temperature,
U – anti-freeze temperature.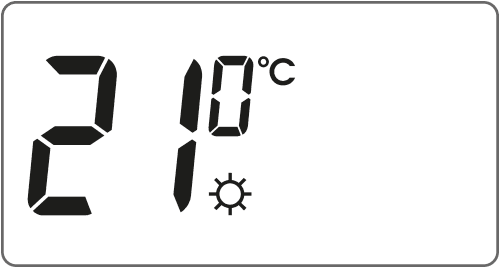
- the buttonsbc to set the desired temperature.
- ? button again, you can switch between the next temperature types to be set ( S , T , U ).
- After setting all 3 temperatures, confirm everything with the buttoni .
The night temperature setting must be lower than the day temperature. It is not possible to set the night temperature higher than the day temperature.
Anti-freeze temperature off
To turn off the anti-freeze temperature in AURATON Tucana P, set the "dashes symbol" on the display (below 0°C or above 10°C) when programming this temperature.
Introduction to programming
Timeline
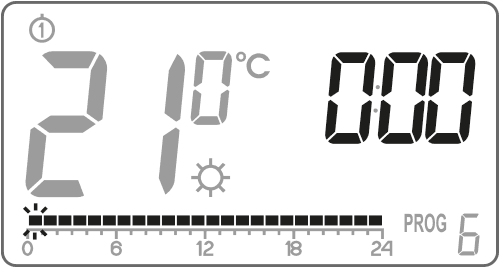
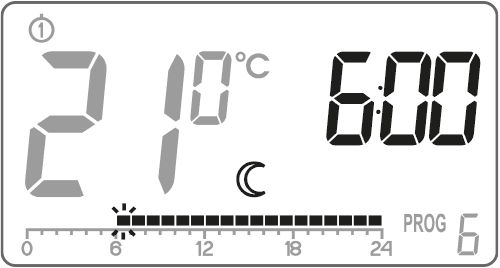
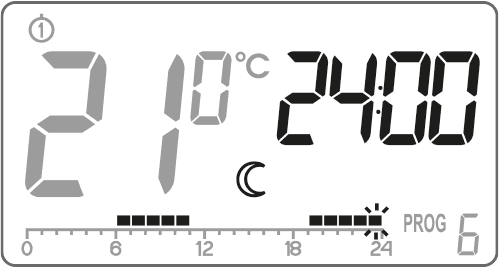
The timeline on the LCD display is divided into 24 sections, each representing one hour of the day.
Black rectangles above the timeline indicate that the program has set the daytime temperature for that time; their absence indicates that the program has set the nighttime temperature.
Example:

The figure above shows that from 6:00 a.m. to 11:00 p.m. AURATON Tucana P will control the heating device so that the room is at day temperature ( S ). From 11:00 p.m. to 6:00 a.m. AURATON Tucana P will switch to night temperature ( T ).
Factory programs
To ensure the AURATON Tucana P knows when to switch to the day and night temperatures, you need to set a specific program for each day of the week. To do this, you can use one of three preset programs (from 0 to 2):
Program No. 0 – Anti-freeze. U
This factory program cannot be modified. Designed for setting the anti-freeze temperature all day long.
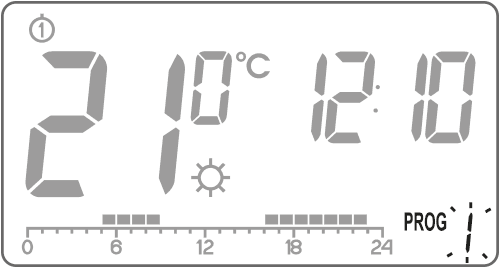
Program No. 1 – Weekly
. Non-modifiable factory program. Sets the daily temperature from 5:00 to 8:00 and from 15:00 to 23:00.
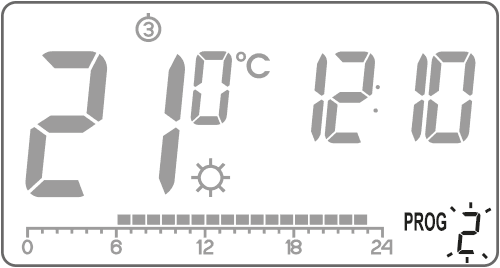
Program No. 2 – Weekend
. This factory program cannot be modified. It sets the daily temperature from 6:00 a.m. to 11:00 p.m.
Program No. 3, 4,….,9 – User
Programs No. 3 through No. 9 are user programs. They can be freely modified and adapted to your requirements.
Programming
Weekly programming
Programming the AURATON Tucana P involves specifying the hours for a given day of the week during which the daytime temperature should be maintained. The nighttime temperature then applies.
AURATON Tucana P operation mode from Monday to Sunday. Outside the time periods specified below, AURATON Tucana P will maintain a lower night temperature.
| Day | Daytime temperature | |
| Monday | 5:00 – 8:00; 15:00 – 23:00 |
 |
| Tuesday | 5:00 – 8:00; 15:00 – 23:00 |
|
| Wednesday | 5:00 – 8:00; 15:00 – 23:00 |
|
| Thursday | 5:00 – 8:00; 15:00 – 23:00 |
|
| Friday | 5:00 – 8:00; 15:00 – 23:00 |
|
| Saturday | 8:00 – 23:00 |
 |
| Sunday | 8:00 – 23:00 |
|
Program selection
To set up the program:
-
Press the buttonh . The program number segment will begin flashing.
-
Press the l and thenbc the or l to select the day of the week on which the program is to be run.
-
Press the button several timesh and select the desired program number. Programs 0-2 are factory-set, programs 3-9 are customizable.
- Confirm your selection with the buttoni .
- Return to step 1 and repeat the procedure for the next day of the week. Once each day of the week has an appropriate program assigned, we can complete programming.
Modifying a user program
To set up the program:
-
Press the buttonh . The program number segment will begin flashing.
-
Press the l and thenbc the or l to select the day of the week on which the program is to be run.
-
Press the button several timesh and select program no. 3-9 (user-modifiable).

-
All 24 black rectangles on the timeline will be lit, each representing one hour. A visible rectangle indicates that the daytime temperature is to be achieved at that hour. The absence of a rectangle above the timeline indicates that the nighttime temperature is scheduled.
The flashing rectangle indicates where on the timeline we are making changes.
-
Use the; or: to select the day temperature (lighted rectangle) or night temperature (off rectangle) on the time line.
-
Use the buttonsbc to highlight the next hours on the time line and select the day or night temperature for each hour (light up or darken the rectangle using the buttons; : ).
- After modifying the entire timeline, save the program with the buttoni
Once modified, the program can be assigned to other days of the week by selecting it on the desired day of the week.
Manual control
V
If for any reason you wish to interrupt the current program and extend the daytime temperature maintenance, you can do so manually. To do this:
- Press the button: V symbol will appear on the display . The comfort temperature will then be maintained until the next temperature change implemented by the program.
- To cancel the above-mentioned function, press the buttoni located under the battery cover – the V from the display.
Similarly, if for some reason you want to interrupt the current program and extend the night-time temperature maintenance, you should:
- Press the button; V symbol will appear on the display . The night-time temperature will then be maintained until the next temperature change implemented by the program.
- To cancel the above-mentioned function, press the buttoni .
Vacation mode
Sometimes we leave our homes for extended periods. To avoid reprogramming the entire AURATON Tucana P, we can use vacation mode, which allows the AURATON Tucana P to maintain a single temperature throughout our absence. Vacation mode can last a minimum of 1 hour and a maximum of 99 days.
To activate vacation mode:
- Press the: or; and hold for 3 seconds. The display will show the temperature and a flashing time field for the vacation mode setting.
- the buttonsbc to set the time: 1 – 23 hours, then 1 – 99 days. Confirm with the buttoni .
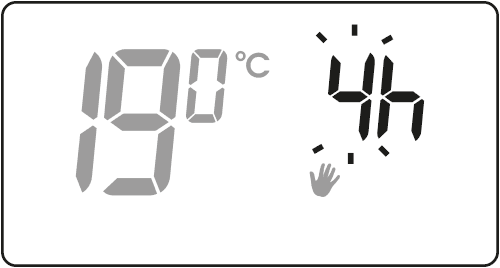
- The temperature field will begin to flash. You can set it using the buttonsbc . Confirm your selection by pressing the buttoni .
If you do not confirm your selection, the AURATON Tucana P will automatically enter the set vacation mode after 10 seconds. To exit vacation mode, press the buttoni .
The holiday temperature is independent of the day, night and anti-freeze temperatures.
Setting the anti-freeze temperature program
U
In AURATON Tucana P you can set the anti-freeze temperature in the range from 0°C to 10°C (the factory anti-freeze temperature is set to 7°C).
In the event of an extended absence, you can activate the anti-freeze temperature mode. This helps avoid the unpleasant consequences of water freezing in the heating system by automatically setting the temperature between 0°C and 10°C. To set the anti-freeze program, simply select program 0 on the desired day of the week.
Heating device operating time counter
The AURATON Tucana P features a heater operating time counter. This is activated by pressing and holding the buttoni for 5 seconds. For 10 seconds, the controller display will show the heater's operating time since the last reset.
This time may not reflect the actual operating time of the heating device due to the presence of e.g. internal thermostats in heating devices.
Temporarily turning off the relay
After the heating season, to avoid accidentally switching on the heating device, you can turn off the relay in the AURATON Tucana P.
:and; buttons simultaneously for 5 seconds turns off the relay (the minimum temperature of 4°C will be maintained) and turns off all display elements except the current temperature, time, and day of the week.
To restore all AURATON Tucana P functions, press the: and; for 5 seconds.
RESET AURATON Tucana P
Pressing the RESET (. ) button will clear the time and day and restart the AURATON Tucana P.
MASTER RESET AURATON Tucana P
MASTER RESET restores factory settings. This is performed by pressing thei and RESET ( ) .
All user programs are deleted!
Configuration settings
Configuration settings are made sequentially:
backlight

hysteresis change
delay change
offset change
clock calibration
To enter the configuration settings change mode, hold down theb andc for 5 seconds until the display backlight starts flashing.
Changing the backlight color
Hysteresis change
Hysteresis is designed to prevent the actuator from switching on too frequently due to minor temperature fluctuations.
For example, for HI 2 , with the temperature set to 20 °C, switching on will occur at 19.8 °C and switching off at 20.2 °C. For HI 4 , with the temperature set to 20 °C, switching on will occur at 19.6 °C and switching off at 20.4 °C.

The hysteresis change mode is signaled by the flashing HI . Use the buttonsbc to set the desired hysteresis.
HI 2 – ±0.2 °C (factory setting),
HI 4 – ±0.4 °C,
HI P – PWM operating mode (section “PWM operating mode”).
Confirm the selection by pressing the buttoni . AURATON Tucana P will move on to changing the next parameter.
Change delay
The delay prevents the actuator from being switched on too frequently, e.g. due to a momentary draft (e.g. caused by opening a window).
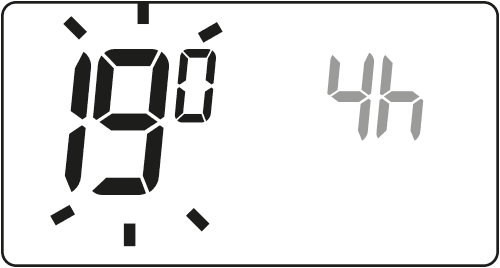
The delay change mode is indicated by the flashing 90:SE
Use the buttonsbc to turn the delay on or off.
90:SE – 90 s delay (factory setting)
0:SE – no delay
Confirm the selection by pressing the buttoni . AURATON Tucana P will proceed to change the next parameter.

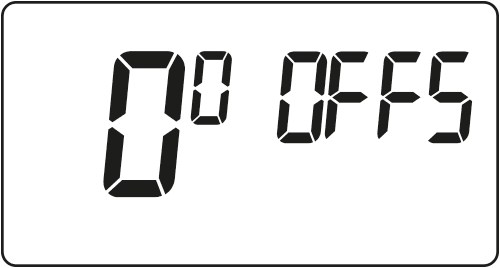
Offset change
Offset allows you to calibrate temperature readings with a tolerance of ±3°C. For example, the AURATON Tucana P indicates that the room temperature is 23°C, while a standard room thermometer hanging next to it reads 24°C. By changing the offset by +1 degree, the AURATON Tucana P will display the same temperature as the room thermometer.
Offset change mode is indicated by the flashing OFFS sign. Use the buttonsbc to set the desired value within the range of -3.0 to 3.0 (factory setting – 0.0). Confirm your selection with the OK button. The AURATON Tucana P will move on to changing the next parameter.
If no button is pressed for 10 seconds while changing the configuration settings, AURATON Tucana P will return to normal operating mode.
The first press of any function button always turns on the backlight, and only the next press activates the button function.
Clock calibration
This function is used to correct the clock readings if they deviate. If you notice the clock is malfunctioning over the course of a week, determine the error rate. This value should be entered in the AURATON Tucana P in seconds. Confirm your selection by pressing the OK button. The AURATON Tucana P returns to normal operation.
Example 1:
After a week of operation, the AURATON Tucana P shows the time faster by 1 minute and 20 seconds (60 + 20 = 80). In this case, slow down the clock by setting C -80.
Example 2:
After a week of operation, the AURATON Tucana P shows the time slowed down by 2 minutes (2 x 60 = 120). In this case, advance the clock by setting C 120.
For the clock calibration function to work correctly, the number of seconds must be determined after a week of operation of the AURATON Tucana P (7 days = number of seconds to be added or subtracted, maximum 294 seconds).
If no button is pressed for 10 seconds while changing the configuration settings, the AURATON Tucana P will return to normal operating mode.
PWM operating mode
(Pulse-Width Modulation)
By changing the hysteresis settings (see the "Configuration Settings" section), you can enable PWM operation. In this mode, the AURATON Tucana P periodically switches on the heating device to minimize temperature fluctuations. The AURATON Tucana P checks the temperature rise and fall times.
Knowing these values, AURATON Tucana P turns the heating device on and off in cycles to keep the temperature as close to the set point as possible.
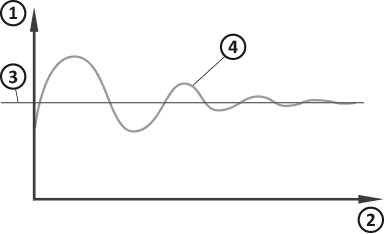
- Temperature
- Time
- Set temperature
- Room temperature
In PWM mode, the AURATON Tucana P may turn on the heating device even if the room temperature is higher than the setpoint temperature. This is due to the PWM algorithm, which aims to maintain the setpoint temperature and anticipate the heating system's behavior.
AURATON Tucana P wiring diagram

- A heating device , e.g. a gas furnace
- Electric heating device (MAX 230 V AC, 16 A)
Q
The power supply should be turned off when installing the AURATON Tucana P. It is recommended that the receiver be installed by a specialist.
The building's permanent installation must include a circuit breaker and overcurrent protection.
Cleaning and maintenance
- Clean the exterior of the device with a dry cloth. Do not use solvents (such as benzene, thinner, or alcohol).
- Do not touch the device with wet hands. This may result in electric shock or serious damage to the device.
- Do not expose the device to excessive smoke or dust.
- Do not touch the screen with a sharp object.
- Avoid contact of the device with liquids or moisture.
Technical data
| Power supply: | 2 x AA (2 x 1.5 V), alkaline |
| Operating temperature range: | 0 – 45 °C |
| Operating status indication: | LCD display |
| Number of temperature levels: | 3 + holiday |
| Antifreeze temperature: | 0 – 10 °C |
| Temperature control range: | 5 – 30 °C (measurement error +/- 1 °C) |
| Hysteresis: | ±0.2 °C / ±0.4 °C / PWM |
| Maximum load current: | Max. 250 V AC, max. 8 A |
| Duty cycle: | Weekly, programmable |
| Degree of protection: | IP20 |
| Dimensions [mm]: | 155 x 80 x 25 |
Disposal of the device
O
Devices are marked with a crossed-out waste bin symbol. In accordance with European Directive 2012/19/EU and the Waste Electrical and Electronic Equipment Act, this marking indicates that this equipment, after its useful life, must not be disposed of with other household waste.
Users are obligated to dispose of it at a collection point for used electrical and electronic equipment.
Manufacturer's address and contact details:
LARS, ul. Świerkowa 14
64-320 Niepruszewo
www.auraton.pl